# Tips for converting THIN negatives
**URL:** https://forums.negativelabpro.com/t/tips-for-converting-thin-negatives/9810
**Category:** Image Editing Help
**Created:** [November 1, 2025, 9:23pm UTC](https://forums.negativelabpro.com/t/tips-for-converting-thin-negatives/9810 "2025-11-01T21:23:53Z")
**Posts on this page:** 4
**Page:** 1
### Author:  [@palebluedot](https://forums.negativelabpro.com/u/palebluedot)
#### Post date: [November 1, 2025, 9:23pm UTC](https://forums.negativelabpro.com/t/tips-for-converting-thin-negatives/9810/1 "2025-11-01T21:23:53Z")
- _ **NLP v3.0.2** _
- _ **Epson V600, Epson Scan software, see below for settings** _
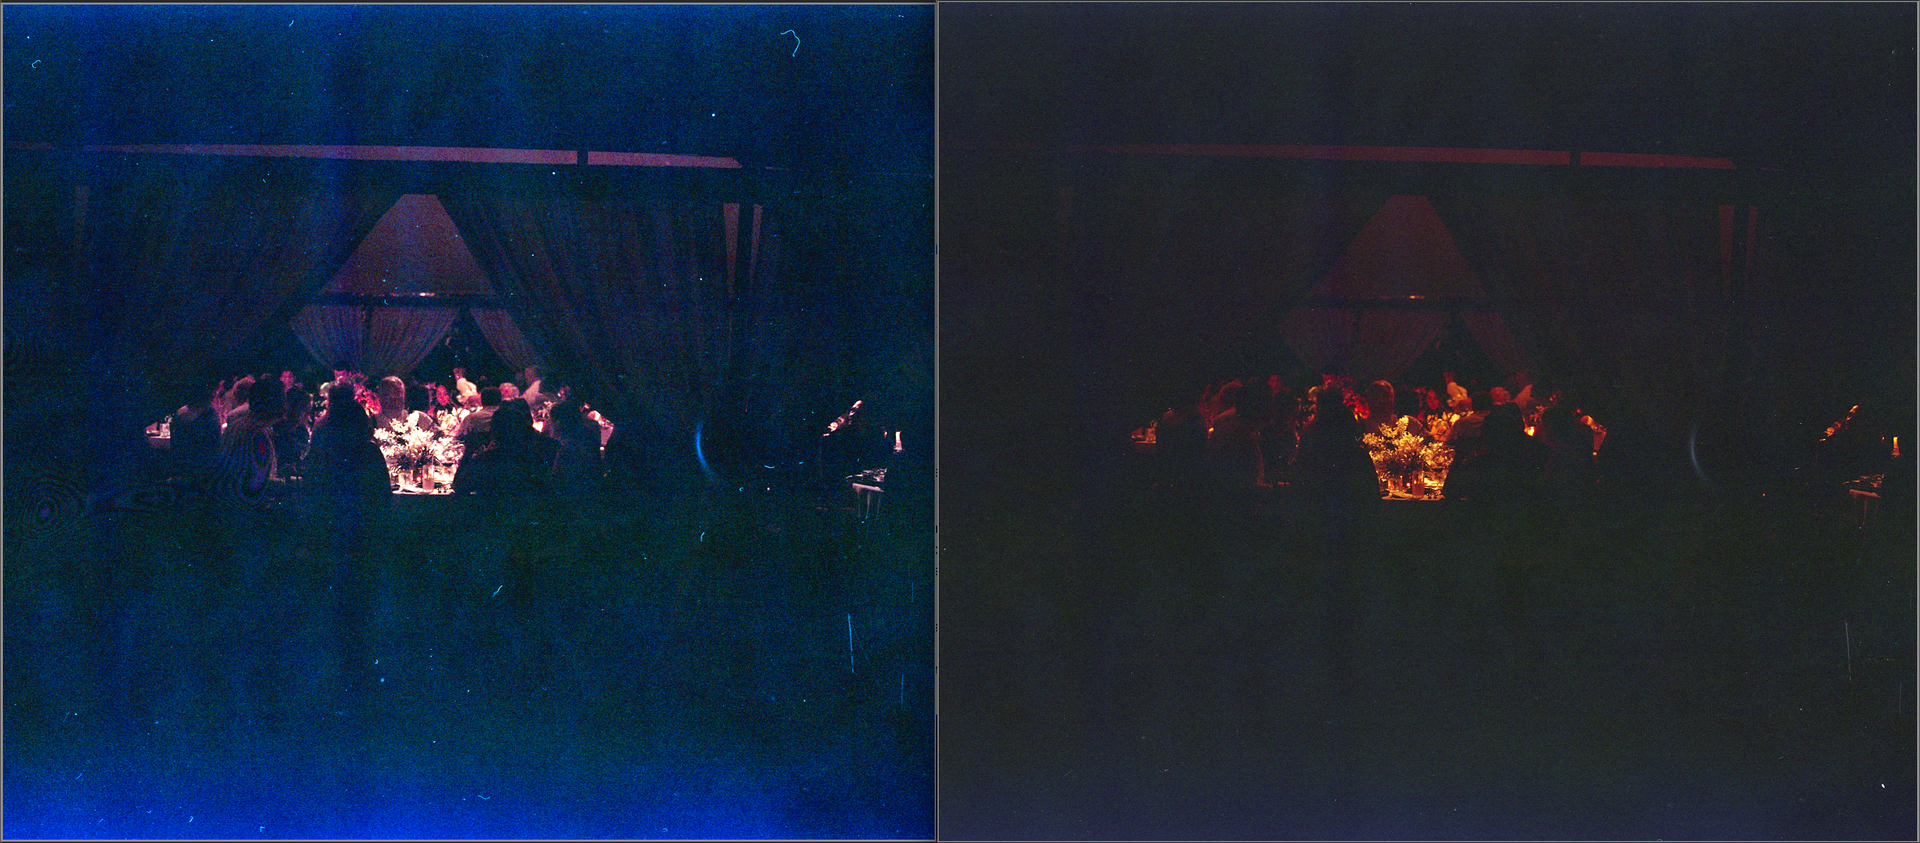
Curious if anyone has any tips for converting thin negatives taken in low light situations. Below I’ve included an _extreme_ example of what I’m talking about – a photo taken with a Mamiya 7ii on Portra 800 at a dimly lit wedding.
**Photo** **#1 (Left)** was scanned as a color positive using the settings recommended [here](https://forums.negativelabpro.com/t/scanning-film-negatives-with-epson-scan-and-negative-lab-pro/345) and then converted in NLP. This process works great for me 99% of the time, but NLP tends to produce nasty results like the one you see here when there’s very little information in the negative. Don’t mind my dust.
**Photo** **#2 (Right)** was scanned & converted using the built-in tools in the Epson Scan software. Unlike NLP, it’s happy to let the shadows be and gives me a lot of nuance in the highlights. Not to mention the colors are just more accurate. Sorry if I’m not using the right technical jargon for this, I’m self taught.
Original files linked here: [NLP Forum - Google Drive](https://drive.google.com/drive/folders/1ow-6c_D9-vpzlKCPCDJsv7jlIAHAprcl?usp=drive_link)
Thanks in advance for your thoughts!!
---
### Author:  [@Digitizer](https://forums.negativelabpro.com/u/Digitizer)
#### Post date: [November 1, 2025, 11:54pm UTC](https://forums.negativelabpro.com/t/tips-for-converting-thin-negatives/9810/2 "2025-11-01T23:54:33Z")
@palebluedot , welcome to the forum
your image has not much to offer for conversion. Tried it manually in colour and B&W
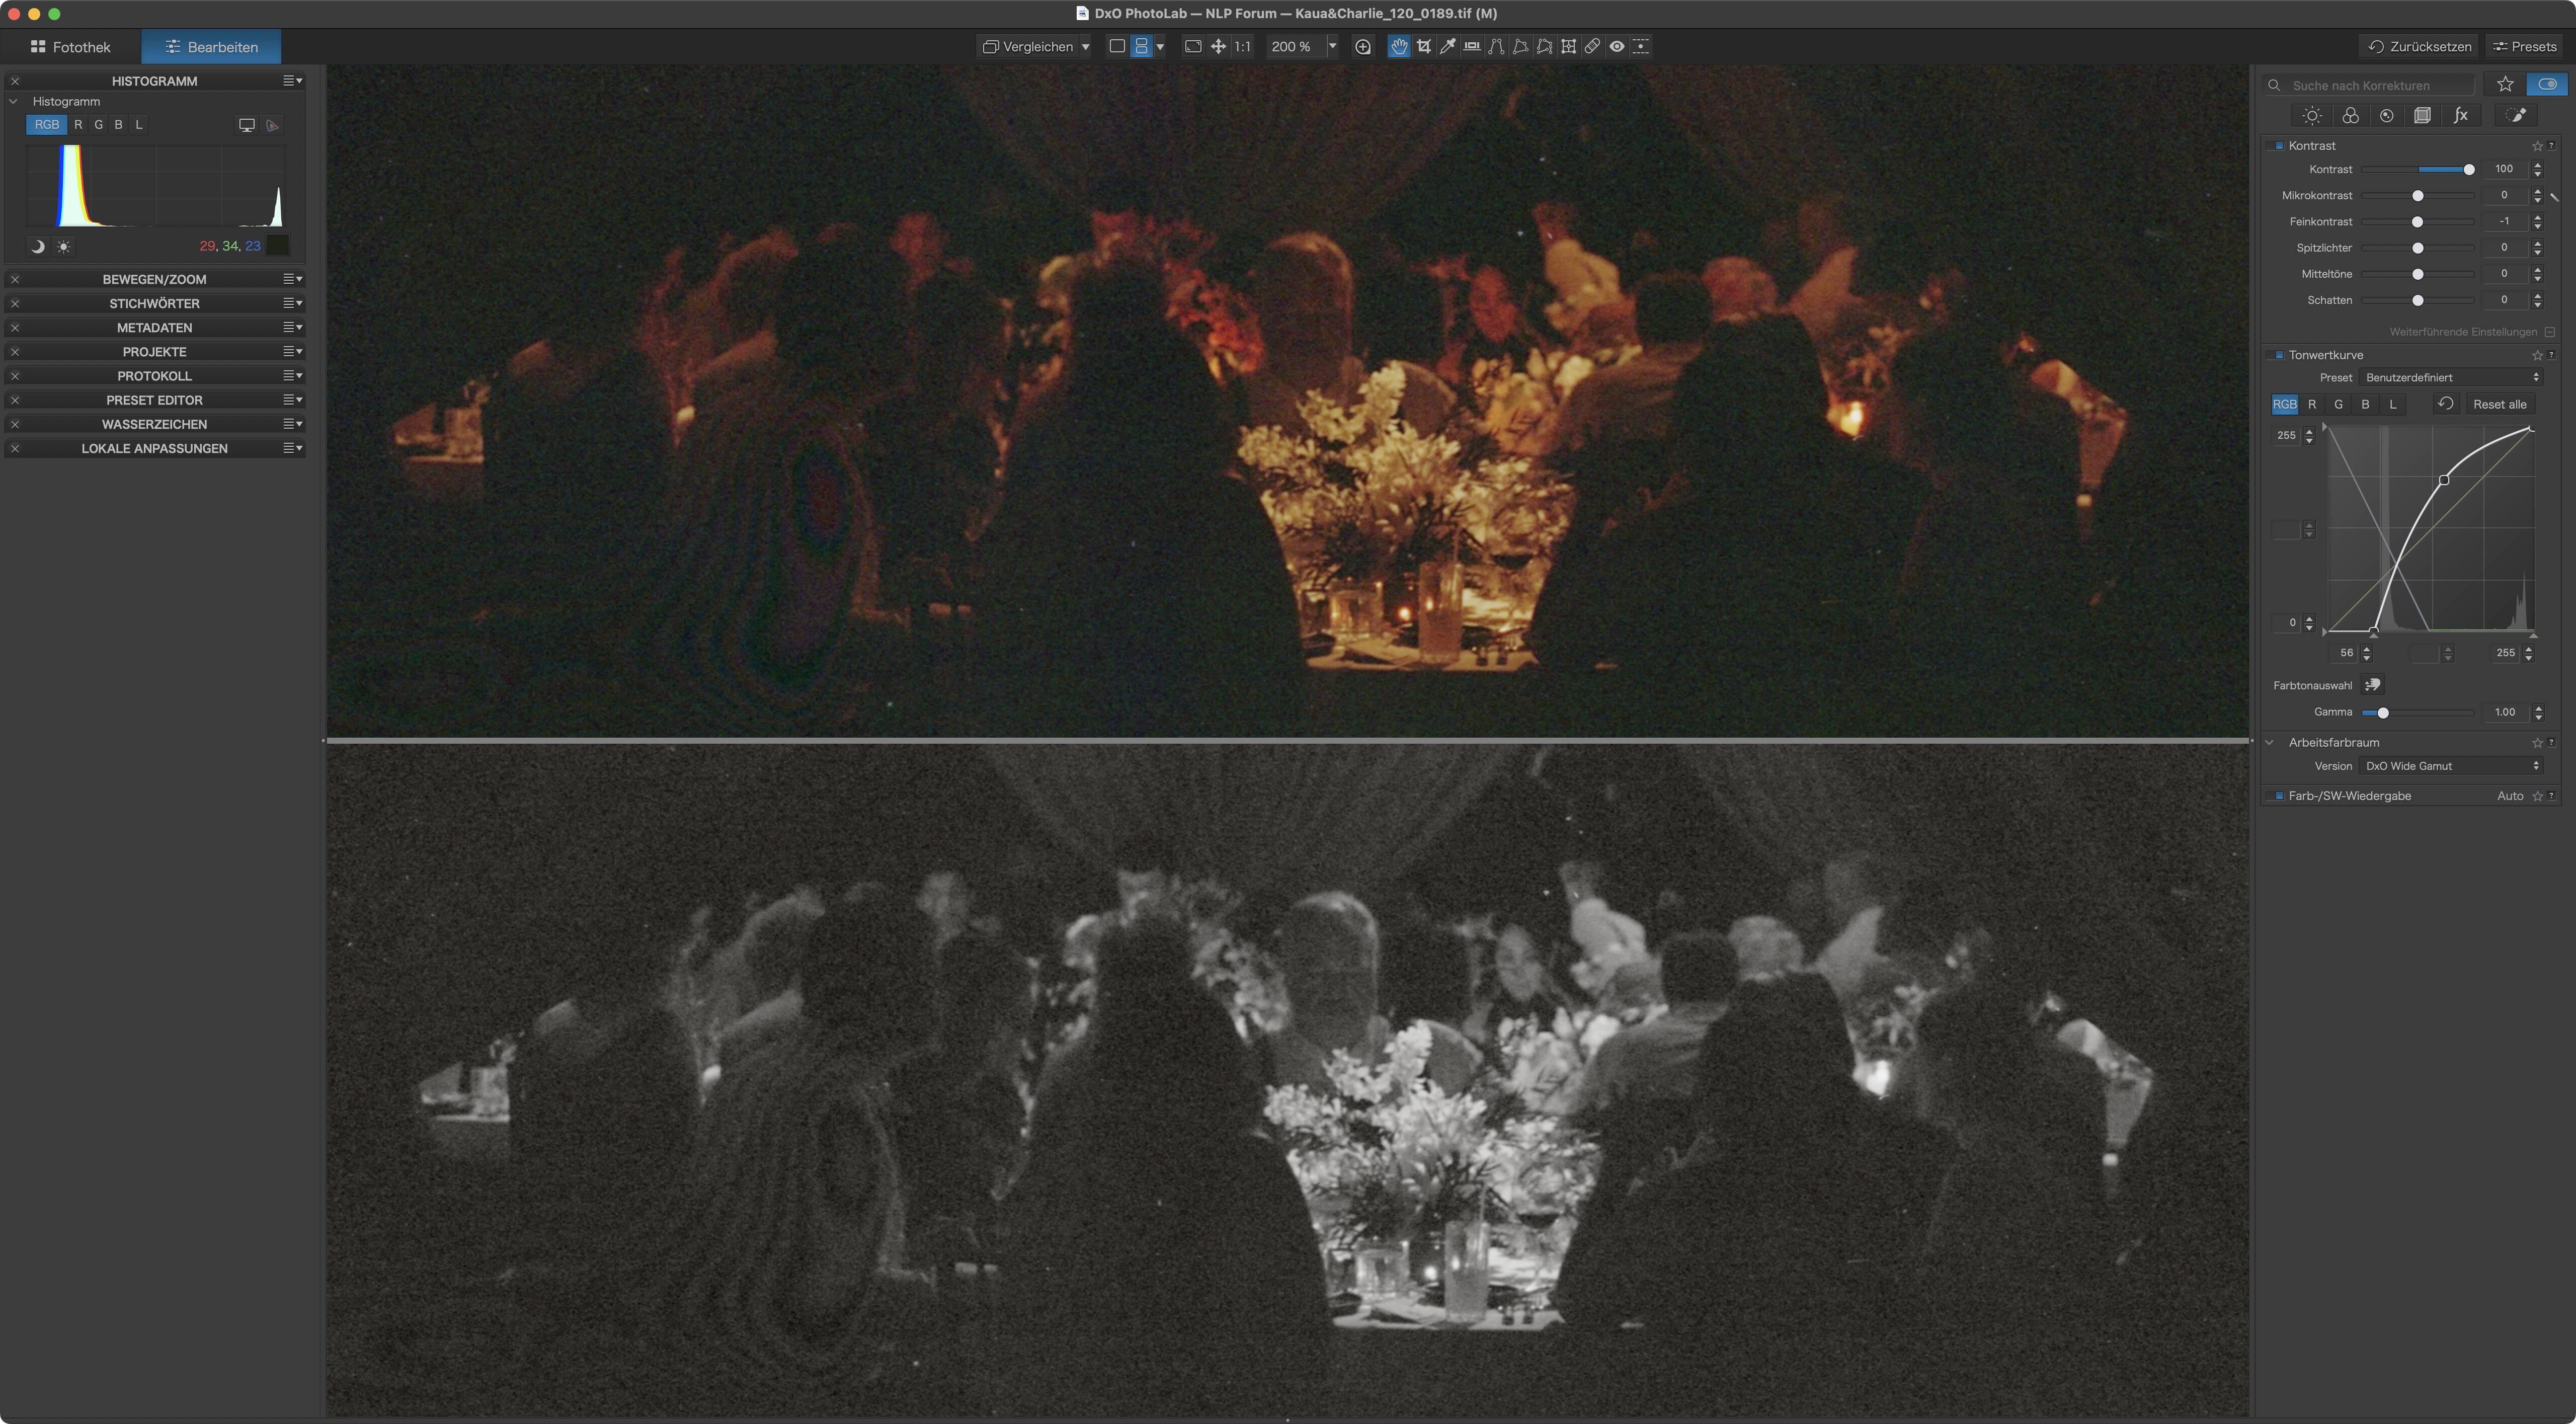
Even if we’d squeeze more detail out of the image, it would mostly be grain. Look at the histogram. wide U-shapes don’t convert well in many cases.
The one thing to try would be to scan with exposure set to high- and lowlights respectively and combine both into an HDR file. This could stretch the extremes in the histogram a little.
To convert, I’d crop both top and bottom heavily (like in the screen above)
In general, NLP can only work what it’s getting fed as described [here](https://forums.negativelabpro.com/t/what-to-expect-from-negative-lab-pro/9744). The less info there is, the more erratic conversions will be.
---
### Author:  [@palebluedot](https://forums.negativelabpro.com/u/palebluedot)
#### Post date: [November 3, 2025, 6:51pm UTC](https://forums.negativelabpro.com/t/tips-for-converting-thin-negatives/9810/3 "2025-11-03T18:51:44Z")
Hi Digitizer, thanks for the response. Your conversion looks really nice.
I’m not necessarily trying to get more information out of the negative, I just want NLP to let the shadows be and not stretch them so much or, as you called it, get “erratic”.
Per your suggestion, I experimented with cropping the image to remove all the empty space that seems to be throwing NLP off, converting, then un-cropping. As you can see in the screenshot below, it produced much cleaner results. Thank you for the idea, I hadn’t though of that and I’ll be implementing it into my workflow for thin negatives from now on.

---
### Author:  [@mikeyjive](https://forums.negativelabpro.com/u/mikeyjive)
#### Post date: [November 8, 2025, 8:59pm UTC](https://forums.negativelabpro.com/t/tips-for-converting-thin-negatives/9810/4 "2025-11-08T20:59:36Z")
Also keep an eye on your masking during the scan (blocking out extra light from your light source)… I’ve been fooled in the past with what I thought were bad negatives but it was really just light pollution appearing on my scan that I hadn’t masked tight enough. I see a little bit of a newton ring as well (the swirly looking anomaly). I’ve managed to tame these in the scan process by making sure no two shiny sides are against each other… i.e. making sure shiny side of negative is against dull side of glass or vice-versa. This might result in you scanning upside down but that can be quickly corrected in your post-scanning workflow.