Collimating light for more sharpness

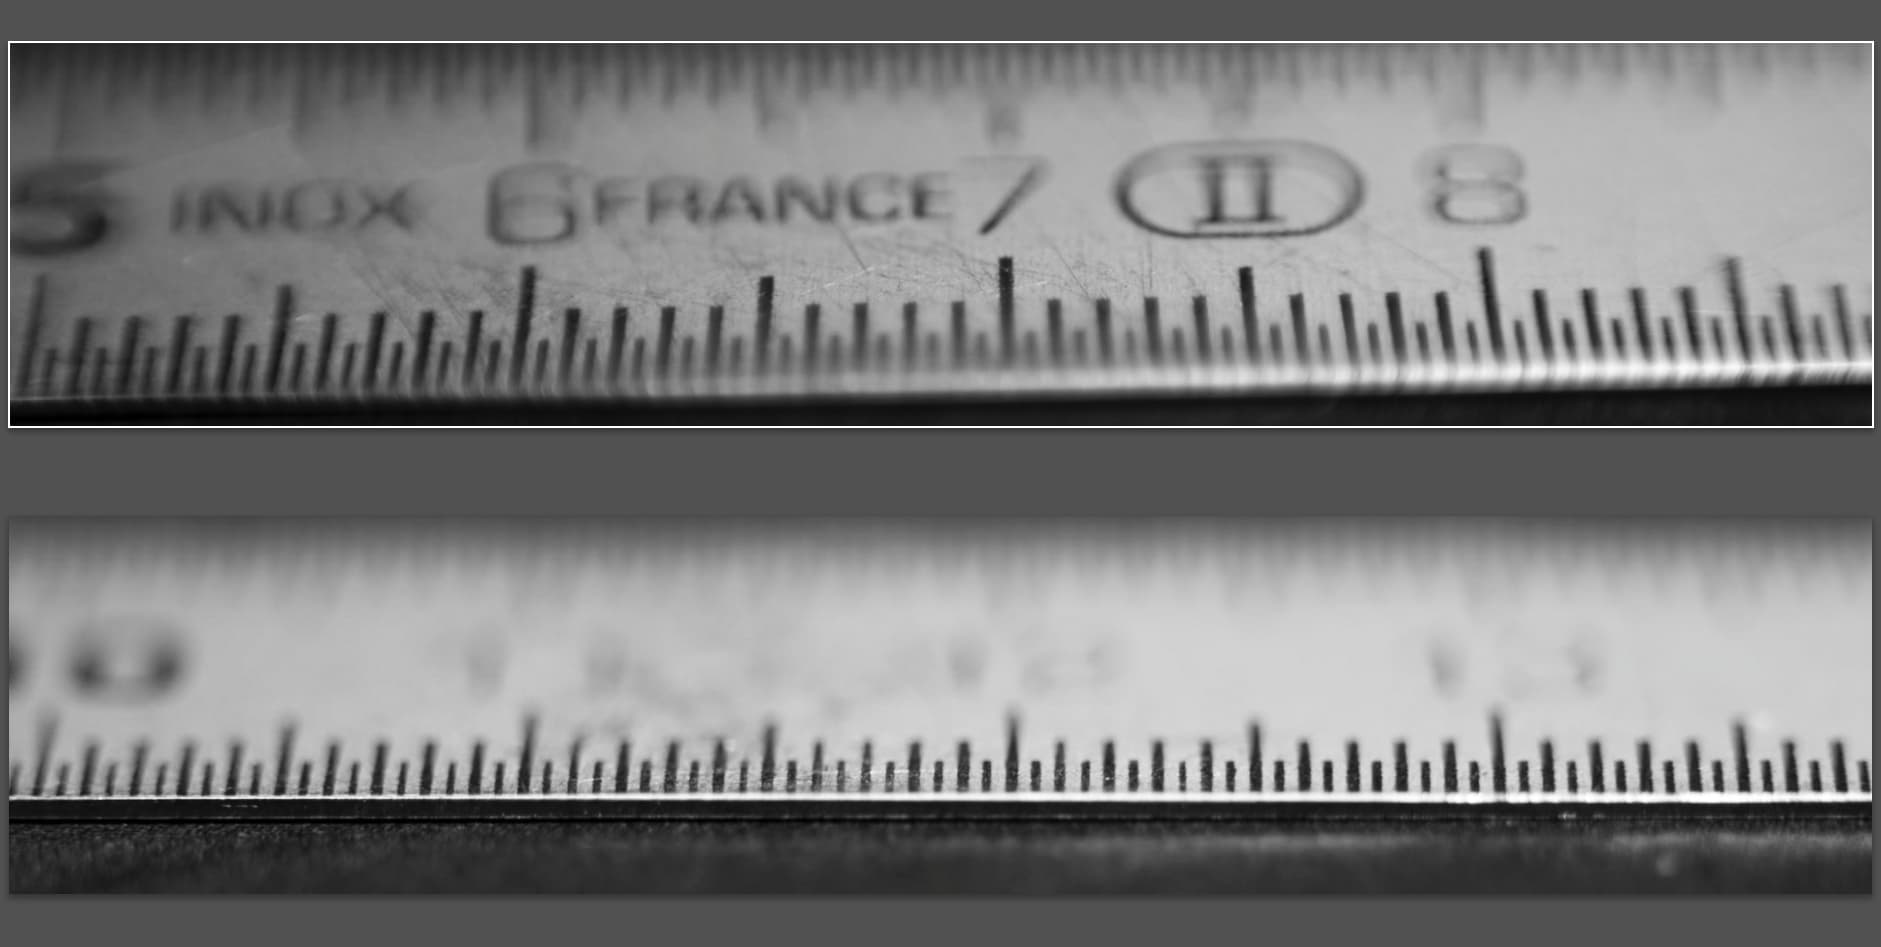
@ArnoG I don’t know if the scanner optics would add sharpness to your scans. I can say that it did mine. I adapted the Nikon Coolscan LS4000 ED lens from a broken scanner to my e-mount cameras; the Sony cropped sensor Nex-7 and FX A7R2. (Thank you @Belinda, as you said, I was wrong. I had thought that the scanner lens would not cover the full frame sensor and didn’t even try it. As you said, the Nikon scan lens at 1:1 magnification covers FX quite nicely). Even with the cropped sensor camera the Nikon lens made a huge difference over my Leitz Focotar enlarging lens. But @ArnoG your macro might already be good.

You not only would have to find one. As people learn of the value of scanner optics they are becoming rarer and expensive. But then you have to mount it such that it can attach to your camera body and be focussed either with a bellows or as I did with a helical focusing device.

This lens would not be very useful for general photography. And it has no variable aperture.

I also have the same model Nikon scanner that works fine. It has become my “gold standard” for scans from color negatives. With the Coolscan lens my cropped sensor NEX-7 camera scans are getting close to the perceived sharpness of the working scanner.

The NEX-7 and the Coolscan have approximately the same pixel count. But the NEX uses an RGB matrixed sensor with it’s reduced perceived sharpness as described by @Digitizer . The Coolscan uses a monochromatic sensor separately exposed by red, green, and blue LEDs. So each color channel has the full resolution. Also the matrix described by @Digitizer tends to create color moire patterns in images necessitating a filter in the camera to slightly blur the image. Because each pixel of the scanner has the same color sensitivity there are no color moire patterns — and of course the scanner has no anti-aliasing filter.

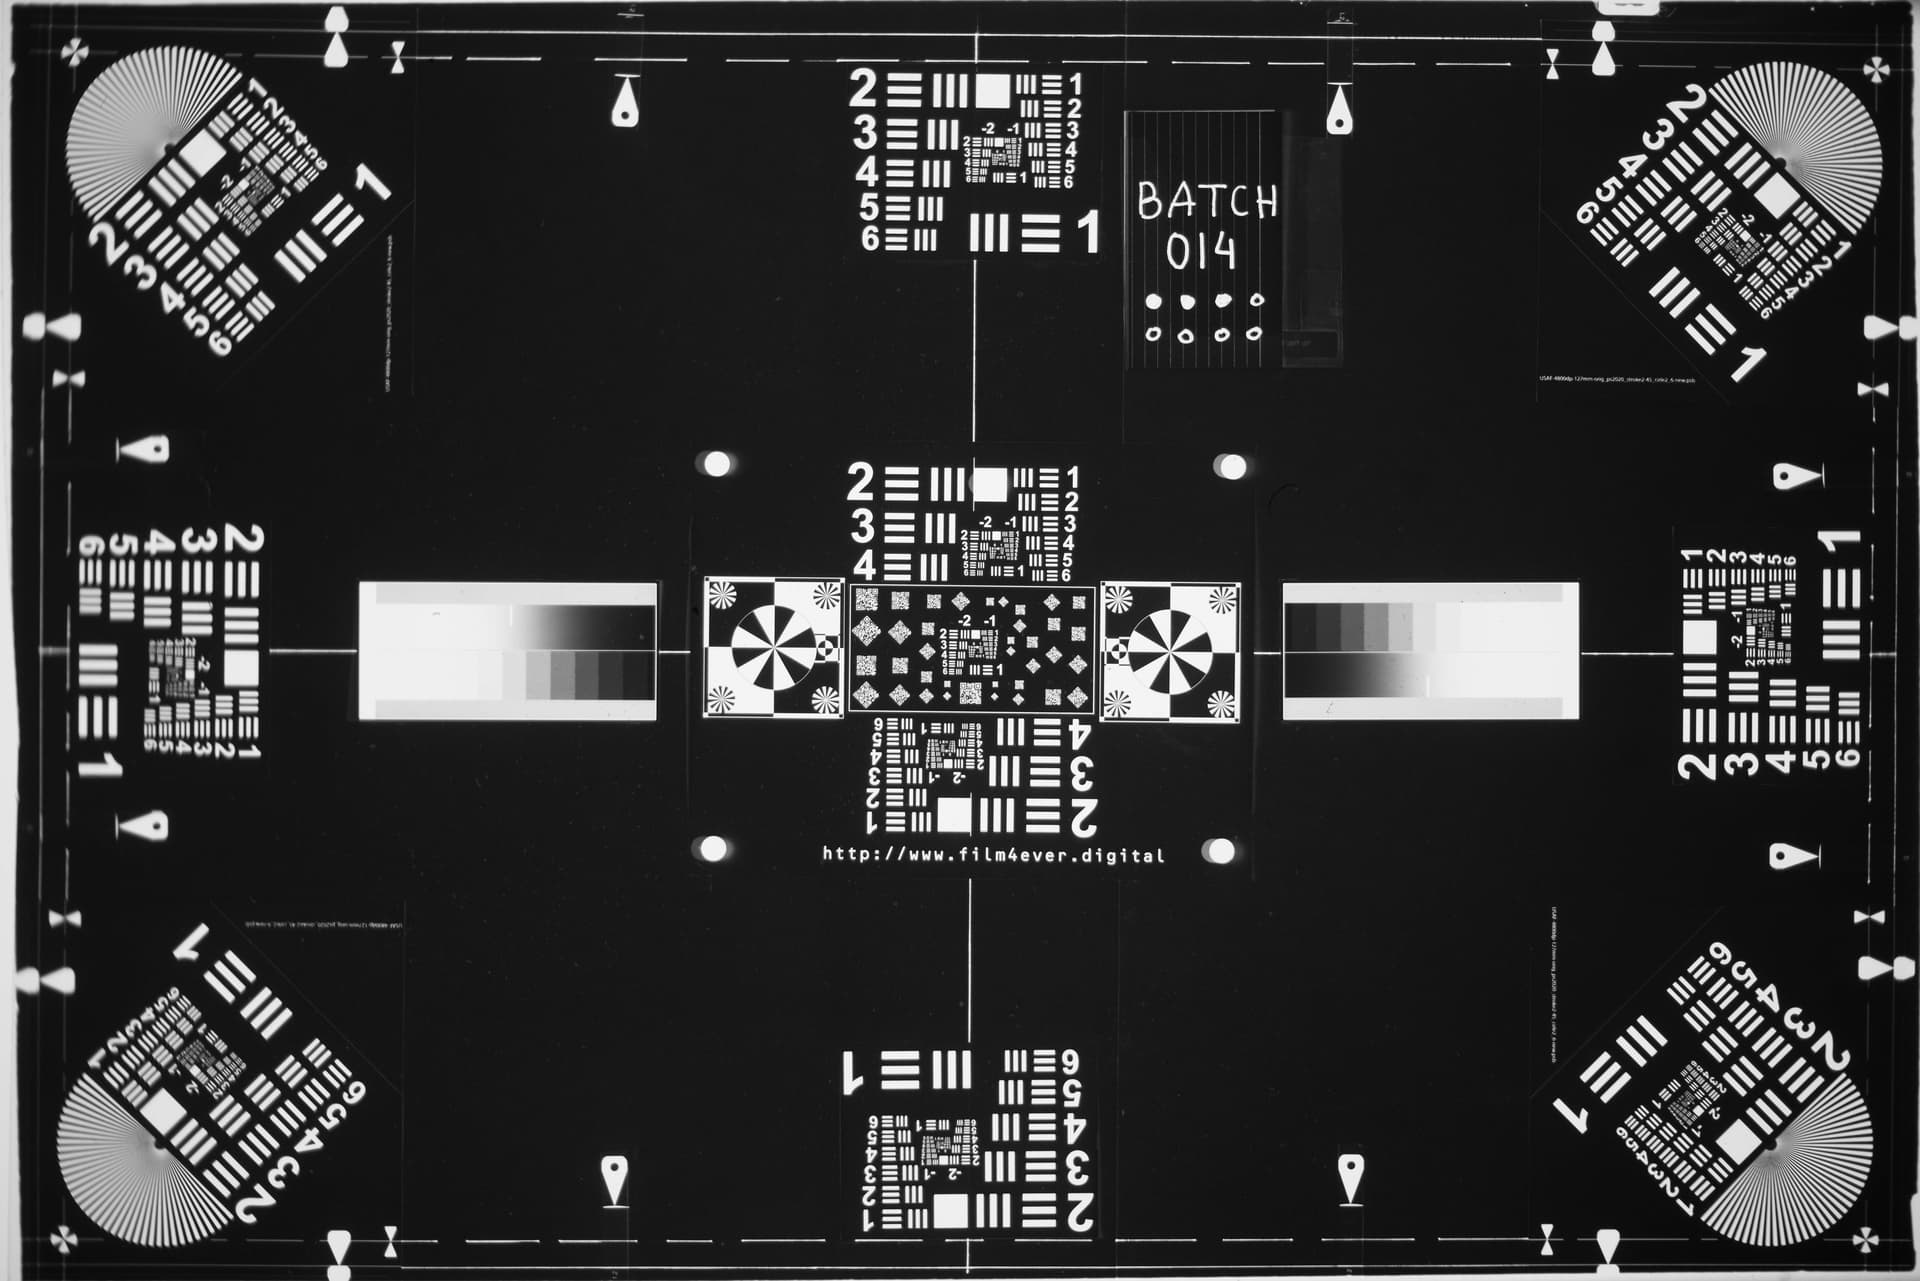
My FX Sony A7R2 makes 5304x7952 pixel scans and has no anti-aliasing filter. I am hoping that it will provide sharpness equal to the Coolscan.

BTW I found that vibration was hurting my resolution far more than optics.

I did a quick resolution comparison between the Nikon Coolscan LS4000 ED, a Sony NEX-7 24Mpx with a Nikon LS4000 lens, and a Sony A7R2 42Mpx with the same Nikon scanner lens. I have no significant experience in optical testing and there may be uncontrolled variables that make my test worthless. But here it is.

Worst resolution-- 24Mpx NEX-7 with Nikon Coolscan LS4000 ED lens:

And a close crop from the same:
NEX-7 tight

Nikon Coolscan LS4000 ED scanner operated with VueScan software:

and a close crop from the same:
LS4000 ED tight

And the best, surprisingly the A7R2 with the same Nikon scanner lens:

and tight crop from same:
A7R2 tight

This is just a quick and dirty comparison

I made no effort to control focus by sweeping focus and picking the best image. Just set up the equipment and took the images.

I would appreciate “guidance”, particularly if I should have done the test differently.

@Digitizer : thanks for the details on the “fancy stuff”. I read about the details of these processes before, and your description seems exact, thorough, and complete. I’m impressed how you have all that readily available.

Anyway, yes, I am close to building my setup to see what I get, as you suggest. I was simply trying to decide which lens to start with from what I have lying around. My little MF holder seems to slide perfectly into the negative holder slot of the enlarger that I got, so it seems a no-brainer to go that route. I just need some form of adapter for my Zeiss lens, that I probably need to draw up in 3D CAD and have 3D printed, or maybe I can put something together from a local hardware store. Oh, and I need some time, which always seems my limiting factor :wink:

I do realize that I could do better resolution-wise, but there is an additional factor that is hard to capture in specs: the way a sensor “draws” a picture. The Df is using the Nikon D4 sensor, and when I switched from my old D700, which uses the older generation D3 sensor, I was impressed by the more natural look of the pictures I got. This is not something that can be read from spec’s alone, and is hard to describe in words, but the Df/D4 sensor simply gives very pleasant and natural looking images. For the same reasons I prefer the “look” and the way Zeiss lenses “draw” over Nikon lenses. Both are technically good, but I prefer the way Zeiss lenses “draw”, but this difference is not obvious from the lens specifications. I spent many weeks overhauling a 70 year old Contax iia body, simply because I love the way that the similarly old 50mm f/1.5 Zeiss Sonnar lens for the old Contax cameras draws, and wanted to use that lens. These old Sonnar lenses are apparently not perfect at all from the specs, but the look of the way they draw is what I am after in my B&W film adventures (which triggered this scanning exercise eventually for me). Confusingly, and contrary to many, I never much liked the “Leica look”…

Anyway, I digest. I suppose it’s the art aspect of photography that makes this hobby so much fun. The bottom line is that, at least for me, there’s more to it than simply specs and technical perfection. It’s also a certain “look” I’m after, which is hard to describe in words.

@davidS : yes, indeed I did look at the prices of used scanners and it seems that I missed the boat there. 600 euros and upwards…I did find a cheap Minolta 5400, but it came without a lens for some reason, lol.

So I’ll follow @Digitizer’s advice and will now put something together when I find the time to see what I get. Building it around the enlarger I got will enable me to still make a clean comparison between collimated and diffused light, which was the original reason I started this thread, but I suspect from what I learned from all the comments that I’ll stick with diffused light anyway. Will post progress here and the eventual setup in the “show us your setup” thread.

Arno

Hey guys! Scanner lenses are good, but did some one ever tries to use collimated light to achieve more sharpness? Did someone tries a wetmount the films in the collimated light?

@Kaffir, some of your questions might be answered, at least partially, in post number 15 of this thread.

Short version: Move a diffuse light source away from the negative to enhance details like grain, dust and scratches.

Hi all, sorry for the long silence, but I got distracted by work, and I wanted to complete what I was trying to put together before I polluted this post again with half-done jobs. A quick recap of what I was trying to achieve: Something cheap but good that can do collimated as well as diffused scans, can have a tungsten light source, and is easy to operate. I wanted to give back to the community that helped creating ideas so here’s where I landed:

I purchased an old enlarger (30 euro), flipped it upside-down, mounted my 100 mm f2 Zeiss lens through two adapters (67mm to 52 mm (10 euro), and 52 mm to 39 mm (7 euro)), pushed the lens out by 50 mm to get to 1:1 with an old extension tube-set that I had lying around, and mounted my camera. The enlarger takes care of the alignment and has a diffuser roughly halfway between the light and the negative that can be slit in and out.

I initially tried the negative holder from the enlarger that clamps the negative between two glass plates but ended up seeing Newton rings. So I decided to fabricate a cheap but good negative holder, bought some hard foam plates at the hardware store (is soft PVC that doesn’t scratch the negative) (3.5 euro), and started cutting and assembling a prototype. That worked quite well, but I still had dust in the pics, so I purchased two carbon fiber antistatic brushes for record players (2x 10 euro), and made a new negative holder on which the brushes could be mounted, and opened and remounted for easy entering of a negative roll. The brushes help tremendously good in preventing dust: I very rarely come across a single dust spec now. Highly recommended.

The contraptions look like so:

Enlarger (sorry its tilted: Issues with uploading). Slit for the diffuser can be seen halfway the light and enlarger collimator optics box. Magnification is tweaked by focussing the lens and focussing is achieved by moving lens and camera up and down with the focusing knob of the enlarger:

Negative feed-in (yes, I did the not recommended storage of a roll of negative back into the film canister, which I don’t plan to do regularly, but the negative holder seems to not care and create a perfectly flat negative anyway…). Oh, and I also chopped away some of the brushes outside of the negative area:

Directly under the negative holder is currently an opal glass diffuser, that I talked about previously. The negative holder is constructed from hard foam board, with some negative glued in between so achieve am accurate spacing the height of the negative distance. The prototype was glued with contact glue, but that ended up a bit thick and causing too large a slit. The final version was glued with 10 second glue, which forms a thinner layer.

Prototype (too show internal assembly):

Final version with chamfered edges on the light-side to prevent stray light on the negative and slightly rounded corners where the negative goes in, out, and across the hole:

Assembled plus opal glass for diffusion:

Total cost: Around 70 euro

I cut the foam board of the final version with a passe partout(?) cutter for picture frames since that got me nice straight cuts and is quick. Next up will be a version for 6x6 and one for slides, in which slides are fed one side in, other side out. Slides will need to be refocussed every slide, but for the negatives I get away with just verifying focus and adjusting only when I happen to bump the camera. Overall, it works fast and I get good and clean scans now. When I find time, I will compare collimated and diffused light, but I suspect based on previous discussions that diffused will be better. Next up is a lens comparison (next post).

Following some previous discussions on lens sharpness, and doubts whether pushing a 100 mm Zeiss lens out 50 mm to go from 1:2 to 1:1 (effectively halving the resolution), I decided to compare an old 50 mm f2 ai Nikon lens (50 euro) reversed mounted (gives 1:1) with the fancy Zeiss lens. Nikon states that the 50 f2 ai is good at close distance and has negligible focus field curvature (and therefore good for macro), soft at f2, but optimal sharp at f5.6. The Zeiss also peaks at 5.6 (but is also sharp at f2, because it’s a Zeiss), and is a planar with no distortion nor field curvature (but ouch expensive).


Ruler at f2 to show magnification approximately 1:1, 50 mm top, Zeiss bottom. Despite the crap focus (was only a quick shot to test magnification) both seem to have little field curvature (which is needed of the whole negative needs to be in focus at the same time). Pics below are B&W so color does not distract from focus.


f2, 50mm left, Zeiss right


f2, as above, 100% crop: 50mm wide open is indeed soft, while Zeiss is sharp at f2 (at a cost…)


f5.6, as above


f5.6, as above, both are sharp, but 50mm seems, sharper, more contrasty and more DOF


f5.6, as above, 200%, 50mm seems a bit sharper, has more contrasts and roughly twice the DOF, which should help if alignment is not perfect or negative is not perfectly flat.

Overall, the 50mm wins imo, but only because the Zeiss is pushed out by 50mm to get to 1:1, thereby effectively halving its optical resolution.

Conclusion: For 35mm negatives (what I shoot mostly) I need to use the reversed 50mm, which gives also a more compact and manageable setup on top of the enlarger. For 120 film, I need to use the Zeiss since that can be scanned at 1:2, and its resolution should easily beat the 50mm if it can almost compete with it when its resolution is halved. Correct?

Imho you’re right maybe with a small restriction: the focusing of the point light source must not be set at the infinite but at the optical center of the macro lens.The light rays may not be parrallel when they hit the negative. If you adjust the focusing at infinite you loose an important part of the light emitted particularly in the corners of the negative because the parrallel rays dont go through the main lens, leading to an important fall-off.
Another important element is that the “light cone” between the condenser and the main lens must be larger or at least equal to the size of the negative to be scanned. Hope it helps

1 Like

Hi David,

I know this thread is a little old, hopefully you are still active in the forum.

I am looking to adapt a similar scanner lens via a helicoid method. I was wondering if you could give me some info on the setup you have used. I think I have identified the helicoid you used as the Leitz Helicoid focusing adapter for the 5cm f3.5 Elmar. Could you confirm if this is correct? If so I am assuming that the internal thread is M-mount, and was wondering what the internal adapter (sleeve) you have used is.

Any info would be great!

Andy

Hi Andy,

I am not sure of the helical focusing part. It may be from an old Leica enlarger. As I remember it screwed into a Leitz Focuslide allowing my M3 to take macro photographs. It takes standard Leica M39 screw mount lenses.

I have a lathe and made a simple collar to go between the scanner lens and an old extension tube. Collar ID matches lens OD and collar OD matches the ID of the extension tube. Set screws hold it all together.

The lens, out of a Nikon Coolscan is really sharp. I also have an old Honeywell Repronar slide copier with an Asahi Optical lens optimized for 1:1 magnification. The Nikon is significantly better.

I don’t use the helicoid mount for focusing the system, only for setting the magnification. I rack the camera with lens up and down to focus with this macro stage:

I also display the camera’s HDMI output with a flatscreen TV. Wonderful way to focus. It will also show you vibration which of course can kill resolution.

Hope this helps.

David

From someone who uses collimation I can definitely say it’s worth it for B&W, colour not really. But I’m set up with flash so use it for both.
I wouldn’t consider a point source, I use a circular diffused area and have adjusted it’s size so there is no Callier effect, diffused area is something like 2/3rds of the condensing lens circumference.

Basically all your assumptions are correct.

I think this is correct. A condenser actually focusses (condenses) the illuminating light so that it converges towards the center of the camera lens, it is not supposed to collimate. An imaginary miniature eye at the center of the lens, looking towards the collimator, should see equally bright light coming from all angles that pass through the rectangular extent of the negative. If you used collimated light and, at the worst extreme a wide angle macro lens, the illuminating rays passing through the corners of the negative would pass by or ‘miss’ the lens, causing vignetting in the resulting camera image. The condenser optics (focal length) should match the focal length of the camera lens, and its size (diameter) should be sufficient to ‘cover’ the negative; in an enlarger using undiffused illumination (‘collimation’) this would be by design. Other than a laser beam expanded by a spatial filter, there are few true point sources; the extension (size) of the physical bulb, though small, is significant and effectively ‘diffuses’ the illuminating light into a cone, which may be an advantage to mask blemishes.

I can confirm, based on my personal experience, that coherent light (parallel rays) is not going to result in even illumination(unless you are using a telecentric lens I suppose, but that’s just an aside) and that you need to focus the condensing optic’s projection of the (point) light source into the optical center of the taking lens.

The condenser optics (focal length) should match the focal length of the camera lens, and its size (diameter) should be sufficient to ‘cover’ the negative; in an enlarger using undiffused illumination (‘collimation’) this would be by design.

The Focal length of the collimating lens must be >= the focal length of the taking lens and the the diameter must be such, that the entire FOV of the taking lens is covered by the cone of light converging in the taking lens. Greater focal length on the condensing optics is not an issue and will only result in slight loss of light over the entire frame which is a not issue compared to the amount of efficiency the system gains through a collimated illumination. I will add, that the light source, to my knowledge, should be no smaller than the aperture on the taking lens. This is not an issue as you can stop down without losing light if everything is setup correctly

For anyone stumbling upon this thread I will add, that the amount of retouching require to clean up the added dust and scratches(especially on aging film) is such, that I would personally advocate against a collimated light source. I recently built a system that has both and can switch between the light sources without moving the film or the camera, resulting in captures in perfect registration, with all aspects equal except for exposure time and illumination scheme. The difference cannot be overstated. I like having both, as it allows me to use large portions of the diffuse capture to reconstruct damages on the collimated capture, but building and calibrating such a system was so much effort, that I wouldn’t say is justified by the results. Here are some examples (~5900 DPI, using the Minolta 5400 lens onto a monochromatic area sensor, RGB+IR light source):
image

image

Especially when the emulsion has begun to crack with age, this effect can be quite severe:
image

image

3 Likes

Interesting read + huge thanks for samples!