Which version of Negative Lab Pro are you using?
3.1.0 beta
If using DSLR scanning, please include: 1) camera make/model, 2) lens make/model, 3) light source make/model
Canon EOS R5, Sigma 70mm ART MACRO, Cinestill CS-Lite
If using film scanner, please include: 1) scanner make/model, 2) software used for scanning, 3) settings used for scanning
N/A
Please add the conversion you are having difficulty with, along with a short description of what you are seeing wrong with it.
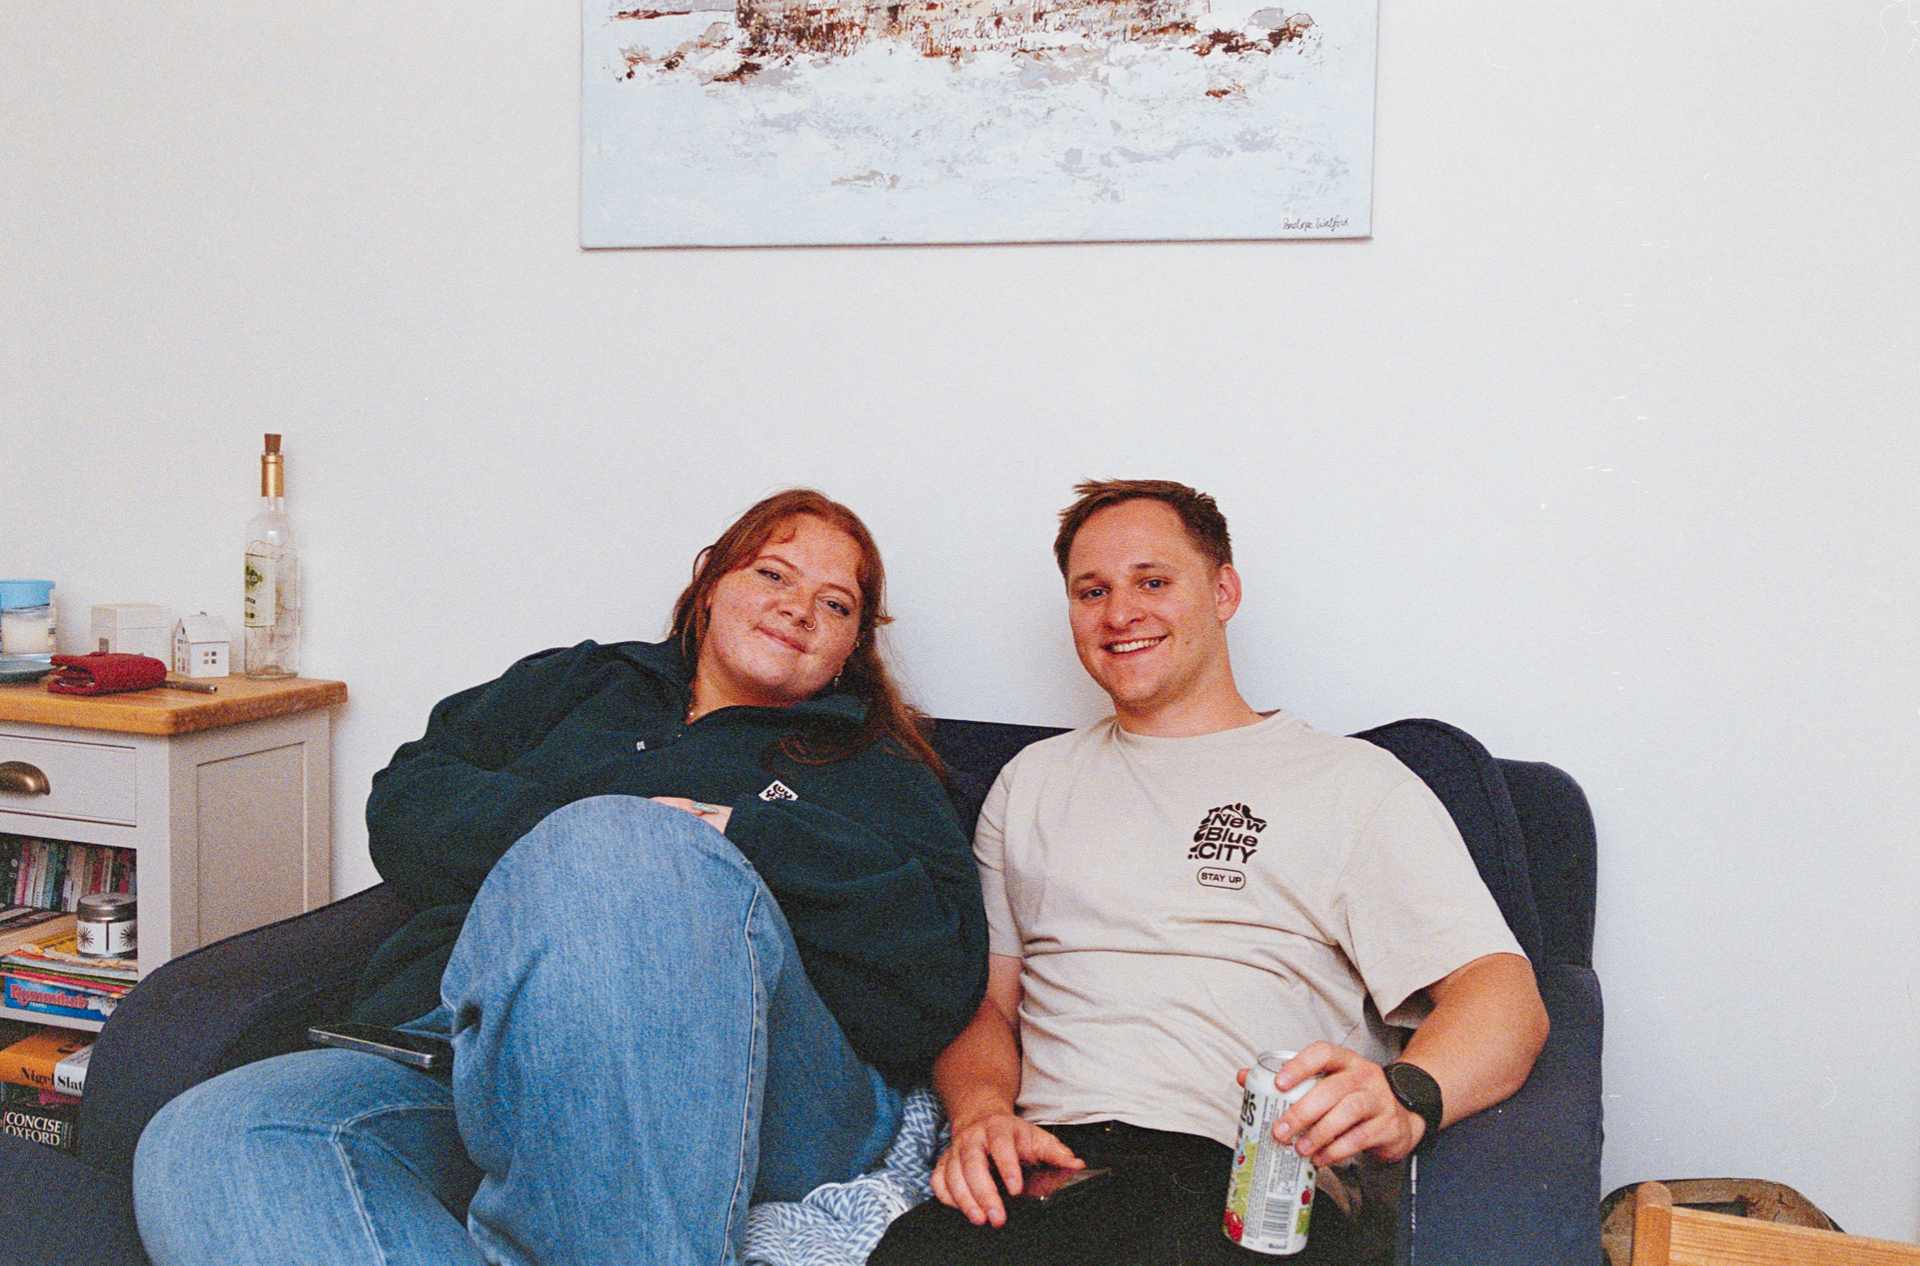
Skin tones are going weirdly dark and weirdly red - and any attempt to correct them destroys the white balance of the rest of the photograph. Here are 2 conversions, with the NLP Standard preset, with roll analysis on and off respectively.
My understanding is that portra has good skin tones, so I’m assuming this is something about my scan or my conversion?
It’s not required, but it’s very helpful if you can provide a link to the original RAW or TIFF negative before conversion. If you don’t want to share this file publicly, you can also email it to me at nate@natephotographic.com
I’d probably fix the skin with Lightroom’s tools on a positive copy.
WB taken from the black trousers (before converting.
Also, scanning exposure looks a bit too high. ETTR is okay, but a bit too aggressive in this case.
Don’t expect me to deliver a “perfect” conversion, I’m simply trying to nudge you to try to find out what NLP can or cannot do. NLP provides a starting point and if it’s not where we want it to be, we have to try, explore, learn and get more agile doing so.
Expectations: What “perfect” means, only you know, unless you describe your expectations. E.g “I’d like the jeans to be less saturated” or “The faces look like tomatoes to me, can someone help me to make them green instead?” I hope you see what I mean.
Back to the image: I’m not happy with the colour and tonality of the skin and instead of spending a lot of time trying presets and moving sliders, I’d make a positive copy and work on that in Lightroom, using e.g. local adjustments. This might look like an easy way out, giving up or whatnot, but my passion for masochism is limited.
That’s good scientific approach ,- I mean using raw digger. As you can see from raw blue channel is relatively underexposed . Make your light source a bit more bluish - switch light source to highest color temperature or even add blue gel over light and try taking pictures again. Ideally red and blue channels should be approximately in the same exposure area with green slightly ahead. And that will make the orange mask almost disappear and your shot will look normal. Hth
Right and that the sort of image one would get from minilab. Remember minilabs ? - many indoor shots taken with flash looked exactly like that - with reddish and exaggerated faces
OK, I agree with Digitizer’s approach - especially in selecting a low level of pre-saturation in the Conversion settings, because your result was clearly over-saturated.
Alternatively, let’s focus first on an analytical process leading to strategy. #1 - I SUSPECT the wall is not mauve, the furniture the left is not mauve and the bottom of the painting on the wall is not mauve. If those suspicions are correct you discard the result using roll analysis, as the bottom one is more correct. #2 - what remains wrong with this result: it’s too saturated and too dense. #3 - this is not a matter of white balance unless you didn’t white-balance the negative correctly at the digitization capture stage (follow Nate’s instructions). #4 - you don’t need Raw Digger for any of this; it just adds complication to think about how to translate an RGB read-out into relatable imagery. Just use your eyes and the editing tools at hand. #5 - reverting to observation in #2, in NLP reduce Saturation and increase Lightness (what Nate calls Brightness). #6 - look at the outcome for OVERALL tone and colour quality. If you see an OVERALL colour bias, correct it with the tint and temperature sliders in NLP. #7 - if there remain residual local errors, such as wrong skin tones but all else looks good, use masking in Lr to isolate those areas and adjust in Lr using Lr’s mask editing menu.
If this seems like a lot of thinking and working, ya sure, no free lunch; but I agree with Digitizer that NLP, or any other conversion technique, will not give us perfection out of the box; in fact NLP is the best I’ve ever seen. It’s in the nature of the technologies we are cross-breeding. Good quality results require custom editing of each photo that is in any substantial way different from the other photos.