Hi Jacob,
Yes, resetting negatives can be tricky, but in the final analysis my experience is that it usually works. Anyhow, glad you got it going finally and all’s well that ends well. Have a good night and happy New Year.
Best regards,
Mark
 | JacobP
December 29 |
Hi, Mark -
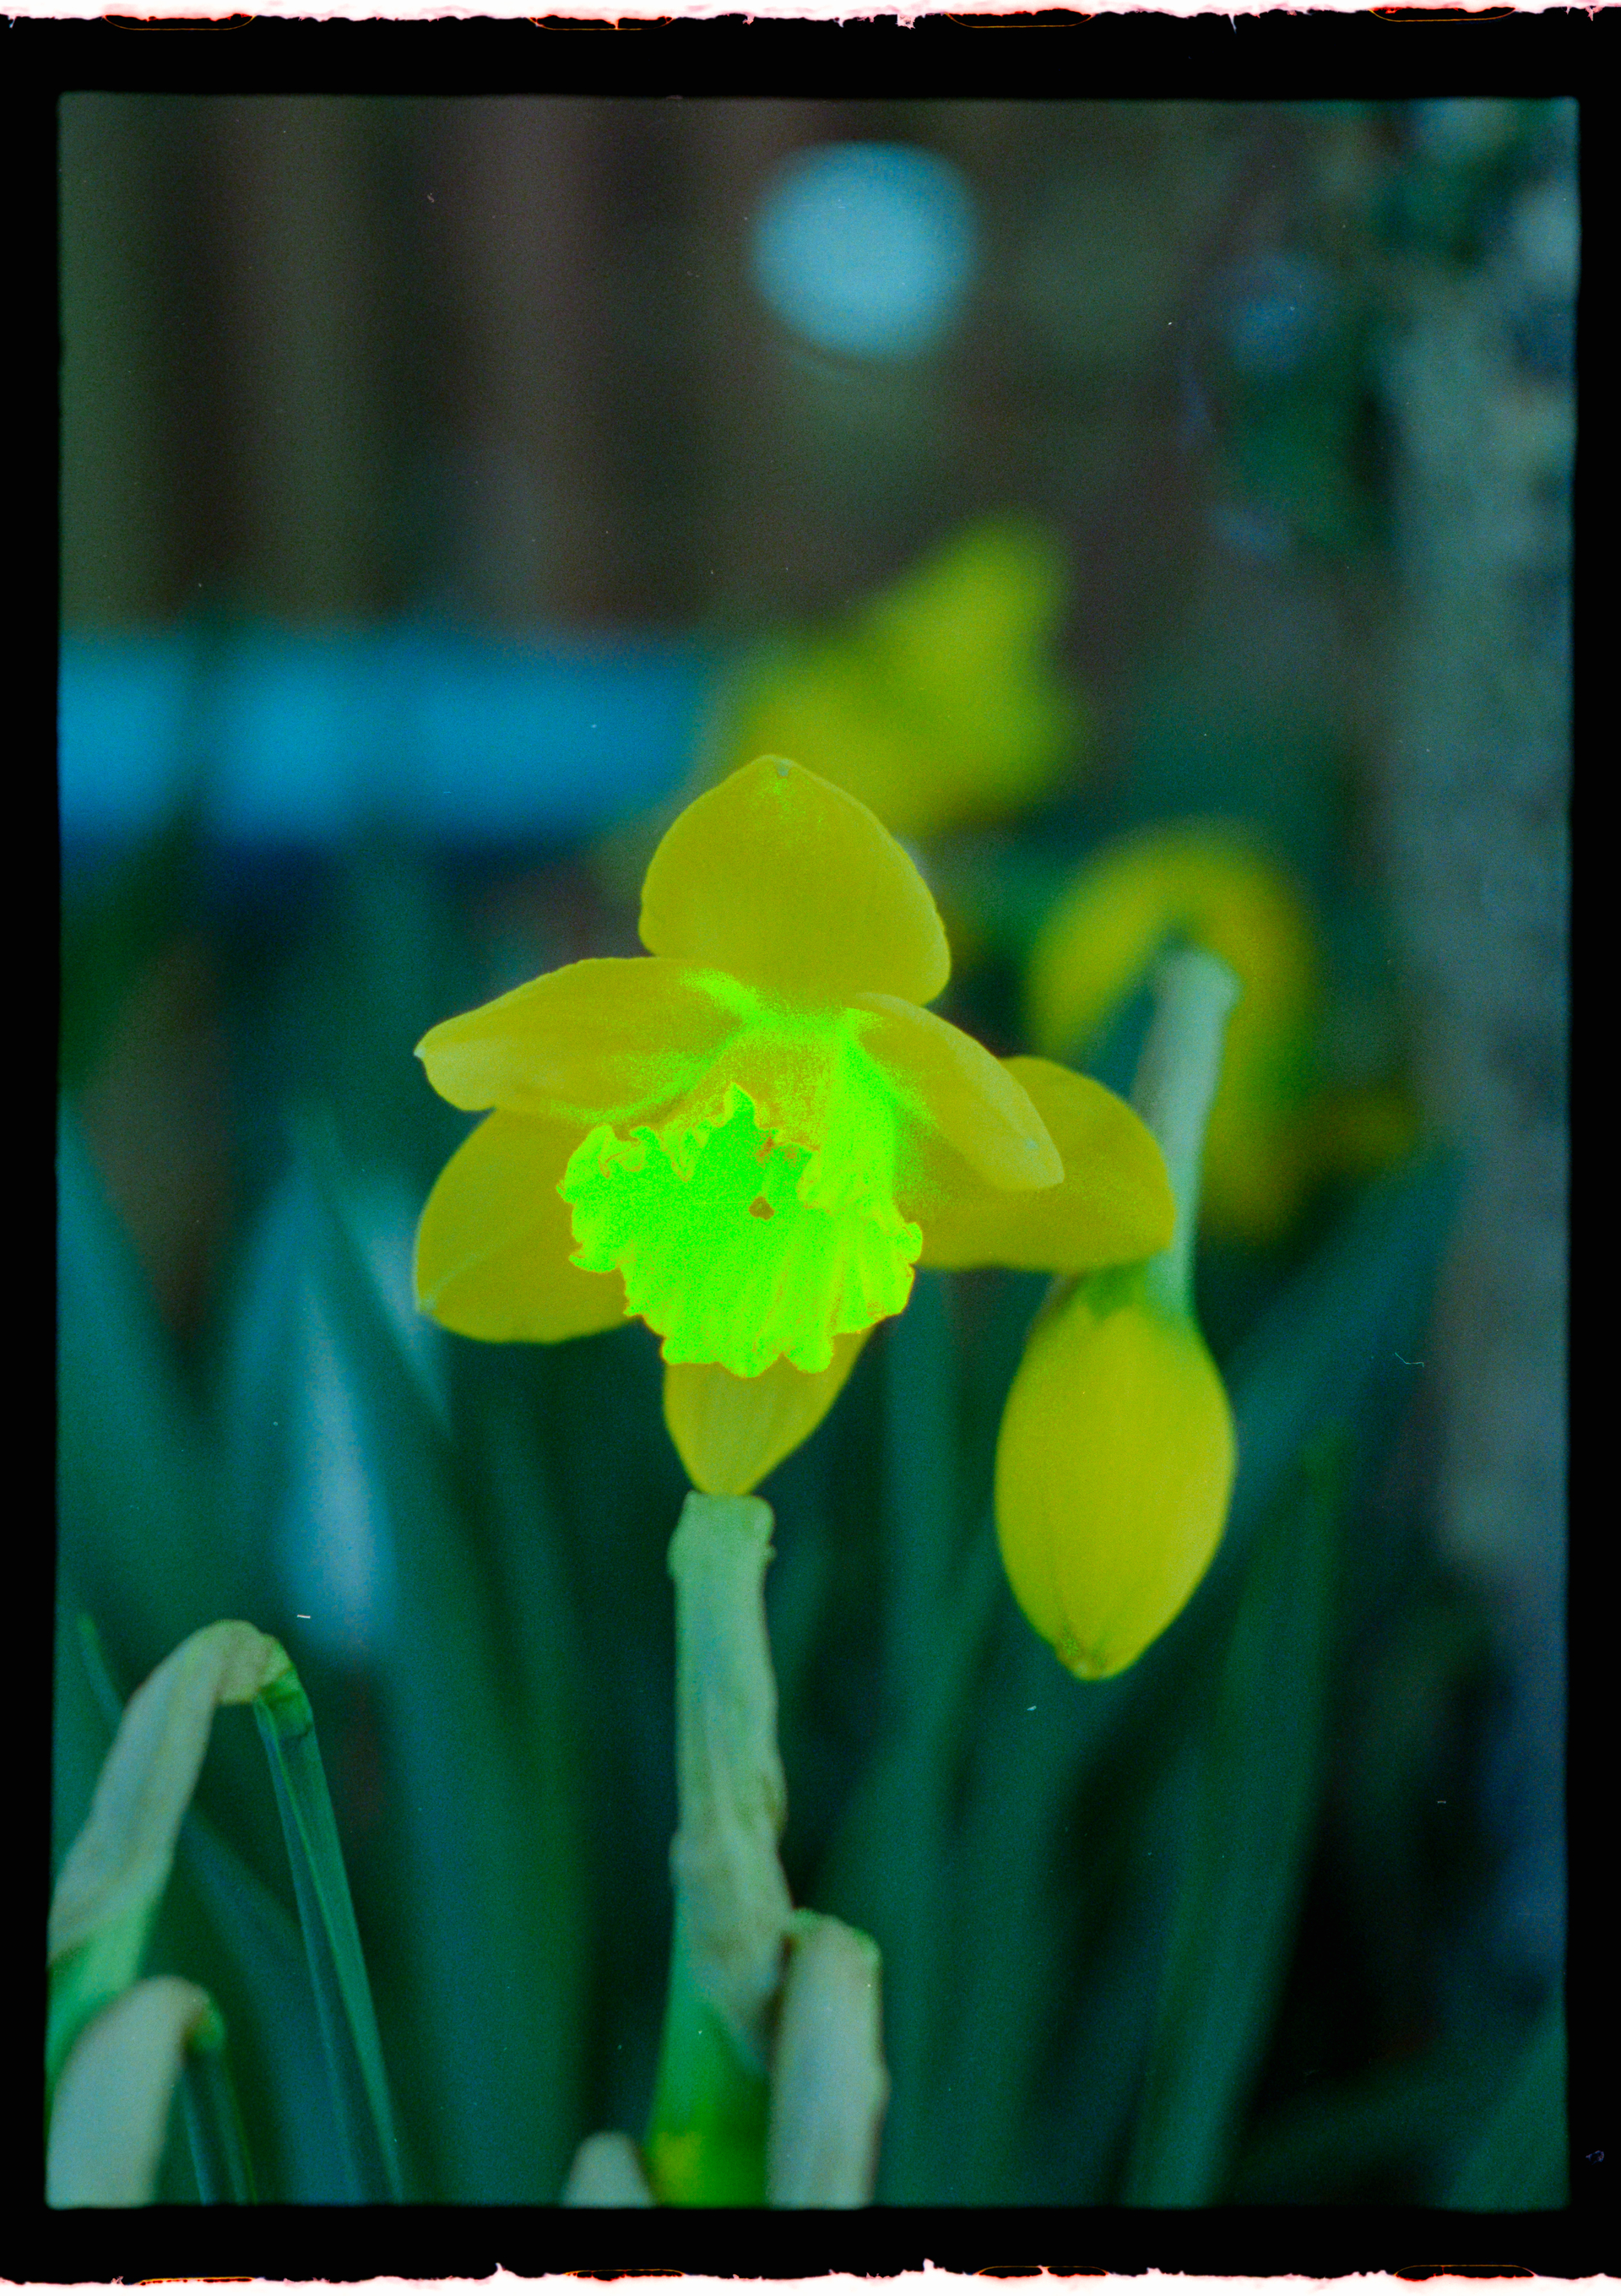
Following your guidance, I attempted to replicate your results, primarily through the modification of the Color Model during conversion. Frustrated as my results were not mirroring your own, I discovered there’s a bug in NLP - specifically, that “Reset 1 Photo(s)” on the Convert Tab does not actually do what the mouseover states. Rather, there seems to be no difference between it and “Uncovert 1 Photo(s)” as both retain all NLP settings after reverting back to the negative, including the Lightroom Profile. Can you confirm if you have the same bug?
Since I converted all my negatives on the roll in batch, and then reset this specific negative when I was attempting to get different results, Lightroom was maintaining the Profile of “Negative Lab v2.3 - Frontier” when I was selecting “None” as the Color Model the second time around (which seems to be coded to make no changes to Lightroom’s Profile setting, since it’s assumed Reset would have worked). I also found that changing the Lightroom Profile to “Adobe Color” after conversion yields radically different results than setting that prior to NLP conversion and seems to cause issues with NLP edits moving forward - though this might be expected behaviour based on how NLP works.
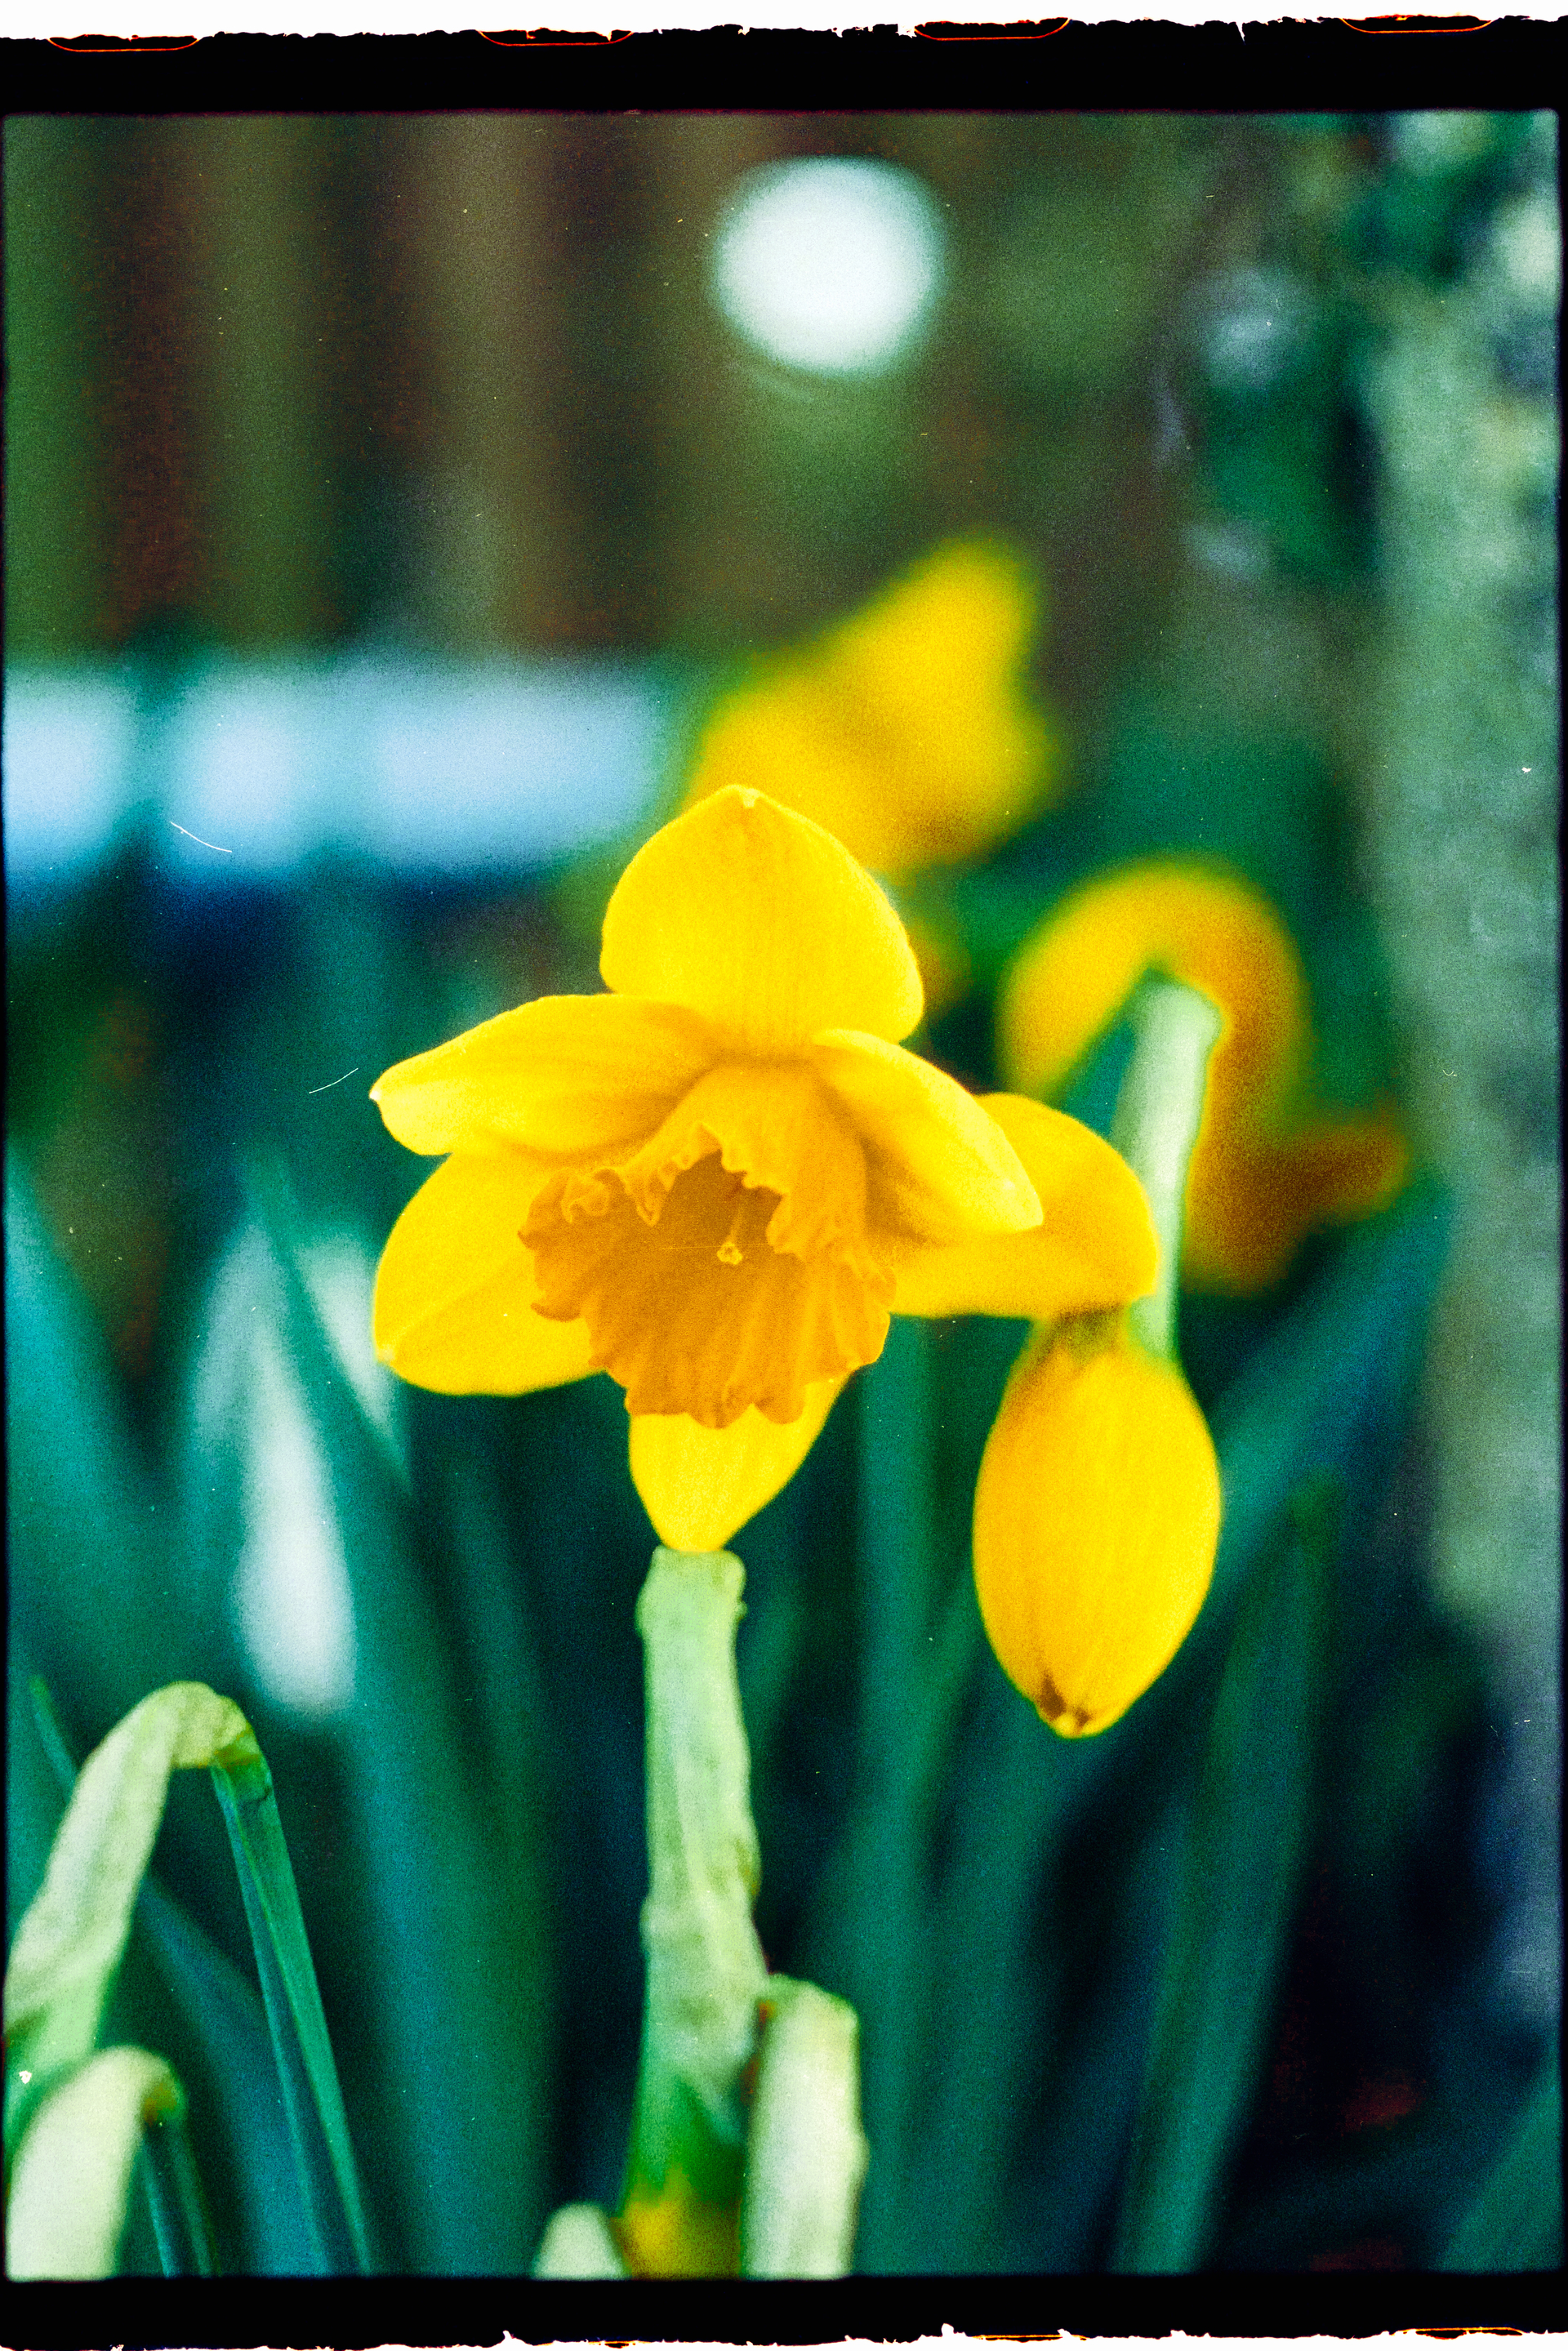
For posterity and any future forum-goer with similar problems, my steps to get the correct color profile are:
- “Reset 1 Photo(s)” in NLP - Convert Tab; click Apply
- Change the Lightroom Profile in the Develop Module to “Adobe Color”
- Select White Balance from film margin, crop down to just negative, if not previously done
- Open NLP, change Color Model to “None”, click “Convert 1 Negative”
- Ensure Analysis under the Roll tab is set to “This image only”. Mine is often blank and the WB auto settings (Auto AVG, Auto-Neutral, Auto-Mix, &c.) won’t work unless this corrected.
- Reset individual settings in NLP Edit Tab one-by-one if previous changes were made
- Profit.
Regarding your comments on the high ISO / film quality, the photos were taken with my Olympus Pen F which is a half-frame camera. The small negative coupled with the 400 ISO film, I’m willing to accept I’m pushing up against the limits of the film which is generating the “noise” when boosted. I don’t find it all that abrasive - at least it isn’t the neon green from my initial conversion. 
I really appreciate your help, Mark. Had I not seen you were able to yield reasonable results, I may not have ferreted out the Color Model / Profile issue that came from reseting the negatives.
All said, my final image below, with some adjustments and clean-up. Ultimately, I’m happy with this as a random test shot and especially within the characteristics of the specific film stock.