I don’t have a blank frame as I didn’t have a developed strip around to scan, but what I do have is one of the images I was testing without any flat field correction applied with each light source, so I could see the degree of the light falloff issue.
What’s interesting is that the issue seems to be worst in the bottom left corner in each case. I also found that rotating the Cinestill light 180 degrees made no difference.
I still have some suspicion that the carrier itself is contributing, given the film distance along with the interior reflectivity, which is why I’m interested in trying the flocking. One thing to note is that the Slimlite, being the dimmest of the three lights, has the lowest degree of reflectivity inside the carrier housing, from my observations. So it is entirely possible the issue is more that of reflections inside rather than light source evenness (although, the Slimlite is known to be very even). Despite its evenness, the issue is still in the bottom left corner, just as before, but is almost completely eliminated using flat field correction. Again, the consistency in the area of the problem between light sources makes me thing the carrier is part of the issue. I haven’t ruled out changing carriers at some point, but the film loading / spooling features of the Tone Carrier are very user friendly.
Here are three frames using the three different light sources, at different exposures given the difference in light intensity, with no flat field correction applied.
I have plenty of blank frames to play with so I always think of that first but @VladS suggested parchment paper which will also work. What I should have said was just try it without any film in at all and expose to centre the histogram. That should show the combined effect of the lens and the light source alone but adding a piece of film/translucent paper will show up any interaction this might cause between the film and the holder either internally or between the light source and the film. Good to have both.
I’m wondering whether the fact that the Slimlite Plano is dimmer means that it is less susceptible to the light bouncing around inside the holder. Wouldn’t it be true that it less obvious to the naked eye but that because you have to alter the exposure the sensor would see it in the same way?
On a positive note I think the fact that it always on one side suggests that it should be fixable once you’ve found out what’s causing it.
Do you have a 6x7 mask, that might be interesting.
If the issue persists with different backlights and different orientations … the issue is caused by something else.
The image of your setup shows some light coming in from the right and a white wall. Some stray light can therefore get in the way and the lighting and white wall could well be all it takes, even when the room is completely dark when you snap the captures.
If you have an old lens hood that screws on to the Laowa’s and stretches over the funnel of the film holder, things should get better - iff they are caused by that stray light. if not, I’d try in complete darkness without funnel or even without the film holder…and some black cloth or cardboard on that white wall. I’ve seen stray light from the shirt I was wearing and even some of my setup, e.g. in this capture:
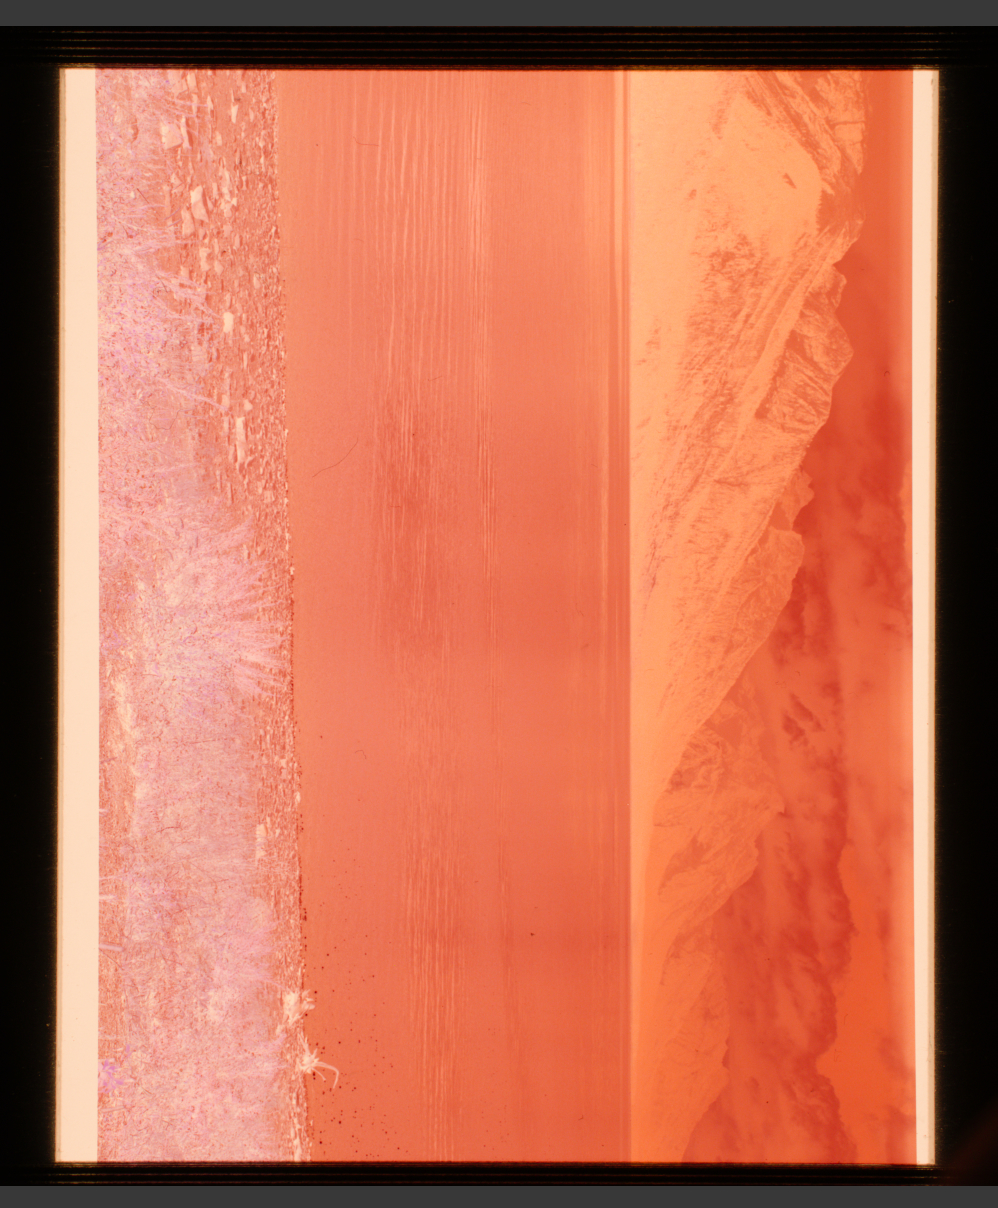
Right: Sloppy manual conversion done in DxO PhotoLab 7. The vertical bands are in the original shot, possibly caused by the developing lab or by me shooting through the window of the car. That was in August 1978 and I was half frozen from the night in my tent. Got up around 4 am because it was 7C below then - breakfast didn’t help much and I needed all the warmth I could muster in that rented Mercury Zephyr bringing me to a frozen Yellowstone National Park.
Thanks, Harry. Yes, using a blank frame to further assess is a good idea. I have some 120 film being developed right now, I will be sure to investigate when I get it back as there should be sufficient blank film at the ends to test. I received some flocking material in the mail yesterday, so I will test that as well.
I’ll go down that line of investigation, Digitizer. I do use a film hood on the Laowa, in addition to the included shrouds that come with the Tone Carrier. I will say that my investigations in the past of the effect of adding or removing the shrouds didn’t seem to affect the result much. The interior portion of the shrouds is somewhat reflective however, same as the carrier itself. As I mentioned above, I’ve purchased some adhesive flocking material. My plan is to flock the shrouds as well as the interior of the film carrier and see if that improves the situation further.
But I agree with you, given that the issue seems to persist most in the same corner of the frame, that the issue isn’t necessarily the light source. I will try my flocking and try to remove as many reflections as possible without getting too close to the edge of the frame and causing some vignetting in the carrier.
If you haven’t done so already you could also try masking off whichever light panel you are using so that your sensor will only ‘see’ light from just outside of the your 6x6 frame. That will restrict the amount of ‘non image forming’ light bouncing around off your semi-reflective internal surfaces.
I’m seeing this discussion just now, and very late in the day, so my 2-cents worth may be redundant, but I’ll make one observation just in case it helps. Looking at the set-up in the photo early into this thread, and having seen photos of other set-ups where users have also experienced problems with uneven or inadequately controlled lighting, my suspicion is that there are too many surfaces that can cause problems between the negative and the lens, starting with the film carrier and then into the tubes.
My suggestion in these cases is to get rid of all of it and use something very simple: no complex film carrier, no tubes. Get a film carrier - or use none - that has no surfaces above the negative - (I’ve written this up in one of my Luminous-Landscape articles), and don’t bother with tubes.
Make the exposures in a darkened room. It need not be pitch black like a darkroom, but just with no direct concentrated light shining in, especially into the work area. The light from the Kaiser Plano shining through the negative will overwhelm very dim indirect light.
Stripping away these accessories leaves you with two issues: (i) the avoidance of Newton rings and (ii) film flatness. You solve the former by having the film just above but not touching the light panel, and if needed, you solve the latter with a piece of TruVue Museum glass or a special Schott anti-Newton glass. Just in case the film holding arrangement doesn’t do this completely, use black cardboard frames to make sure no stray light from the Kaiser Plano enters around the image area.
This isn’t a very “sexy” way of handling the negative holding and transport function because you will need to do some manual positioning for each frame, but it delivers fine, trouble-free results. Less speed, better outcomes.
Thanks for your insightful comment. I’ve been chasing good results from camera scanning for a year or so, and I suspect you are correct, that simplifying the carrier system is probably the path to good results. Most changes I’ve made over the past year have not given me much in the way of improvement (e.g., changing film carriers, light sources, cameras, lenses). There has always been an intricate film carrier however, either from Negative Supply or Tone Carrier. And no matter the quality of the film carrier, no medium format film will be completely flat unless placed between glass as you’ve suggested.
I think will attempt flocking the carrier I have to see if that resolves my issue, but I am interested in trying your simplified approach with glass, especially for scanning 120 film.
May I ask how you approach suspending the film above the light source to avoid Newton rings when using glass plates? Is the thickness of the glass itself directly in contact with the light source enough distance?
Hi LOrdGwyn, I’ve done two different things, both of which work. (1) I found on the Internet a guy in China who makes knock-off Hasselblad/Imacon film carriers for the now defunct Flextight scanners (louw2008 | eBay Stores). It consists of a metal plate on bottom and a magnetized rubber plate on top, between which one sandwiches the film, and this assembly sits on the Kaiser Plano. These are great because it holds the film flat, there is no glass to get dirty and the film is just slightly enough above the Plano glass that no Newton rings develop. The downside of this arrangement is that it’s completely manual in respect of positioning the image itself directly in right place. I tore off the rubber piece and replaced it with a piece of museum glass which I found a bit more convenient to manage.
(2) I have film carriers from the various film scanners I’ve owned over the years, so I selected the one from the Minolta Dimage Scan Elite 5400 which is made of thin plastic - just a base and a lid, ribs between each frame, again no glass. It accommodates six negatives in a single strip. This just sits on top of the Kaiser Plano, so therefore the film itself is lifted enough above the glass that no Newton rings form. The carrier is designed to hold the film flat.
If one still has flatness problems, the solution is a sandwich of anti-Newton glass, under which a piece of black cardboard with the film frame size cut in. But I haven’t needed to go this route, which I think is the least preferred.
A commercial solution on the market looks promising and not expensive - the Essential Film Holder (Essential Film Holder | Best for 35mm & 120 Film Scanning - Award-Winning | Free Worldwide Shipping). I have not tried it so I can’t recommend what I haven’t used, but if others reading this have and can share their views on it, that can be helpful. The one thing I would be interested in knowing is the colour temperature of the diffuser plastic he uses.
Thanks again, Mark, you’ve given me a lot to think about. I like your approach using the Flextight film holders, seems like a great way to keep the film flat paired with the Slimlite Plano. If I continue to have issues with my carrier, that might be my next experiment.
What’s interesting about camera scanning is it is widely touted on places like YouTube, often with endorsements of off-the-shelf products from company’s like Negative Supply. However, these reviews really don’t go into the fine detail of how difficult it can be to get high quality scans from these products. It seems to me that something of a DIY approach is more likely to yield the best results.
Mark’s article on Photopxl entitled “Digitizing negaives with a camera revisited” can still be found on the Wayback machine, it shows his setup in detail and also a detailed examination into how he used Negative Lab Pro, a very interesting read and a ‘top end’ camera copying setup:
Mark, he describes the material he uses like this:
“The diffuser layer is even more special. Again cast acrylic, but this is Perspex SPECTRUM OPAL 1TL2 material, which is optimised for white light, and for consistency of light transmission across the entire sheet. The 1TL2 grade transmits 51% of light across the entire spectrum, from below 380nm to above 790nm - that’s the entire visible light range for humans.”
I think it’s fair to say that the EFH is not without its critics as sometimes, with certain combinations of lenses and film format perhaps, there can be problems not dissimillar to those described here, but he has apparently sold 40,000 of them so presumably that’s a lot of satisfied customers.
As you can see I have provided a link to your article on the Wayback Machine. I know your colleague Kevin Raber who was responsible for Photopxl passed away last year so I imagine that might be the reason the website is no longer accessible, though it could be temporary of course.
Thanks ever so much for coming into this discussion, and all the best for the holiday season.
Yes, I had read the whole blurb about the EFH - I suppose unless I try one myself I wouldn’t pass judgment on it - looks and sounds good, but, as you say, also has its critics. Jury is out. In any case, it’s not a huge investment or undertaking to give it a whirl - who knows, it may be great……
Onto Luminous-Landscape: so what happened are two things: (1) a fellow by the name of Jon Swindall, professional photographer I think in Atlanta GA acquired the site from Josh Reichmann. (2) with Kevin Raber’s sad demise, the family decided that PhotoPXL would need to be decommissioned, but the existing content should live on, so they made an arrangement with Luminous-Landscape to take it all over. Therefore all the articles ever posted on PhotoPXL are now posted on Luminous-Landscape, and they did a very good job of making the transition. That also applies to all of my content, so I now have some 85 or so articles all consolidated on that one site, which is kind of nice. The up-to-date link to my latest major piece on film-scanning is this one: Digitizing Negatives with a Camera - Revisited - Luminous Landscape .
Hi Mark, and very best wishes to you to. That’s very good news about the PhotoPXL content, thanks for posting the link here. I wonder if you might have changed anything in your setup, I expect not since that Sony 61MP sensor is still top notch as is the rest of your setup.
Have you seen any of the Magnum videos with the Fuji GFX100II? This is the introduction but they’ve been posting vasrious videos on this theme in the last couple of months:
Well, leave it to the French with their grand photographic and archival tradition going back to the invention of the medium itself and the extensive efforts they have made over the centuries to preserve history. It’s all very impressive and systematic and of course of the highest technical quality. I found it interesting that they chose the relatively cost-effective GFX-100 over the Phase One systems for doing their digitizing work. As well, the manner in which they’ve organized this monumental task is quite something else.
I was just digitizing some Kodachromes I shot back in 1958 the other night. The slides remain in remarkably good condition, but I have to say, from the perspective of here and now the film material itself is kind of meh, even though back in the day there was nothing else quite like it. The march of technology and looking backward, always the case. We are so “spoiled” for quality these days. And probably 20 years from now what we’re doing today and think is so fabulous may not look very impressive to our successors after all. But the history is so, so interesting. One of these days I hope to visit the Kahn archive of Lumière Autochromes on the outskirts of Paris. As you likely know, it was colour photos made from tiny granules of potato starch and dyes coated on glass plates.
I have one final update. I did much in the way of further experimentation, and I identified the underlying issue.
I’m a little embarrassed as perhaps this would have been more obvious to those with more experience, but it wasn’t to me.
First, I tried flocking the film carrier, which did not improve the glow. I also tried scan with and without the mask, with and without a lens hood, etc. After reviewing my work up to that point, I thought it was odd that I was getting significantly better results with the Negative Supply light after applying flat field correction, despite it being overall a much less even light than say, the Cinestill CS-Lite+ Spectracolor.
I reviewed my workflow and happened to notice the “Only correct color cast” option in Lightroom’s flat field correction. It was not obvious to me that Lightroom was doing color cast correction in addition to light falloff correction with its flat field correction function. There isn’t an option to only correct light falloff.
I then saw my error. Because the Cinestill CS-Lite+ in its color negative configuration has a strong blue cast, used to further neutralize the orange film mask, the flat field correction function was applying color cast correction to the areas of light falloff in my images.
So, I simply white balanced my calibration images to neutral gray, THEN applied flat field correction. And the issue is resolved.
Thanks again for your help, and I apologize for overlooking what probably should have been an obvious solution. But the systematic troubleshooting did allow me to see my error. Hopefully others won’t repeat my mistake!
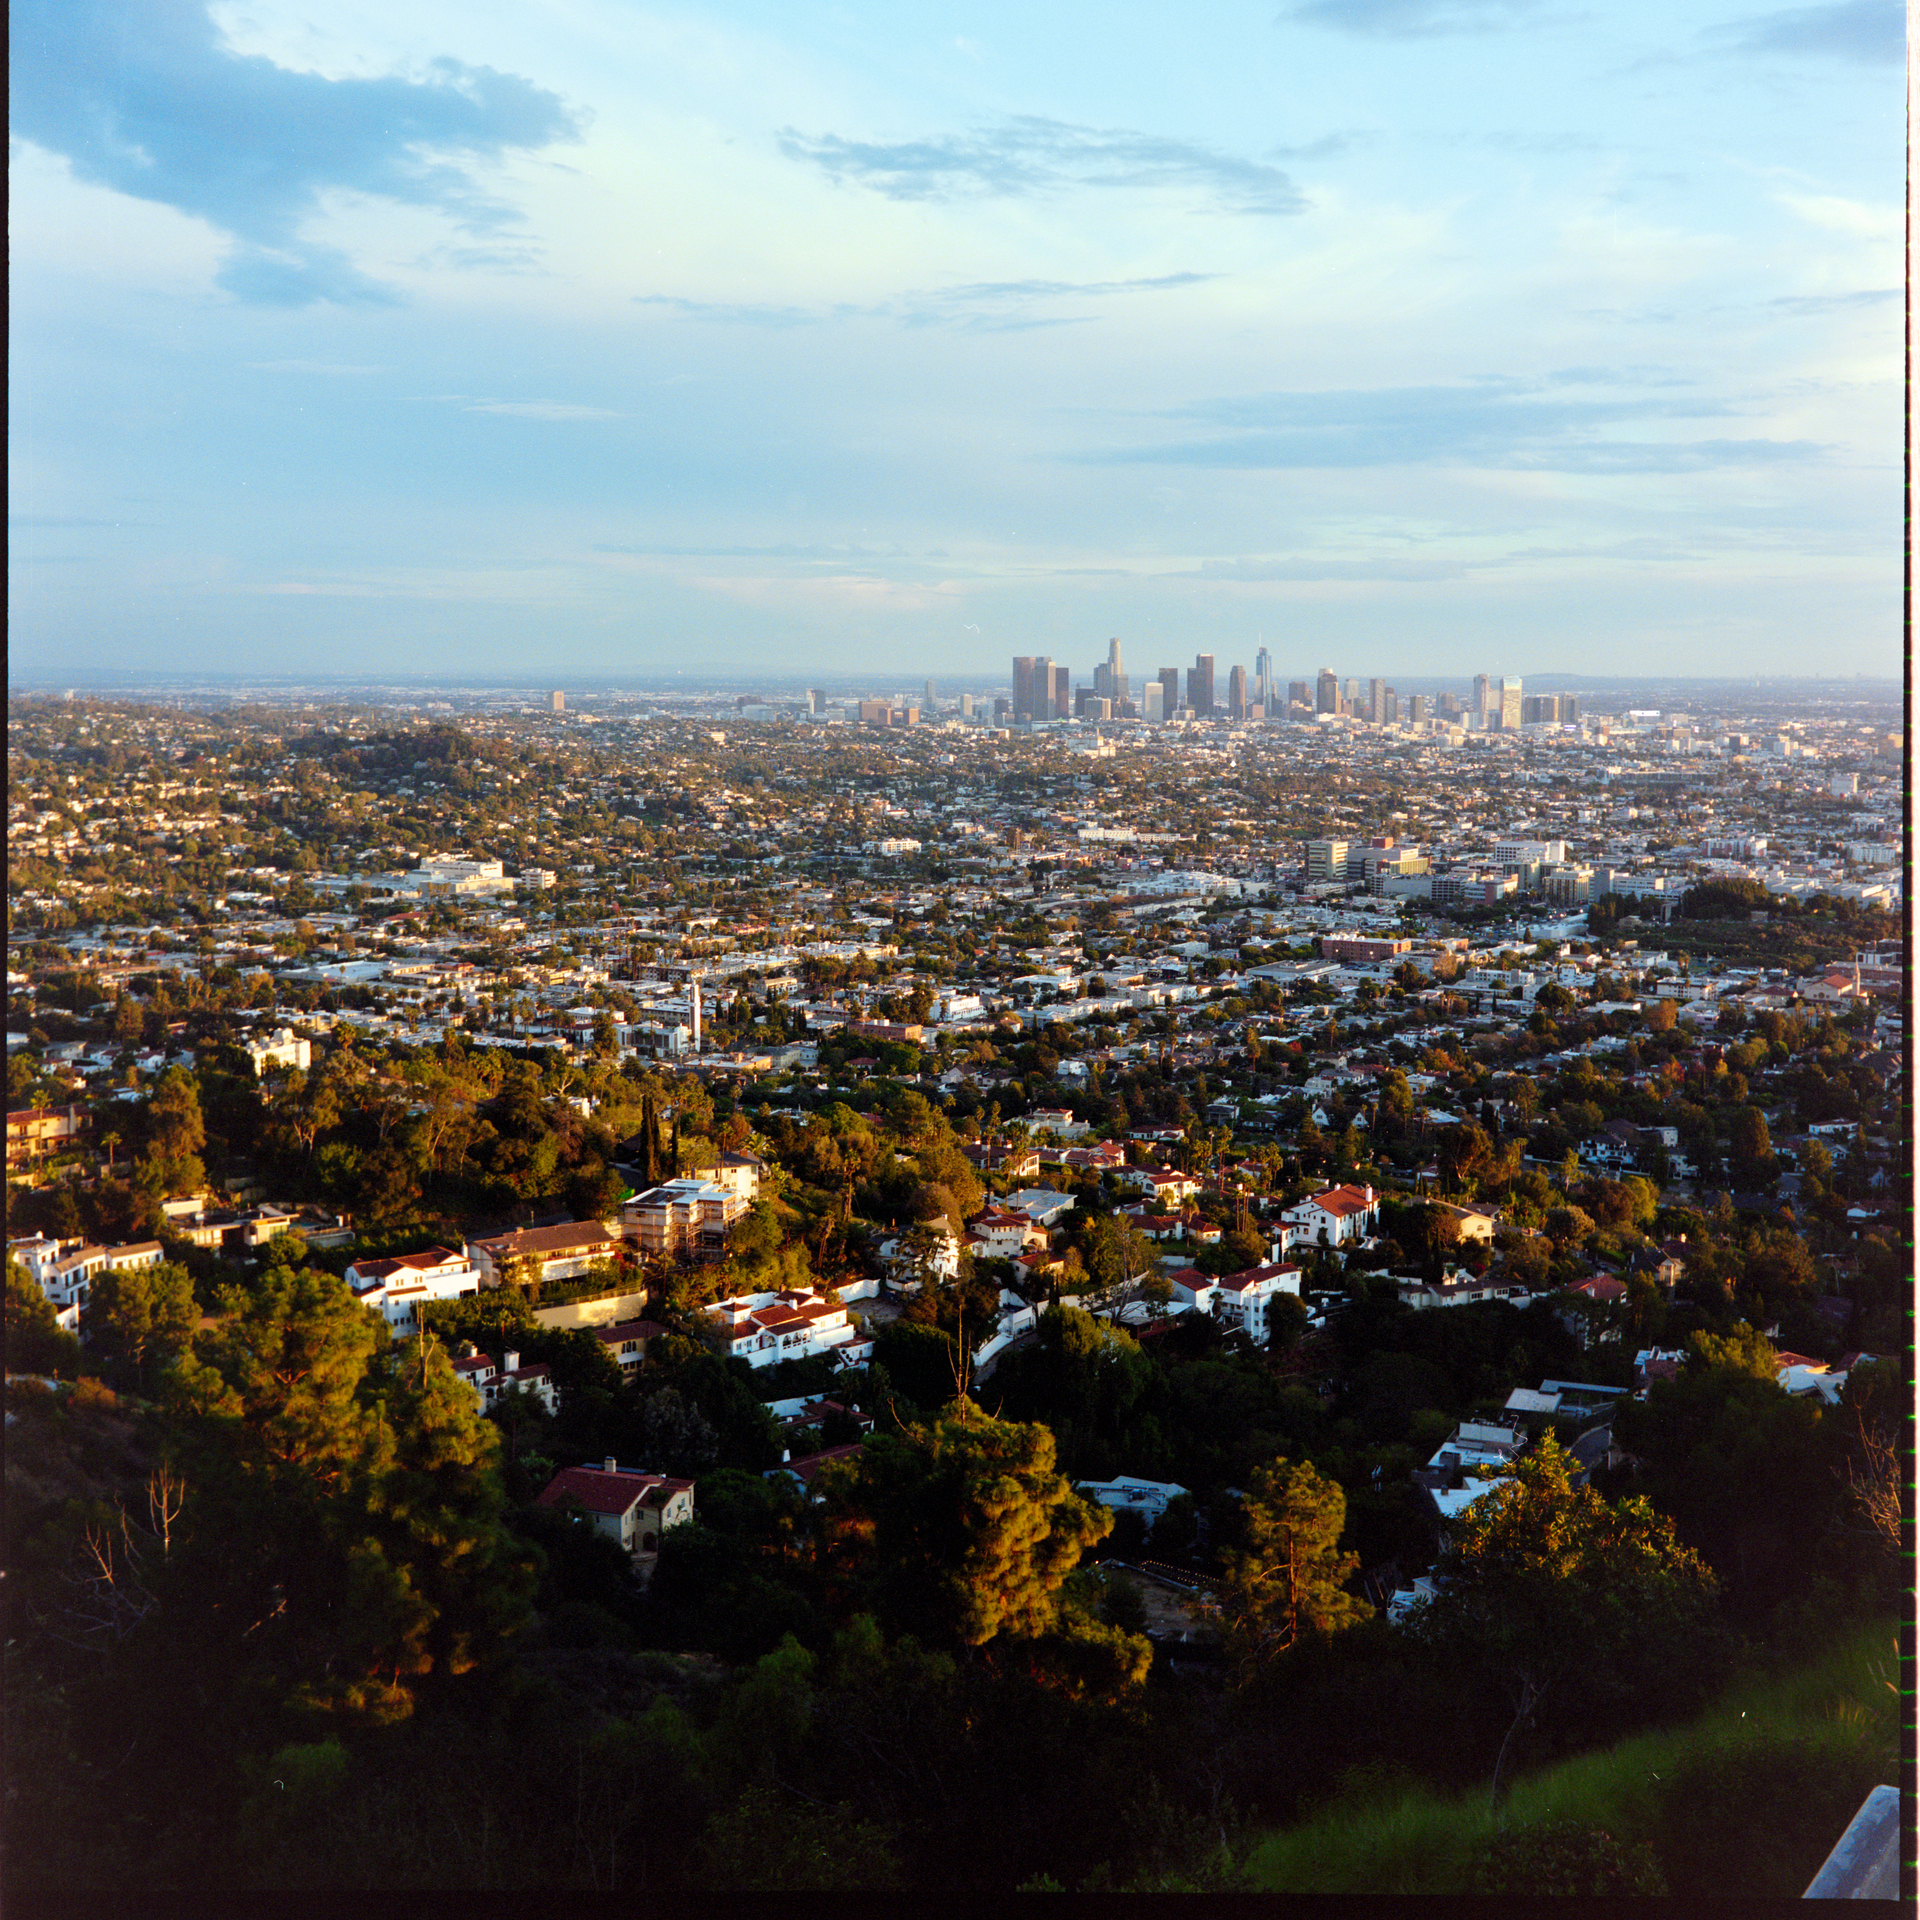
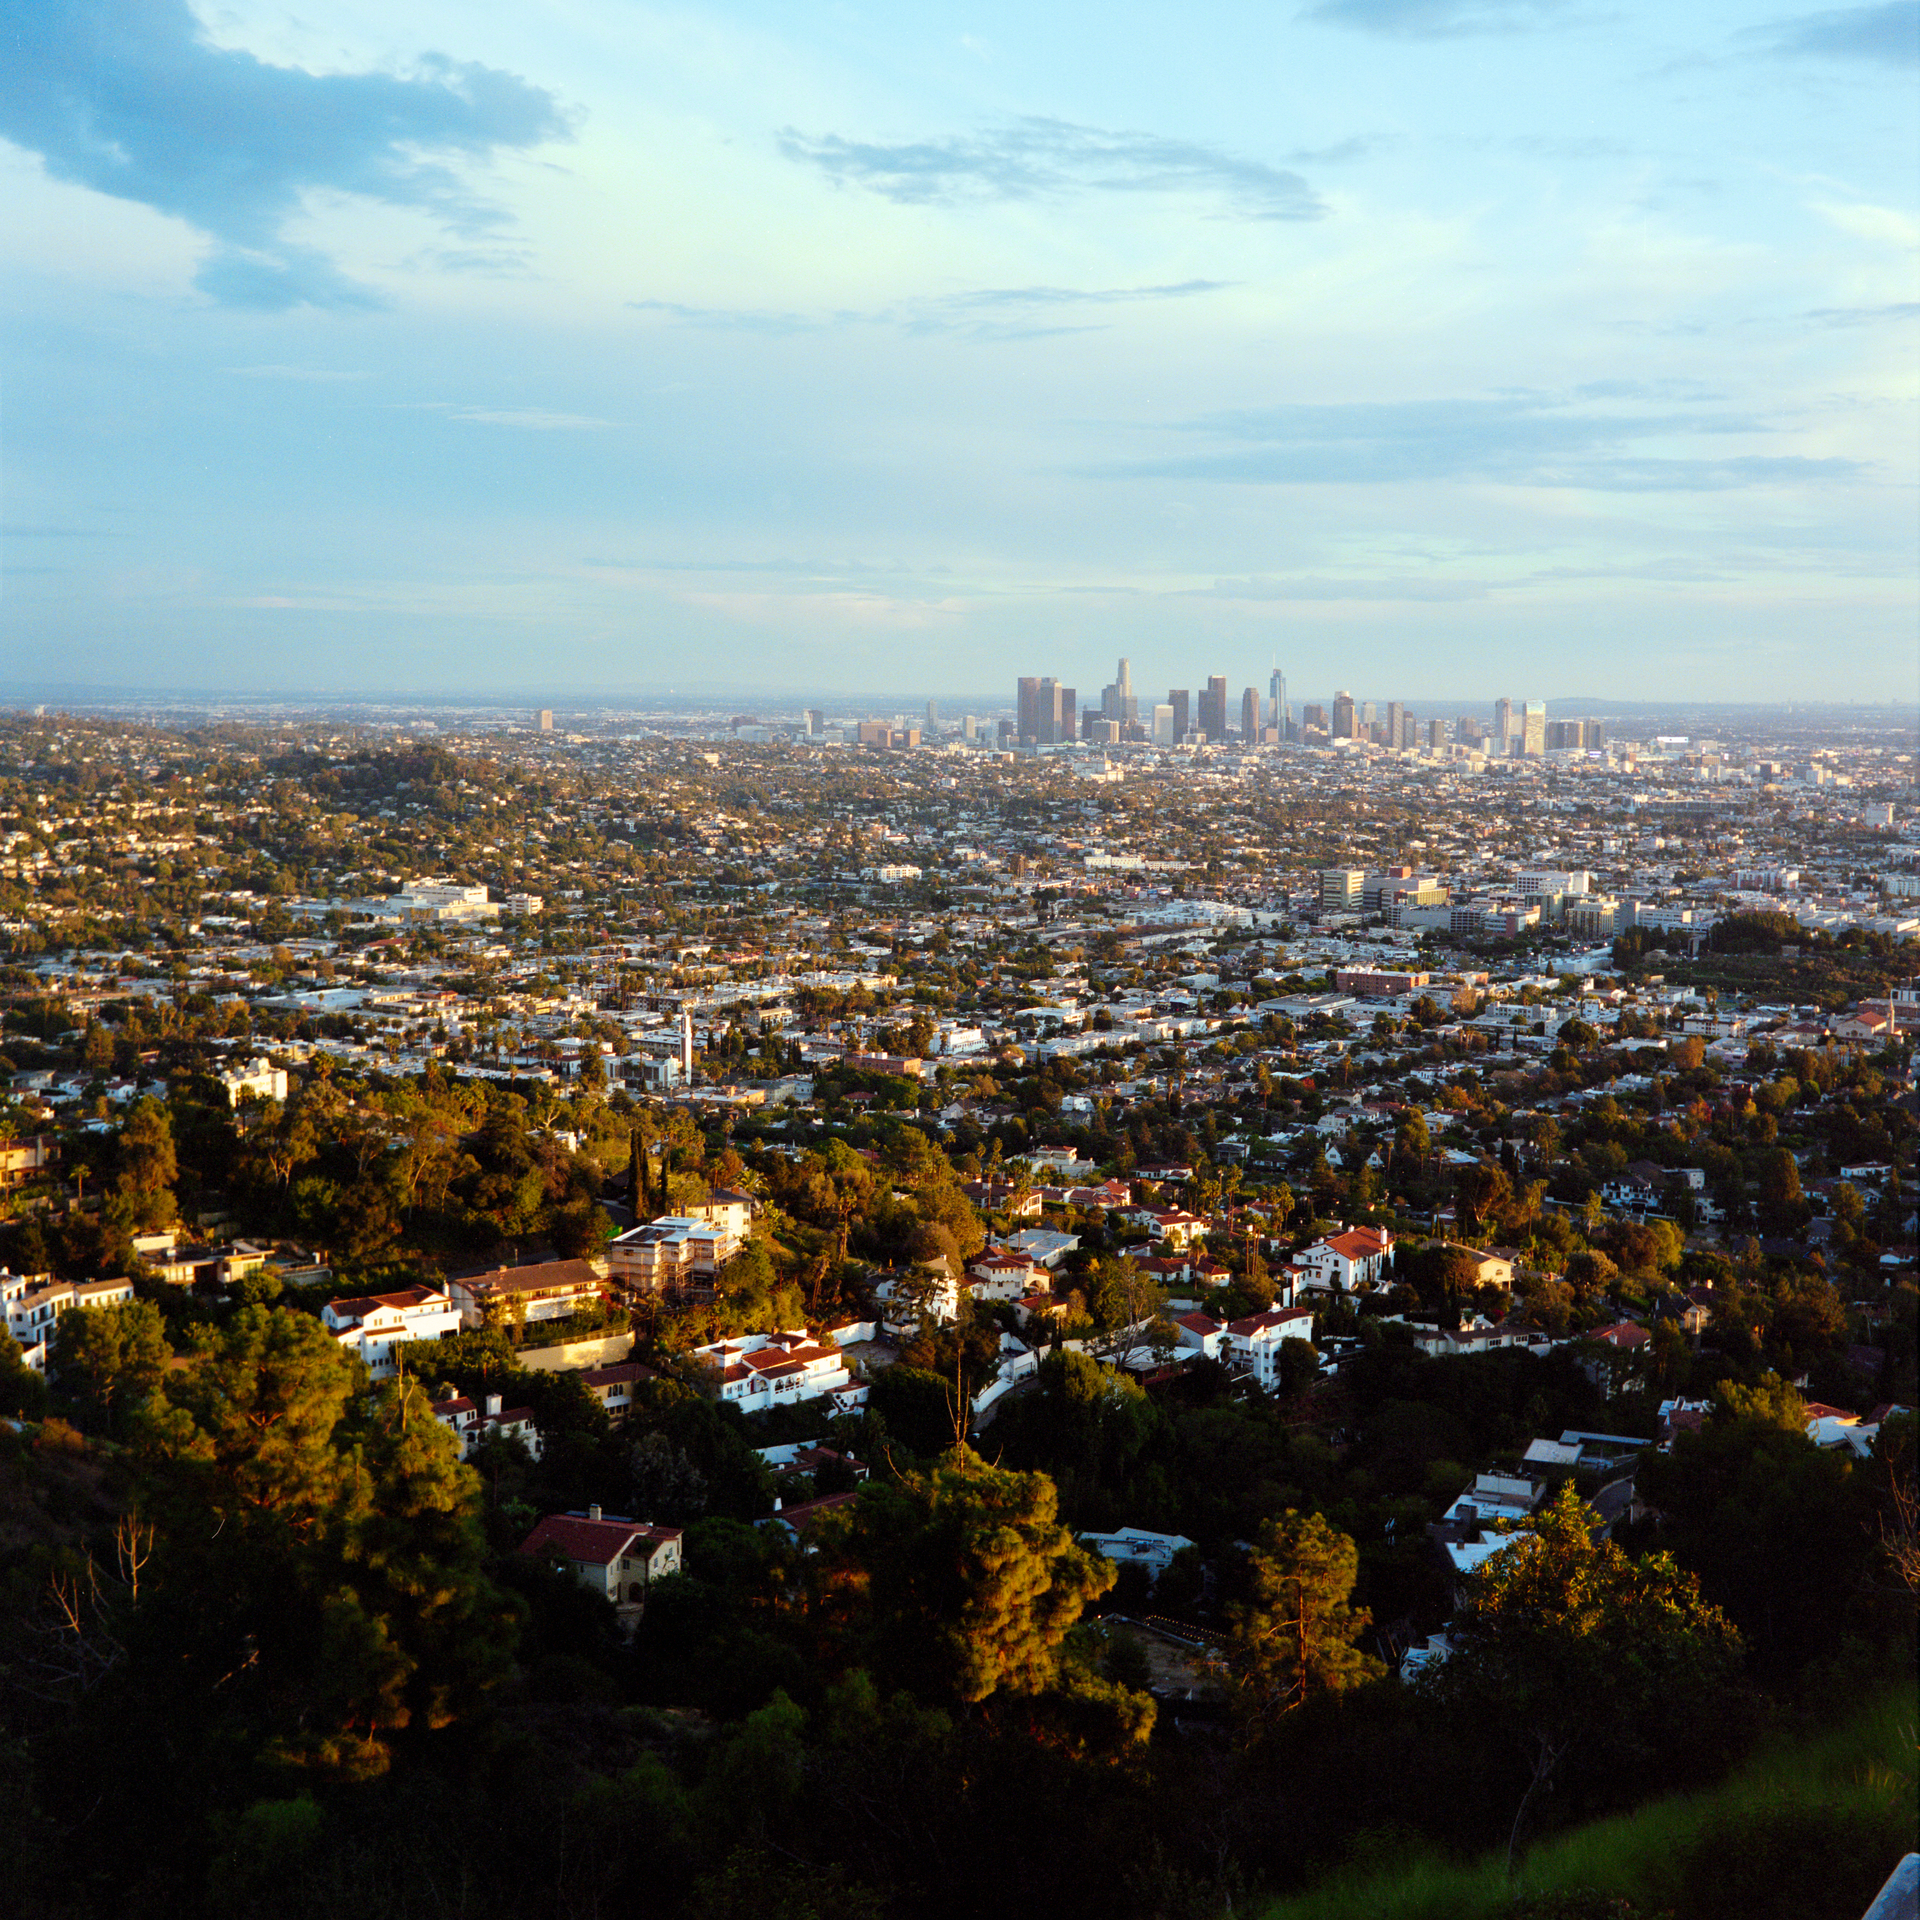
Here is my downtown LA scan done with the Cinestill CS-Lite+ Spectracolor with the process above applied.
That’s good news, although maybe there is more that might be done to reduce the need for flat field correction. To me it looked like it was hugging the right hand edge of the frame and so was not regular vignetting, so could be still be caused by some interaction with your holder/panel. Better to eliminate it if you can.
Yes, you’re right, ideally it would be eliminated entirely. I do plan to try some of the things Mark suggested, but in the meantime I’m happy to be able to get good scans results using the carrier I have. I still suspect the distance from the light source is an issue, so I’ll likely focus my efforts there going forward.