I’ve been trying to optimize my digital camera scanning setup for the last year. The biggest trouble I’ve found is accounting for orange glow due to light falloff / vignetting in underexposed areas of film. Using flat field correction (which I hassled Adobe on until they recently patched it), I’m now getting quite good results on 35mm.
However, I’m still having trouble with medium format, 6x6 specifically. Despite using flat field correction with a blank frame at the same exposure, I am stilling getting glow in the edges of some of my shots. It’s a real drag.
My setup for scanning 6x6 right now is:
Nikon Zf w/ Laowa 90mm f/2.8 macro - using 32-frame pixel shift to create 96MB images
Flat field correction frame shot at the same exposure using 32-frame pixel shift
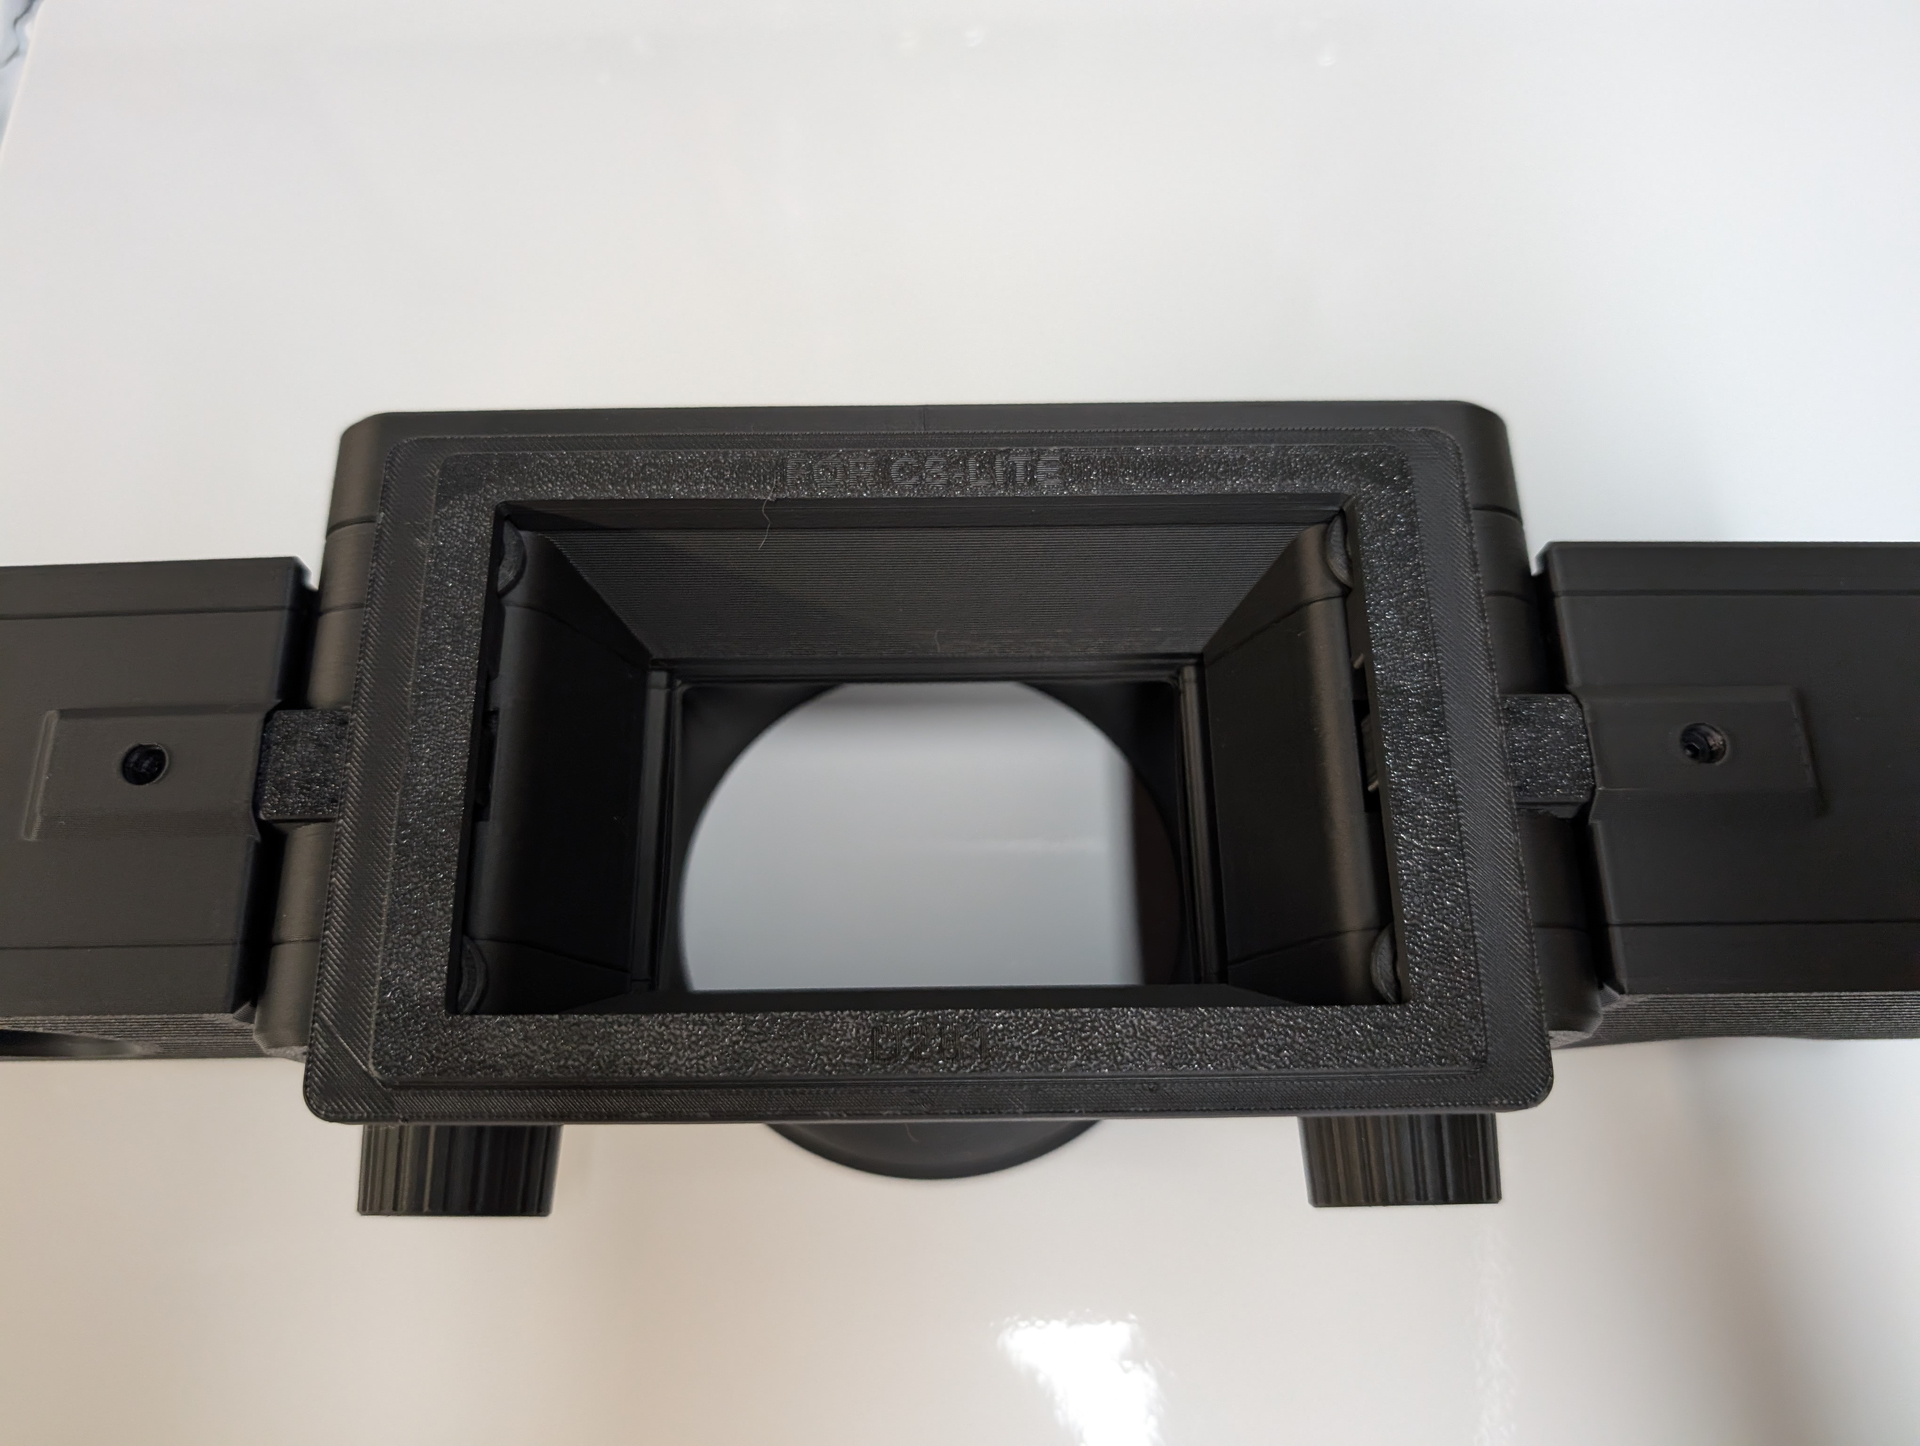
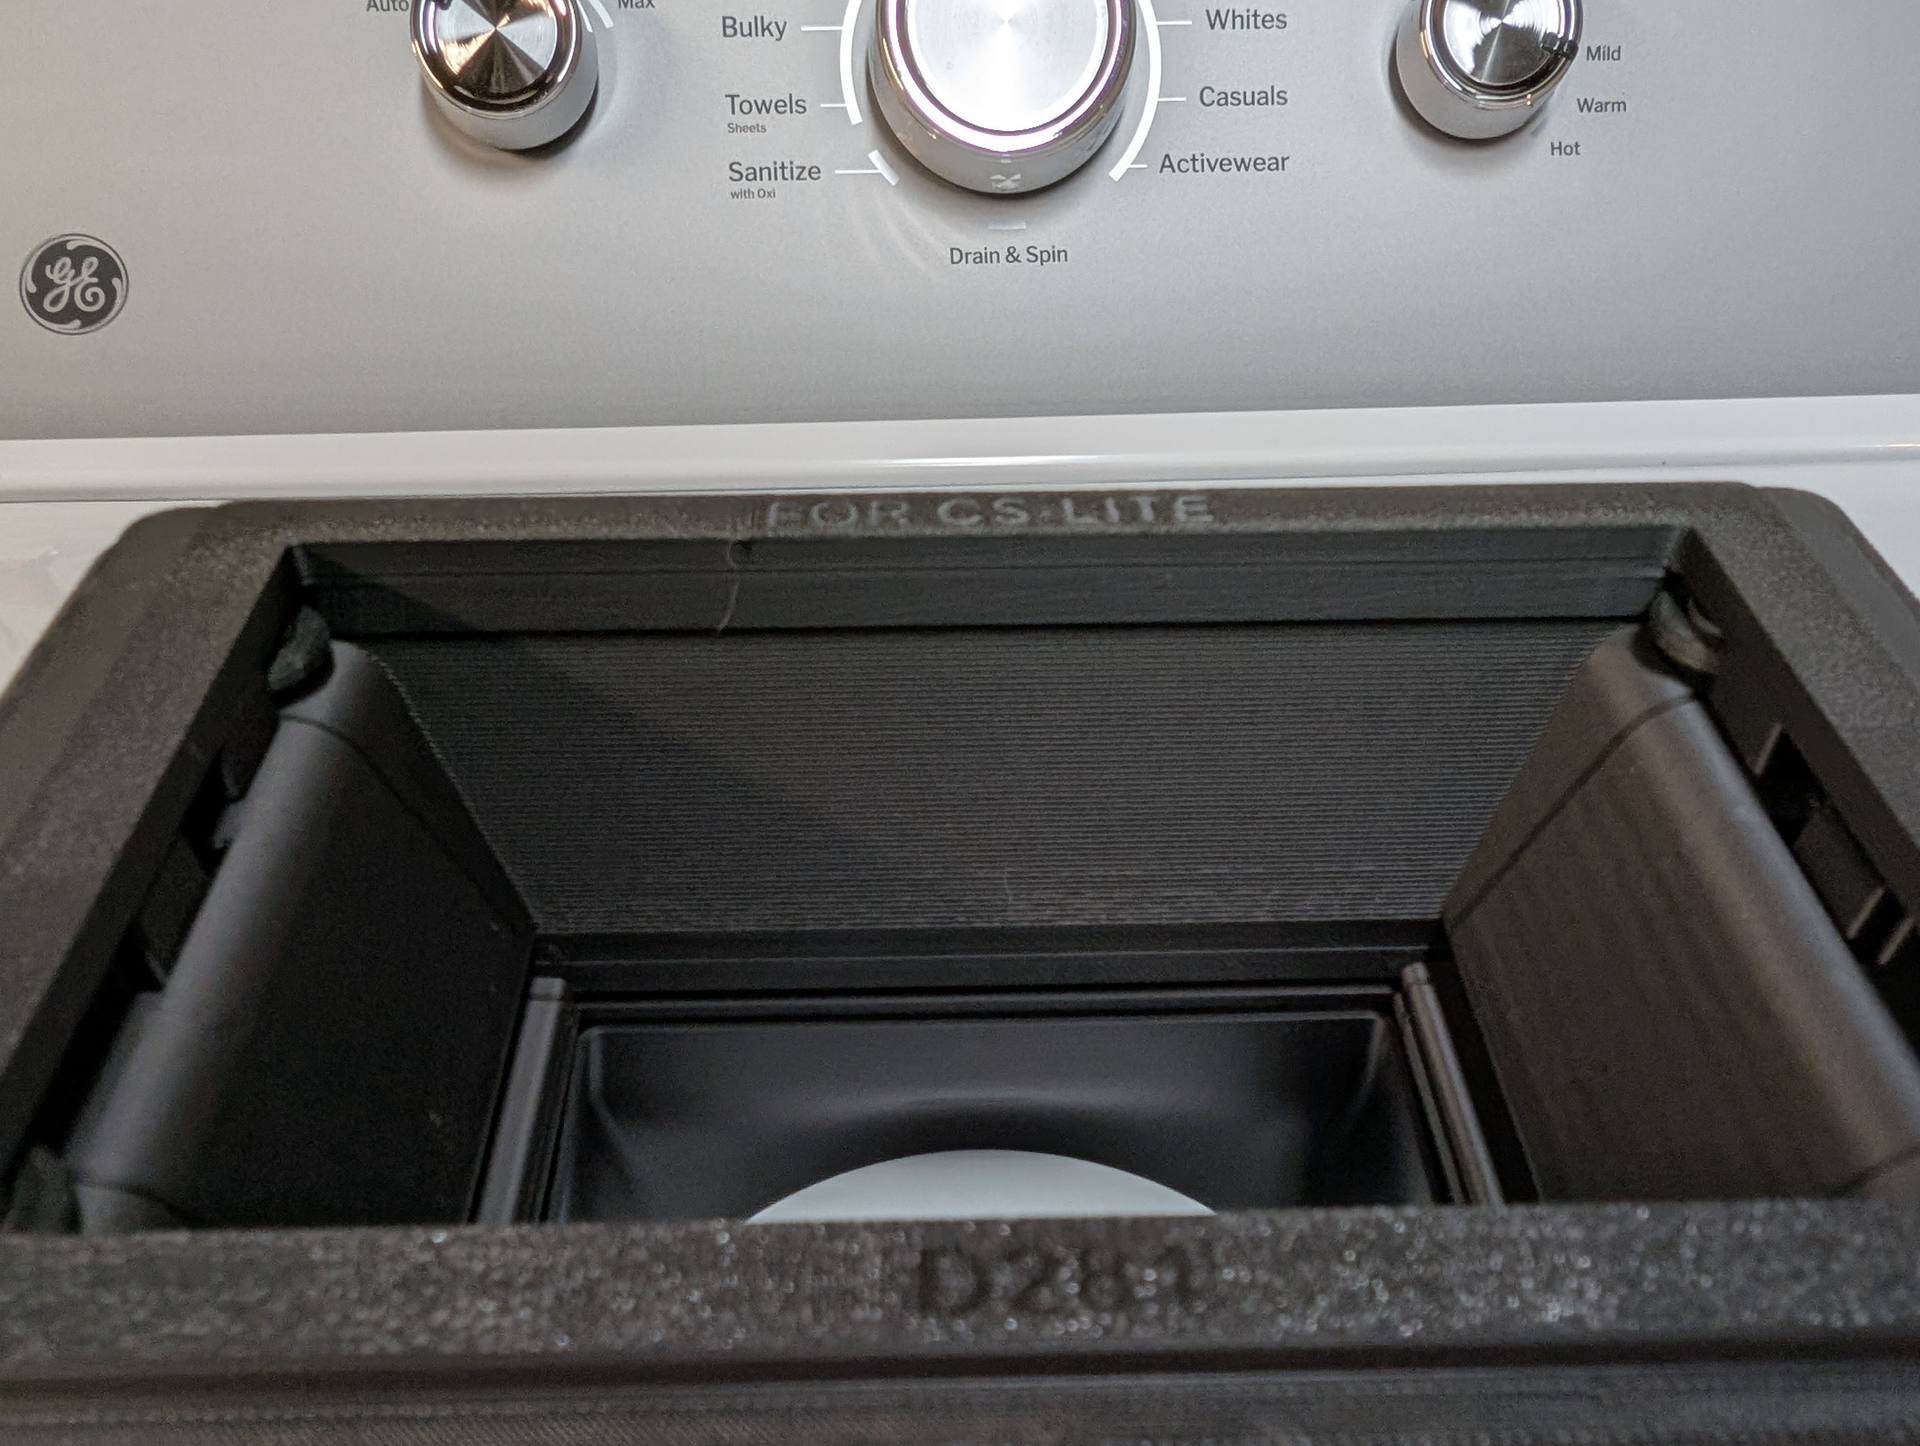
Light source - Cinestill CS-LITE+ Spectracolor
Carrier - toneCarrier 120
I’ve tried switching light sources, different macro lenses without improvement. One note about the toneCarrier 120 is the light source is quite far from the film plane, perhaps 5-6cm.
My thoughts are this is either related to the film carrier itself, or due to film curling.
Appreciate any thoughts. Given the cost of shooting medium format, it definitely hurts my motivation knowing I cannot get good scans if the edges of the frame are intentionally underexposed.
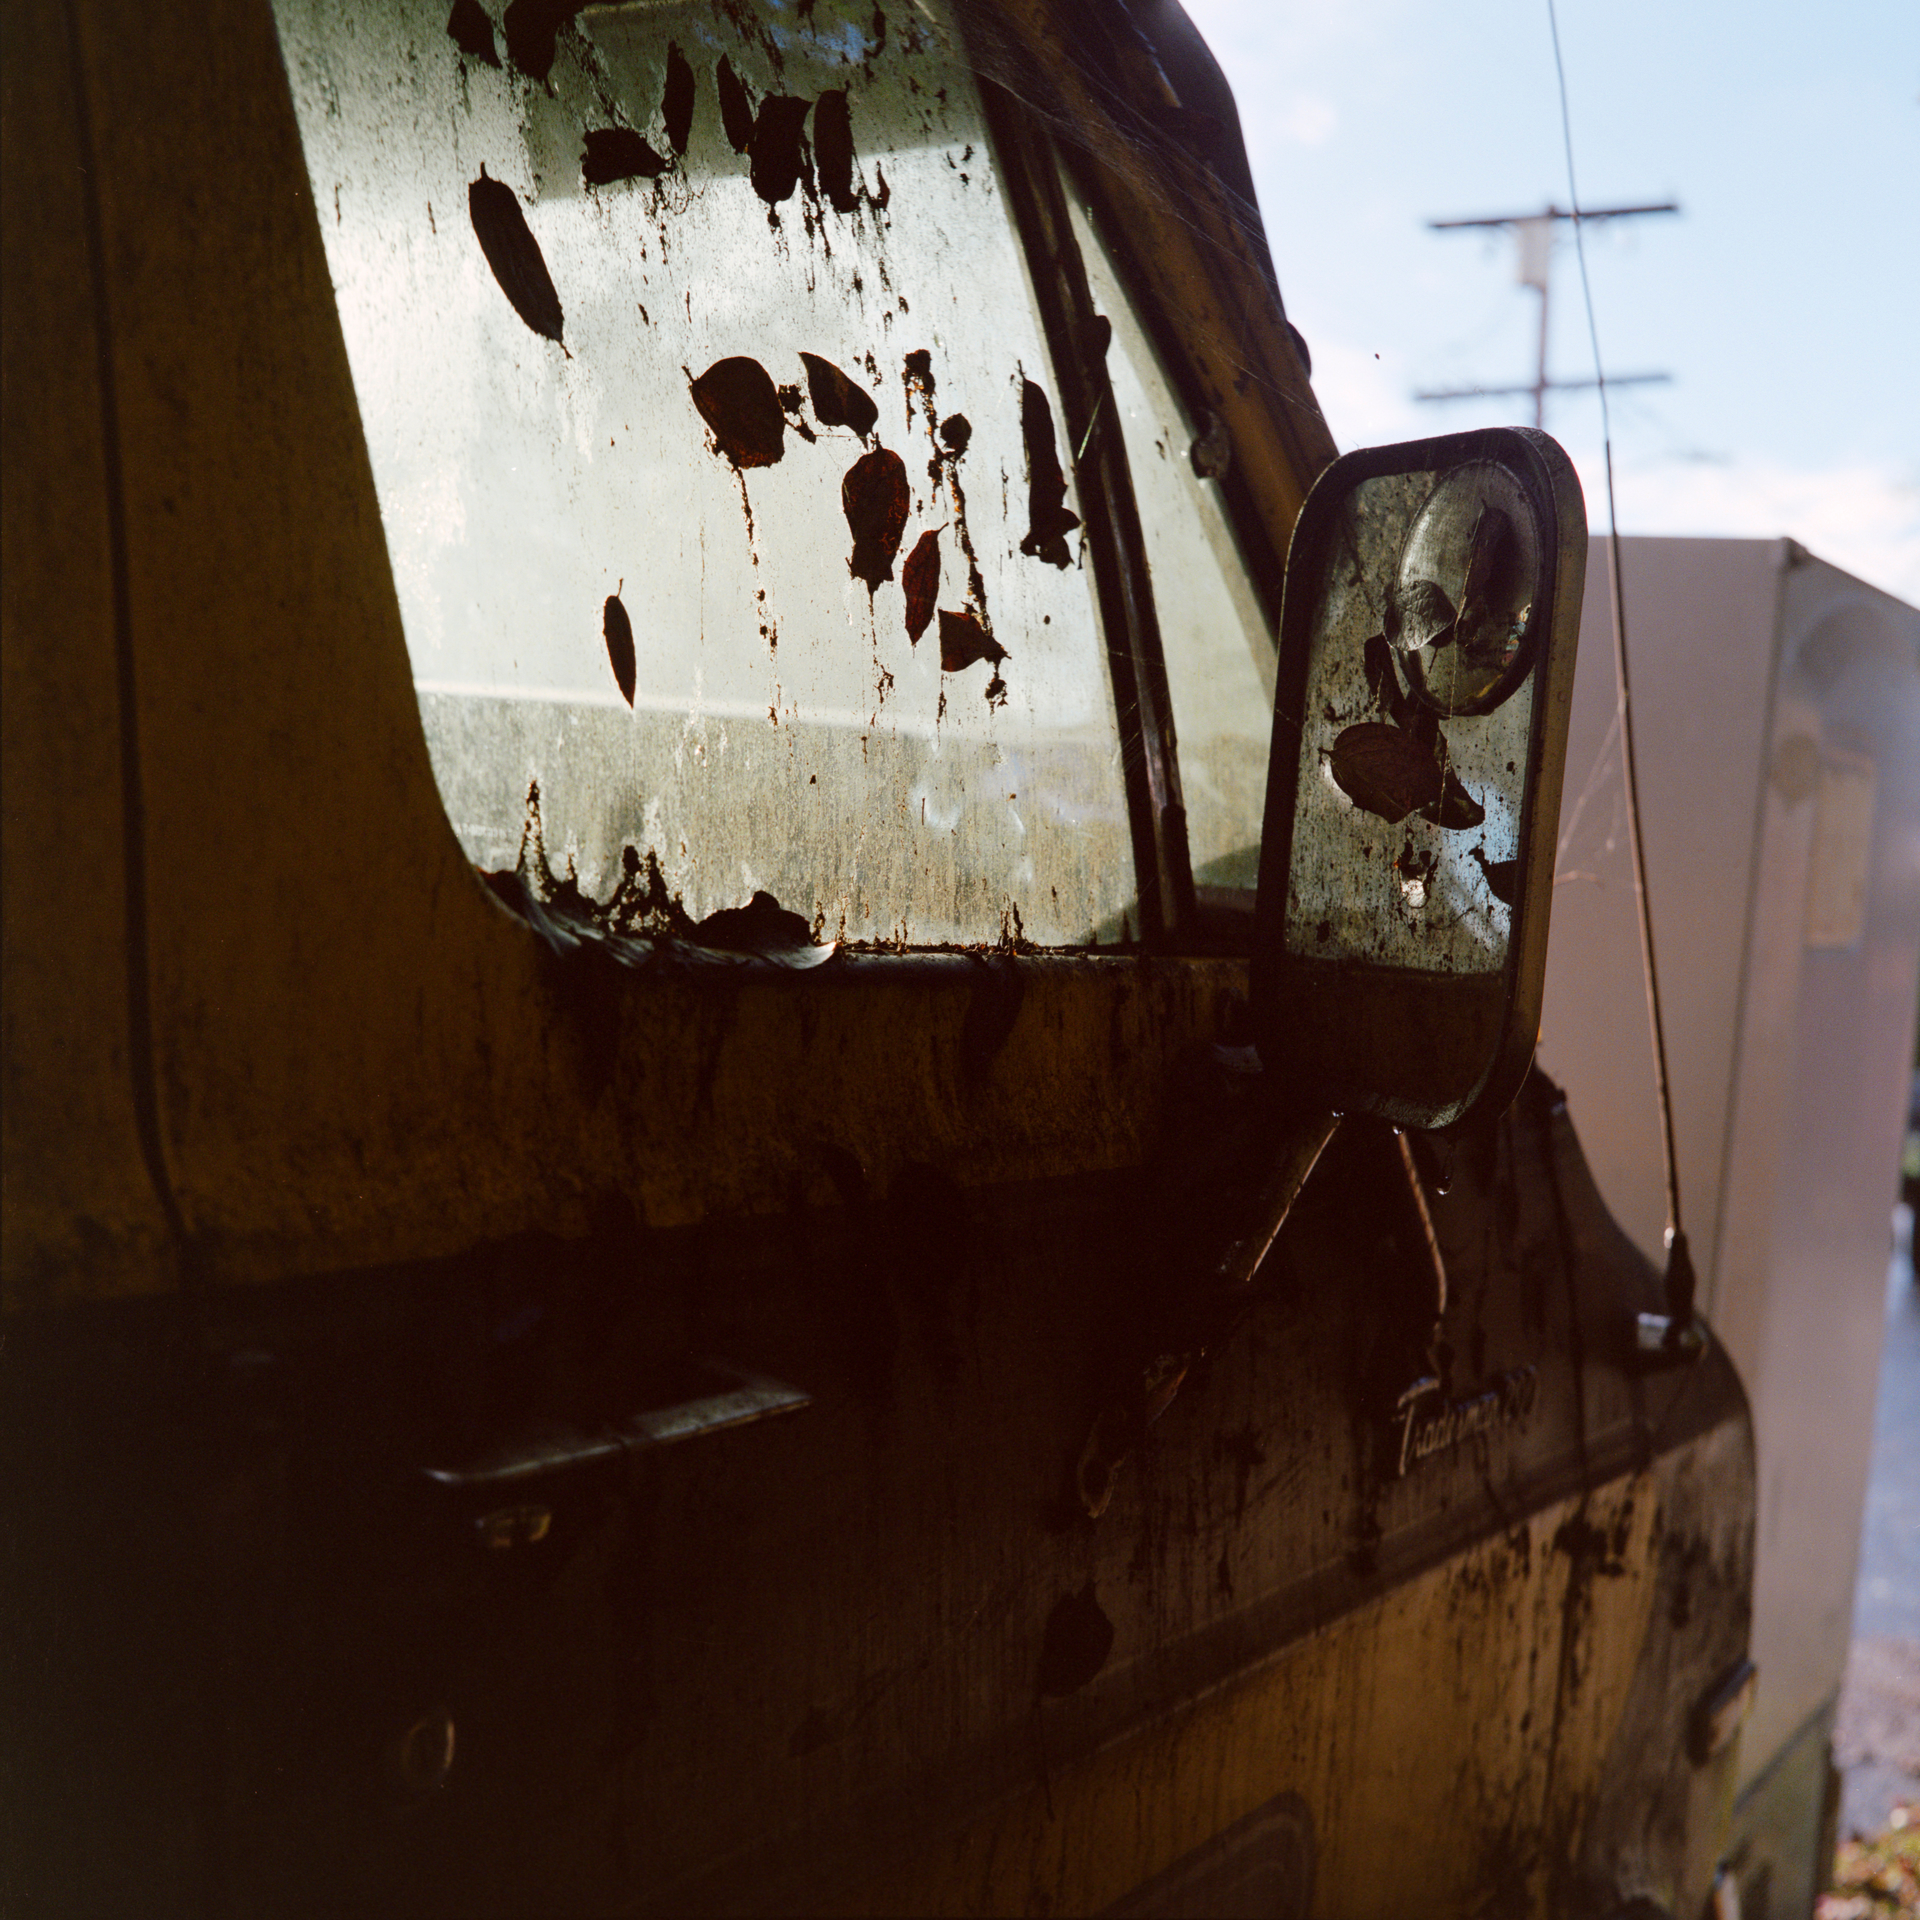
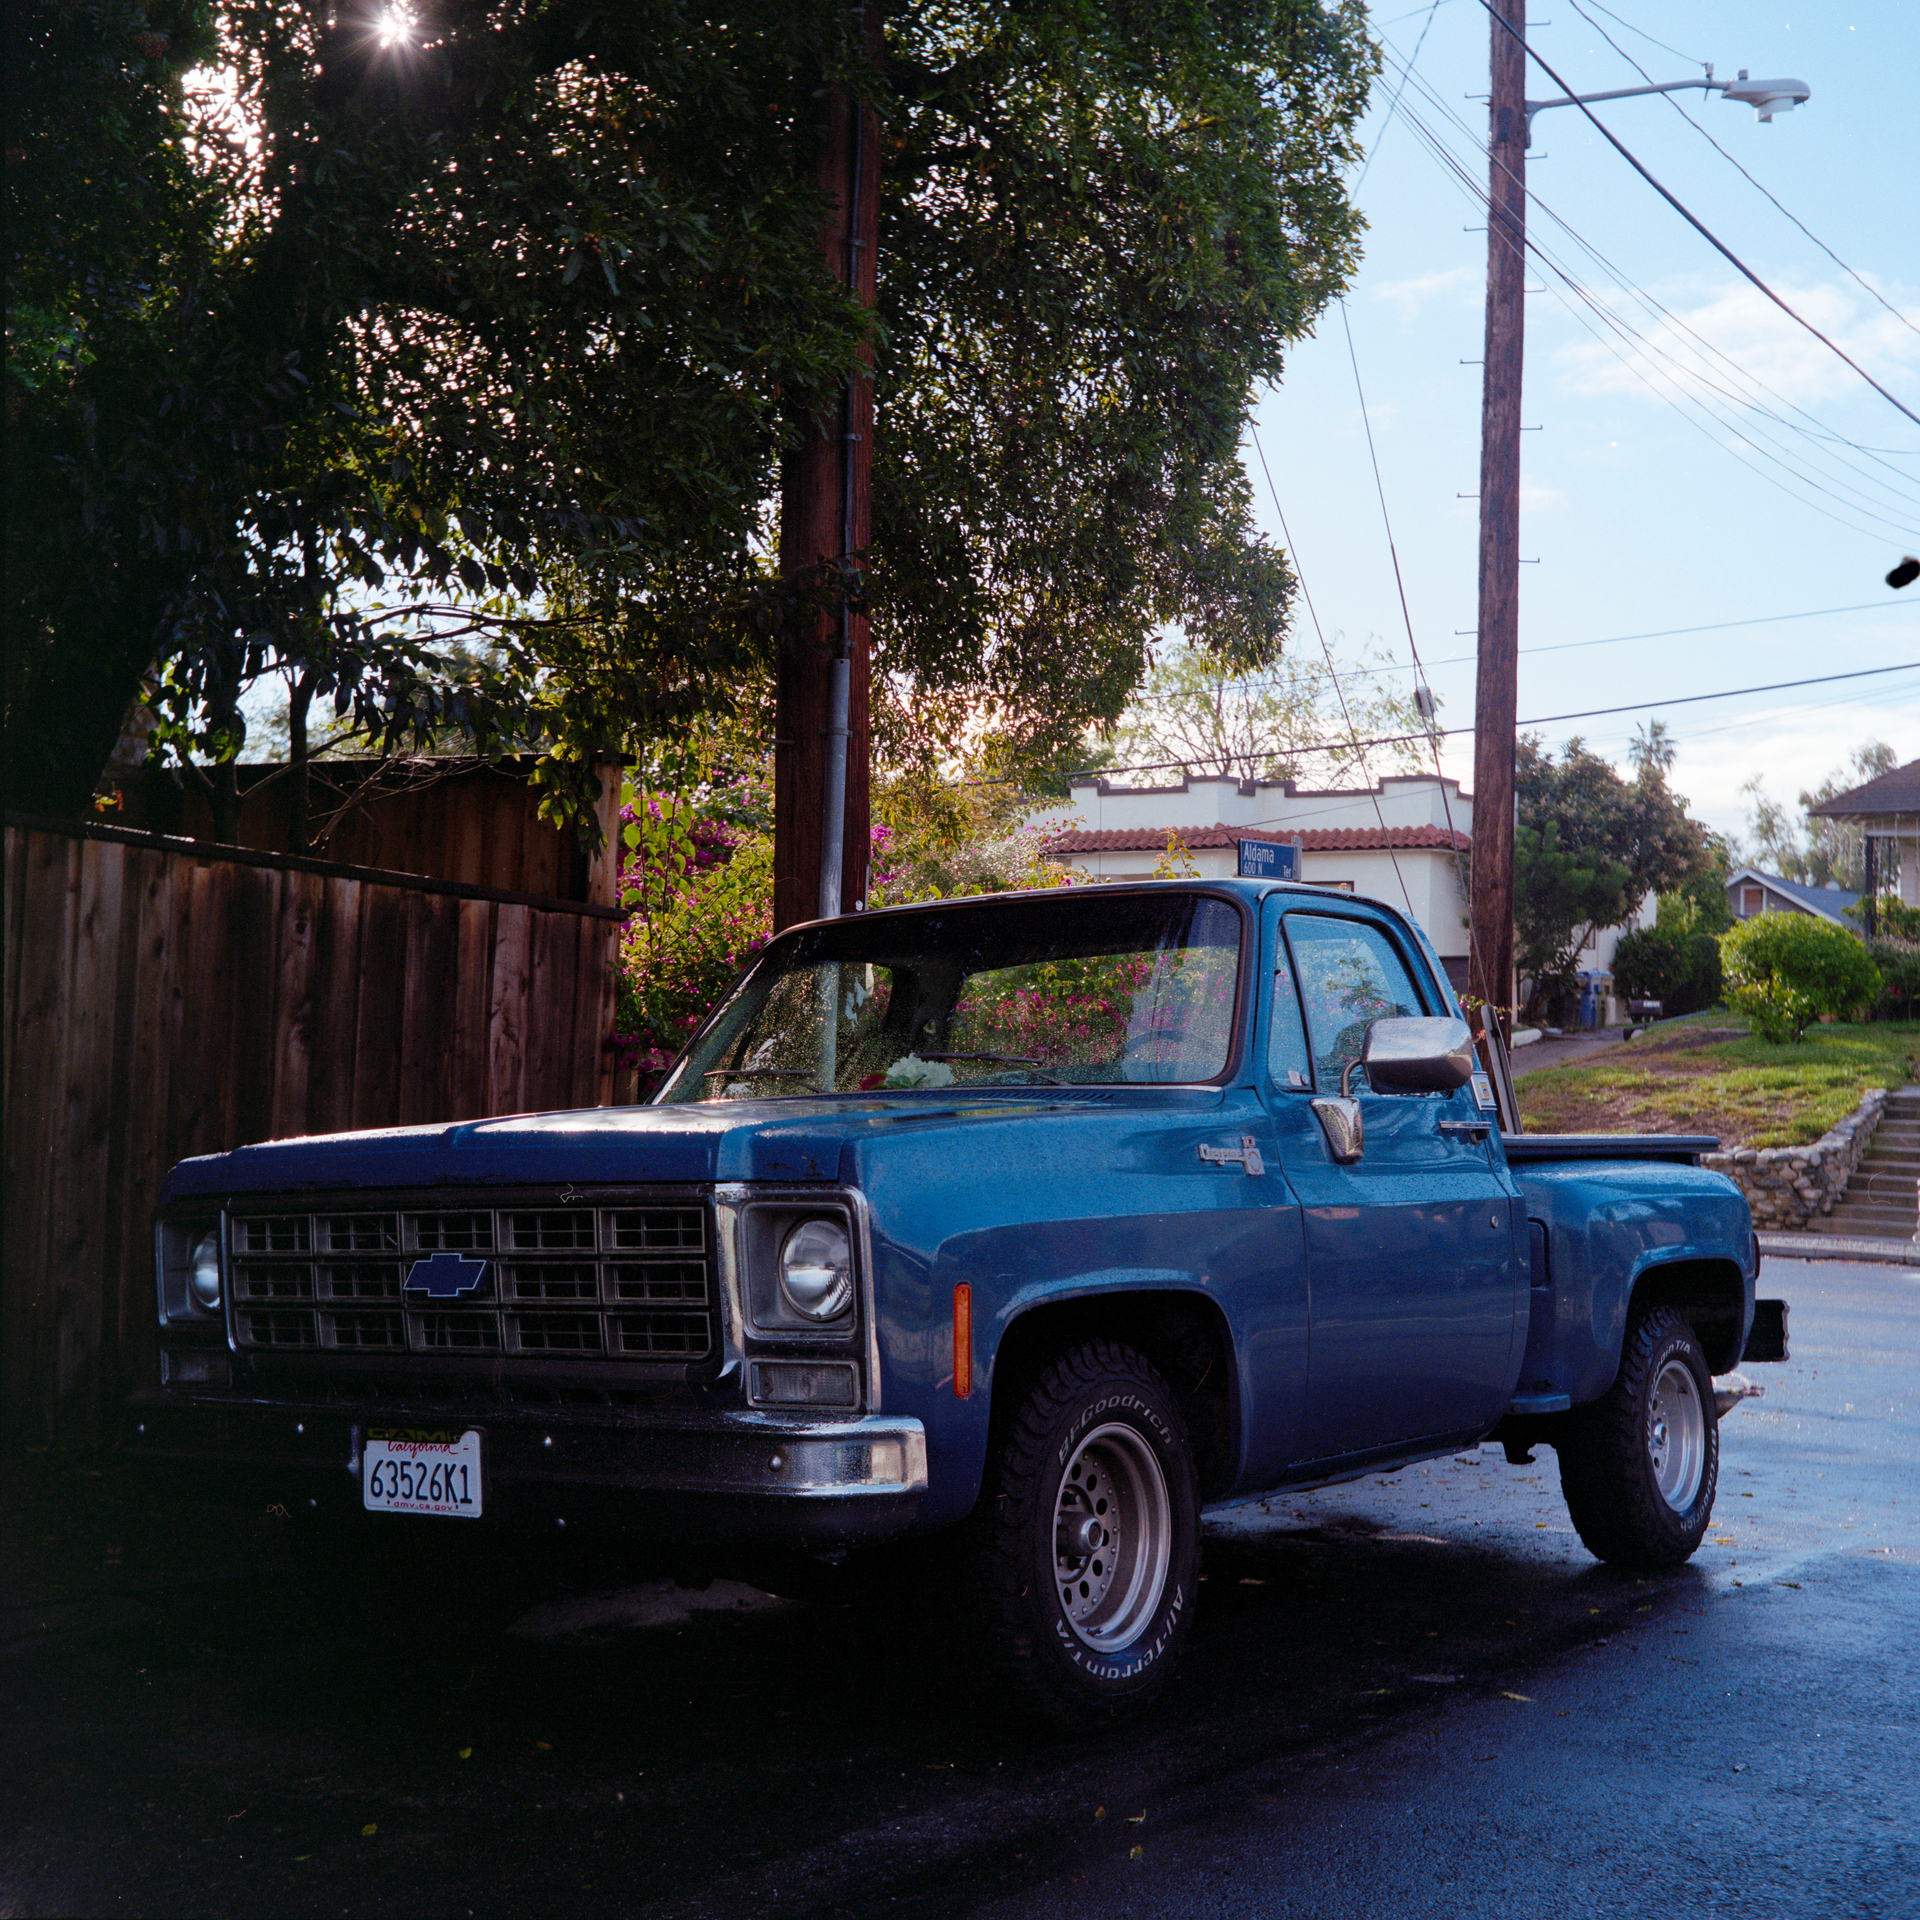
Below are two examples where the bottom left corner / left side of the photo has glow at the edge where the frame should really be dark / black. More obvious when you click on them / blow them up.
If the diffusion layer is too far from the film plane, you will get less light reaching the edges and corners than reaching the center (which makes the edges and corners appear overexposed after the inversion).
As a test, you can try taping your film directly on the diffusion layer (with some masking to make sure no direct light is hitting your camera from your light table). If this produces no issues in the edges, then you will know it is an issue with the film carrier.
I just did a quick and dirty scan of the same two frames using my same workflow, but directly on top of the light source. The results are much better, perhaps not completely eliminated (still had to use flat field correction to remove glow along the left border), but a big improvement. Bummer, as I really like the usability of the Tone Carrier stuff, but this may be a fatal flaw.
Can you show us how the bottom of tone carier looks like - there might be something simple you can do if the issue is self-shadowing of the holder. there is may be a chance that some very long focus Fresnel lens may redirect light toward film gate - just speculating here. Also try moving or rotating light source itself - just in case it’s not totally uniform across its surface
I haven’t been using the CS Lite+ very long, but so far I like the results. I do seem to get reddened shadows with my conversions quite often, but I’m not sure if that is being caused by the light or not. Need to do some more experimentation on that front.
In order to see if the lighting is uniform, you can capture the light without any add-ons and turn the light by 90 and 180 degrees. Check the histogram, the narrower it is, the better the light distribution is. Also look for dust etc. with Lightroom’s extreme settings of contrast, exposure, structure etc.
Thanks, yes I’ve done that in the past when troubleshooting issues with 35mm. I was always able to fix any unevenness with Lightroom’s flat field correction, but in this case it doesn’t seem to be completing resolving the glow at the frame edges. I suspect distance from the light is playing a part as I was able to get a much better result in the van photo above (although the truck shot is a bit of a mixed bag).
I am considering trying Valoi’s film carrier instead since it sits much closer to the CS Lite+ with their film advancer. Or you can advance by hand and put the carrier directly atop the light.
Getting good scans has been a real project for more than a year for me, hoping I can finally get a good result. After bugging Adobe to fix flat field correction for months, I was able to get good 35mm scans, but now 120 is the problem!!
Thanks a lot! What you can try is to place some light diffuser inside the carrier - closer to the film . Though honestly i would think the slant angle of inside should be good enough for those side effects to not appear - go figure. This whole thing still feels strange. try to “scan” piece of regular parchment paper cut to the size, see if effect still noticeable and take contrast in LR to the extreme to see if you see any pattern (like circular one ) which can give you a clue.
Thanks guys. I’ll try to experiment with the carrier some more. At one point I had considered even getting some flocking material and coating the insides of the carrier as the 3D printed material used does seem to cause some degree of reflection.
I had similar issues when scanning using a light from Negative Supply and this same carrier. That prompted me to try a different light, and the problem persists, which suggest it is the carrier after all.
I’m beginning to suspect it may be a light unevenness issue. I’m going to rule that out by trying a Kaiser Slimlite Plano in place of the Cinestill CS Lite+.
I recommend that you only change one thing between tests.
If the light is (supposed to be) uneven, take a shot without negative (or a unexposed film end) and do the same with the light rotated by 180 degrees. If the unevenness moves, it’s the lighting. Do this test twice, once with the film holder, once without. The four takes you get should really be enough to show what the problem is.
Backlight distance: As long as the film area shows light only, things should be okay. If the film area shows parts of the backlight casing, some falloff is to be expected.
Test in an unlit room and wear dark clothes. I had light bounced back from a white shirt showing in captures.
A finite light source will create an inhomogeneous light distribution with fall-off towards the edges. The amount of fall-off depends on the dimensions of the source with respect to the object (the film) as well as the distance between them. This is basic physics and can be calculated: Homogeneity of planar light sources for film scanning - arnogodeke
Happy to report I figured out the issue. It was a light source problem after all.
I installed the Slimlite Plano into my system. Brightness is much less than either of the other lights I’ve been testing (Cinesetill CS Lite+ Spectracolor and Negative Supply Light Source Mini). I used the collimating sheets from the Cinestill light to increase brightness as well.
Using 32 frame Pixel shift, along with a calibration frame at the same exposure paired with flat field correction, the glow is essentially gone using the new light, as you can see in the two frames below.
One interesting observation before I got the Slimlite: I put the NS Light Source Mini back in my system first. The non-flat-field-corrected frames with the NS light were very bad, worse glow even than the Cinestill light source. However, they corrected very well using flat field correction, whereas the Cinestill light does not. I do wonder if the coloration of the light is affecting the flat field correction in some way.
Regardless, the Slimlite Plano is giving me the best result, so I am going to stick with it and the Tone Carrier and optimize this setup. Thanks everyone for your input.
Next I am going to get adhesive black flocking paper and coat the interior of the Tone Carrier as the 3D printed material is still somewhat reflective.
It’s good that you’ve sorted the problem by changing to the Slimlite Plano. Did you try comparing the different light sources by copying a blank sheet of unexposed film as recommended above? It would be good to have that as a reference to try and see what is going on, and also to determine whether the flock material helps at all.
Most film holders are made to fit the film and lighting tightly. Due to the fact that light intensity drops by the square of the distance, it would be beneficial to have a wider space between the light, negative and lens. Imagine a shoebox with light at one end, lens at the other and the negative somewhere in between. Add some baffles for further reduction of stray light. Or use one of the old slide copier devices with bellows on both sides of the negative.