I’m trying to better understand what the brightness slider is doing… can someone explain it to me like I’m 5 years old? Thx!
Let’s have a look at an example with (from left) original, exposure-mod, brightness-mod:
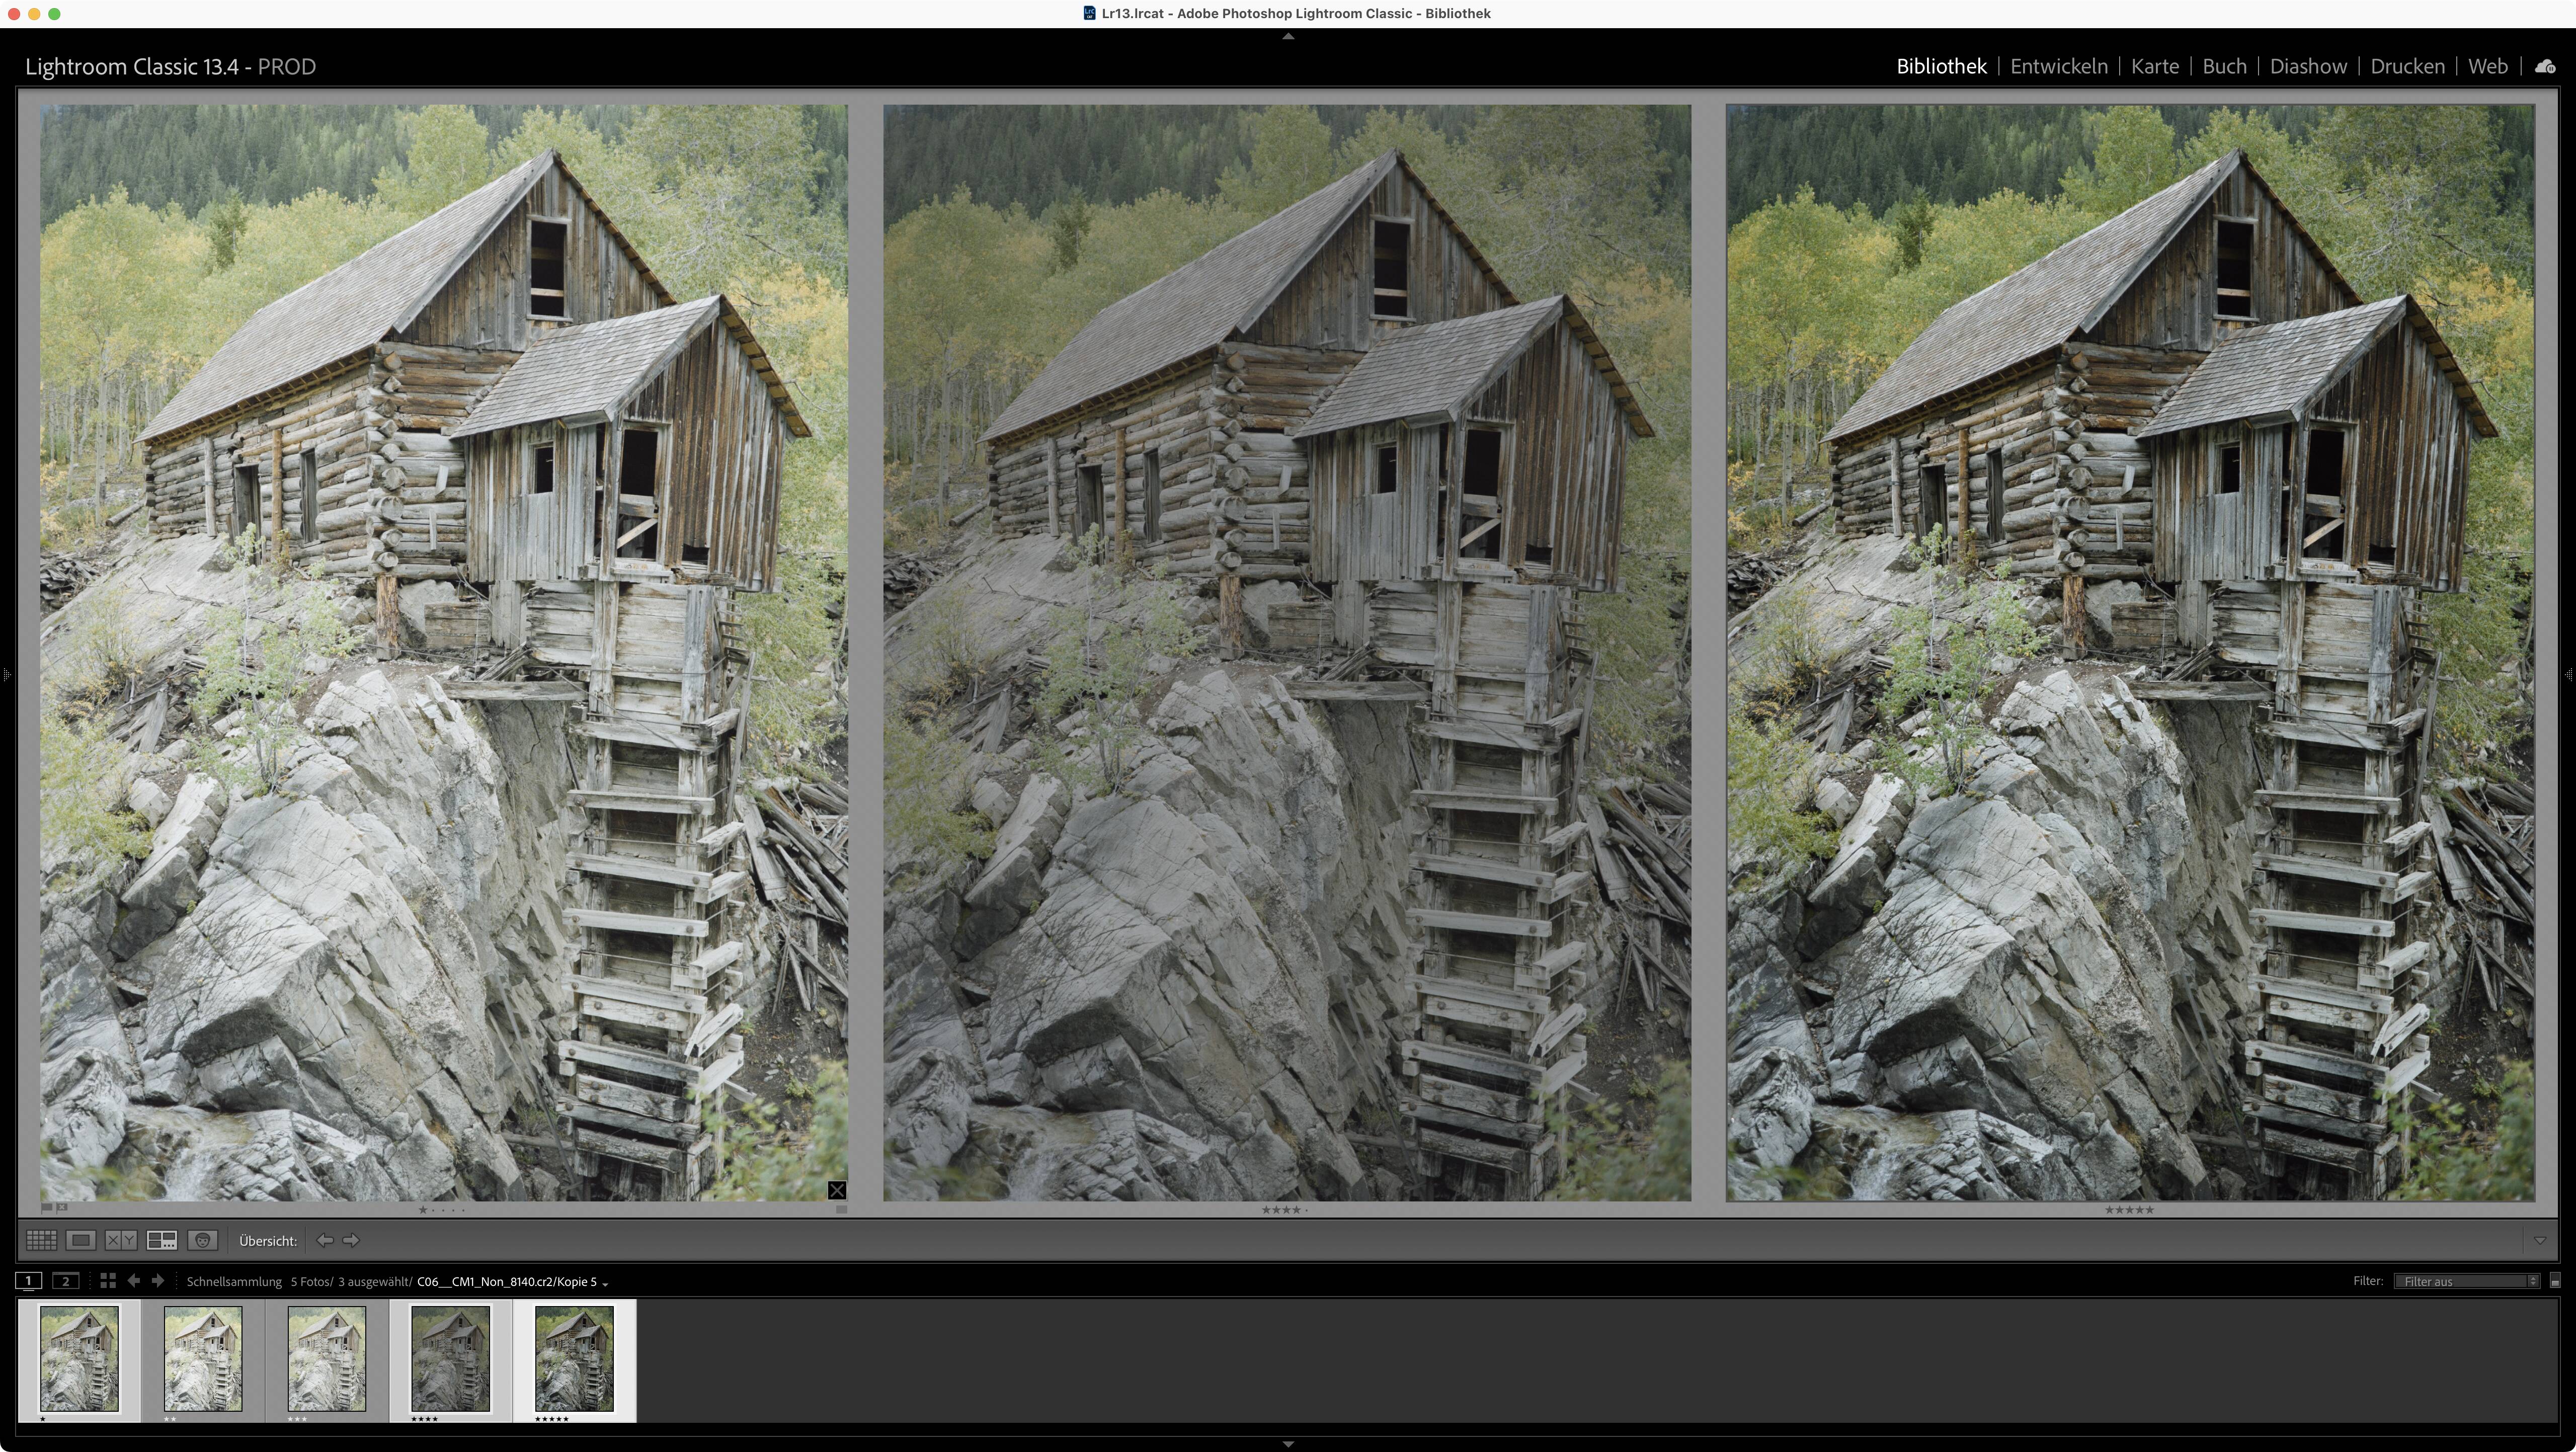
We can observe the following:
- reduce exposure to darken the image and reduce its contrast
- reduce brightness to darken the image and keep its contrast

We can observe the following:
- increase exposure to lighten the image and increase its contrast
- increase brightness to lighten the image and keep its contrast
Exposure compresses or stretches the histogram.
Brightness moves the histogram / shifts the hump of the histogram.
Effects may be more or less apparent, depending on the image they are applied to.Other images might be better suited to demonstrate the effects and I encourage you to try and learn how exposure- and brightness-sliders act on images bright and dark, contrasty and bland.
3 Likes
Thank you for this! When you say exposure compresses or stretches the histogram, what do you mean? Similarly what do you mean when you say brightness shifting the histogram hump?
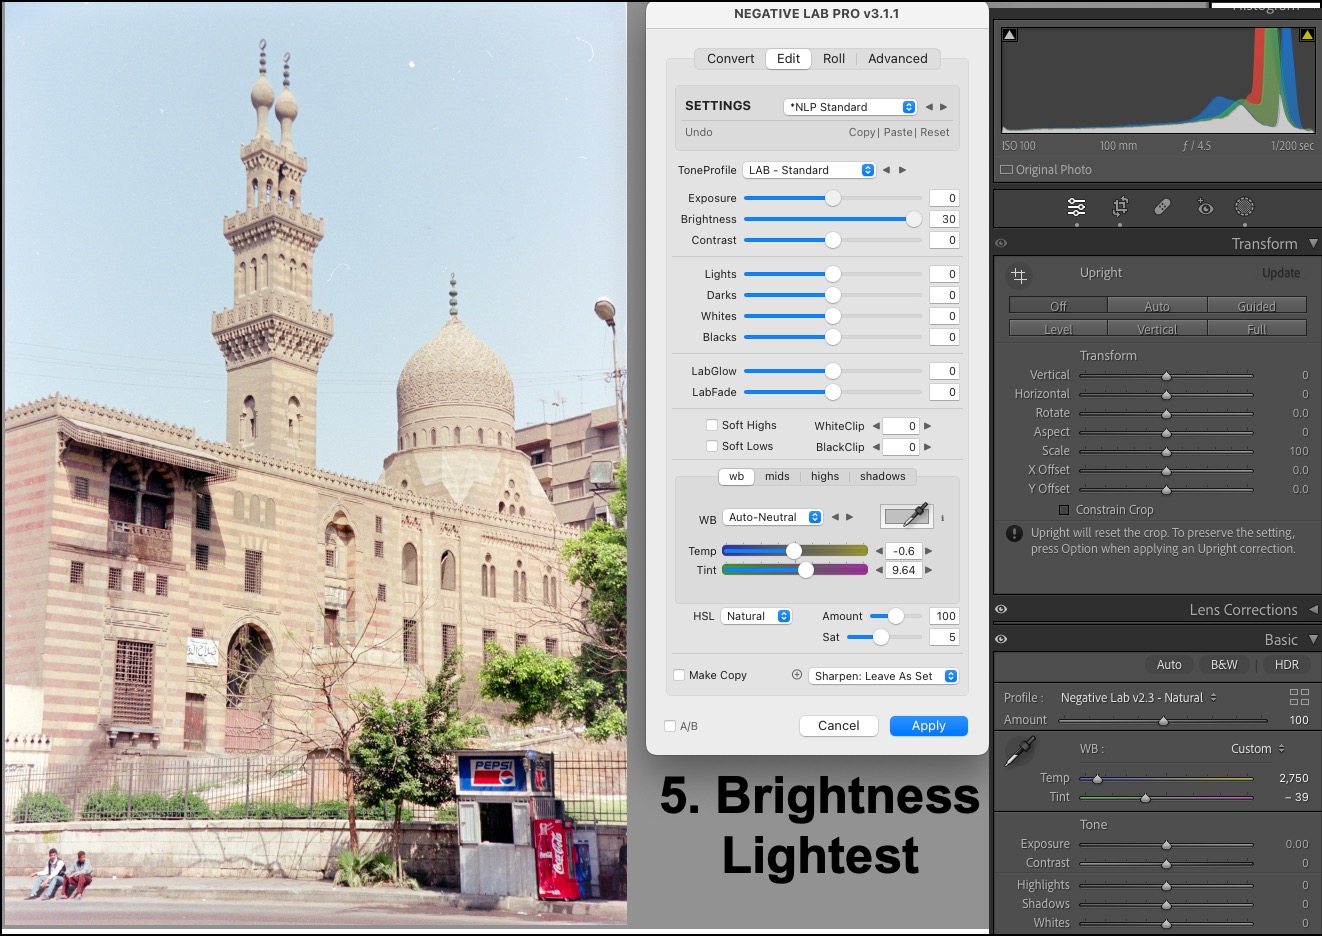
Hi mlim18, I’m not Digitizer and I do largely agree with his explanation, but from your response I see merit in taking this back a step, which may help clarify it to you further. Let us begin with the concept of the histogram, and the first illustration below. We’re using NLP in Lightroom with the histogram showing in the upper right corner. The histogram is simply a display of how all the tones in the photo are spread from darkest to lightest, and it is set to show tones for greyscale and the three primary colour channels. Tones always refer to light and contrast, not colour. The left side is dark tones, the right side light tones. Tones that climb up the walls left or right are out of the reproduceable tone range of your photo (“out of gamut”) and will not show or print. We call that “clipping” and we normally want to avoid it.
We use three main controls in NLP to adjust tones to what we want: the Tone Profile, Exposure and Brightness. Tone profile is the most important because it sets the starting point from which the other two work. I normally use “Lab Standard” because it makes for a pleasing start, but no harm experimenting with some of the others.
Figure 1 here shows this start point with everything at default. Note in the histogram there is some clipping as shown by the white arrows to the top left and top right in the histogram panel. Those are not white if there is no clipping. Now let’s make some adjustments to see what the Exposure and Brightness sliders do.
In Figure 2, I have shifted Exposure all the way left, which darkens all the tones and compresses the dark end of the tone scale to, but not beyond, the dark clipping point.
In Figure 3, I have shifted Exposure all the way right, which lightens all the tones and DOES leave in place some light tone clipping pretty much as it was.
Setting Exposure back to “0”,
In Figure 4, I have shifted Brightness all the way left, which darkens all the tones, but not as much as exposure did (because it is focused more on the mid-tones, whereas Exposure affects the whole tone range more comprehensively), AND it produces substantial dark tone clipping.
In Figure 5, I have shifted Brightness all the way right, which brightens all the tones (just a little less aggressively than Exposure did, again because of its midtone emphasis), AND it left light-end clipping pretty much as it was.
So, that shows you move by move one at a time how each of these work. Now the question is how you should approach your tonal adjustments. I recommend first settling on the ToneProfile that you think will work best for the photo (experiment if you need to). Second, adjust Exposure till you think the photo is about right. Third, adjust Brightness if you think you need particular editing in the midtones. NOW BEFORE CHANGING either Exposure or Brightness, if there is clipping right from the starting point as I have shown in this photo, FIRST go down the NLP Panel to those two little controls called “White Clip” and “Black Clip” and adjust them until the clipping is gone. They bring the tonal range into gamut.
Oh - and I should just add - there are no rigid rules about all this; be guided by what you think makes the photo look best; all these adjustments can be revised at any time - it’s all non-destructive, so you have nothing to lose by experimenting. And don’t be a slave to the histogram. It’s there as guidance. The ultimate arbiter is you and how you think the photo looks.


2 Likes
Shift the sliders and observe the histogram.
And, assuming that you’re older than 5, think of exposure as multiplying every value by the same amount vs. adding a certain amount in brightness.
3 Likes
I’ve come to the simplistic conclusion that the brightness slider increases the the brightness of a photo while decreasing the contrast. Exposure increases the brightness and contrast of a photo.