
Here’s a pic of my setup:
Camera: Sony A6100
Lens: Rodenstock Rodagon 50mm enlarger
And a few pics from that session:


Hi, can you let me know what is attached to tripod head? TY!
Hi this is mine with a 105 mm macro from Nikon on a D750. Light comes from a flash.
I used as well this set up for slides
Phil


Hi
I removed all the lens condensor and add several layers of white plastic.
The main issue was that I had to replace several times those layers because of the light heat
Phil


A card box with few old drivers license. The camera kit is X-T5 with XF 16-55 lens.
The whole setup is a proof of concept for me. The lens is terrible for this job because its max magnification is only x0.15, so I have to use the pixel shifting model in X-T5 to get a decent image. Because I only spent 5 mins on the card box film holder, I have to re-focus on every shot. But I am pretty surprised with what I got from this little experiment.

The left side is what I got from my X-T5, and the right side is the scan I got from a local lab. I would say in general the result is already pretty usable.
Now I am waiting for my Laowa 65mm 2x macro lens and some 3D print film holders, I am confident I will save a bunch of money and have a lot of fun by scanning by myself.
1 Like
I posted this as a separate thread here with more detail, but in summary, this is a scanning bed that you send to a company like SendCutSend to laser cut the metal. It is designed to work with most copystands and light sources, as well as most film/slide holders. The cad file on GitHub is linked to in the original thread, and you are welcome to use it as it is public domain.
Enjoy,
Anthony
2 Likes
I’ve gone through many iterations of setups. My needs/requirements are:
- Mostly black and white 35 mm
- Must resolve grain corner to corner
- Must have enough resolution for 16x20 prints
- Must capture the unexposed border at the edges of the frame
Capture device is a Sony A7 RII with Sony 50mm macro F2.8. Negative Lab Pro for conversions.
Iterations and results:
-
Attempt 1: Camera/lens attached to old Canon auto bellows with duplicator attachment. Flash illumination.
– this worked pretty well but I couldn’t get the frame edges with the duplicator -
Attempt 2: Camera/lens attached to Nikon ES-2 duplicating attachment. Flash.
– pretty great, but again no frame edges -
Attempt 3: Negative Supply basic riser, CR 99 4X5 light panel, and basic 35mm carrier in a standard configuration with the light source on the baseboard and the camera on the riser.
– I wanted to love it but despite using bidirectional levels and the Versalab Parallel laser level I could never get the images as sharp as when the film carrier is attached directly to the front of the lens. The Negative Supply products are going in the right direction but there are way too many points in the system where planes can get out of parallel. -
Current solution: Negative Supply basic riser with a flash attached to the riser head. Camera sits on the baseboard and the basic 35mm carrier just sits freely on an old Canon MacroPhoto coupler pointing up toward the flash. The weight of the basic carrier doesn’t seem to bother the lens’s autofocus motor. I have an LED reading light on next to the flash head to provide illumination for autofocus. I have the camera hooked up to my mac via the Remote app that comes with Sony Imaging Edge Desktop. f8 at 1/200. At 1/200 the LED doesn’t impact exposure. It’s a little fiddly since I have to center each frame manually but as you can see on the 100% crops from a Tri-X frame, the corners and center are all very sharp.


I have just started shooting 4x5, and after trying my Epson V600, i’m back with using a digital camera even for 4x5. Setup:
- Camera: Hasselblad X1D II
- Lens: Hasselblad XCD 45P
- Macro tube: Fotodiox 20mm Auto Macro Tube
- Light source: Kaiser Slimlite Plano
- Connection to copy stand: Leofoto G2 Geared 3D Leveler Pan/ Tilt Head
- Software to shoot tethered: Phocus (Hasselblad)
This setup is the best way that I have found for me to get the best results in a consistent and “easy” way. The geared head helps immensely when making micro adjustments, to get the camera level with the negative. I place the negative between to sheets of glas, not ANR, and I have never experienced any issues with Newton rings.
/Adam

3 Likes
I use a Sony A7 with a Sony 50mm f2.8 macro lens, and a custom integrating sphere RGB backlight.

I made a separate post here with all the details, but wanted to refer to it from here too in case anyone would feel inspired to do the same ![]()
3 Likes
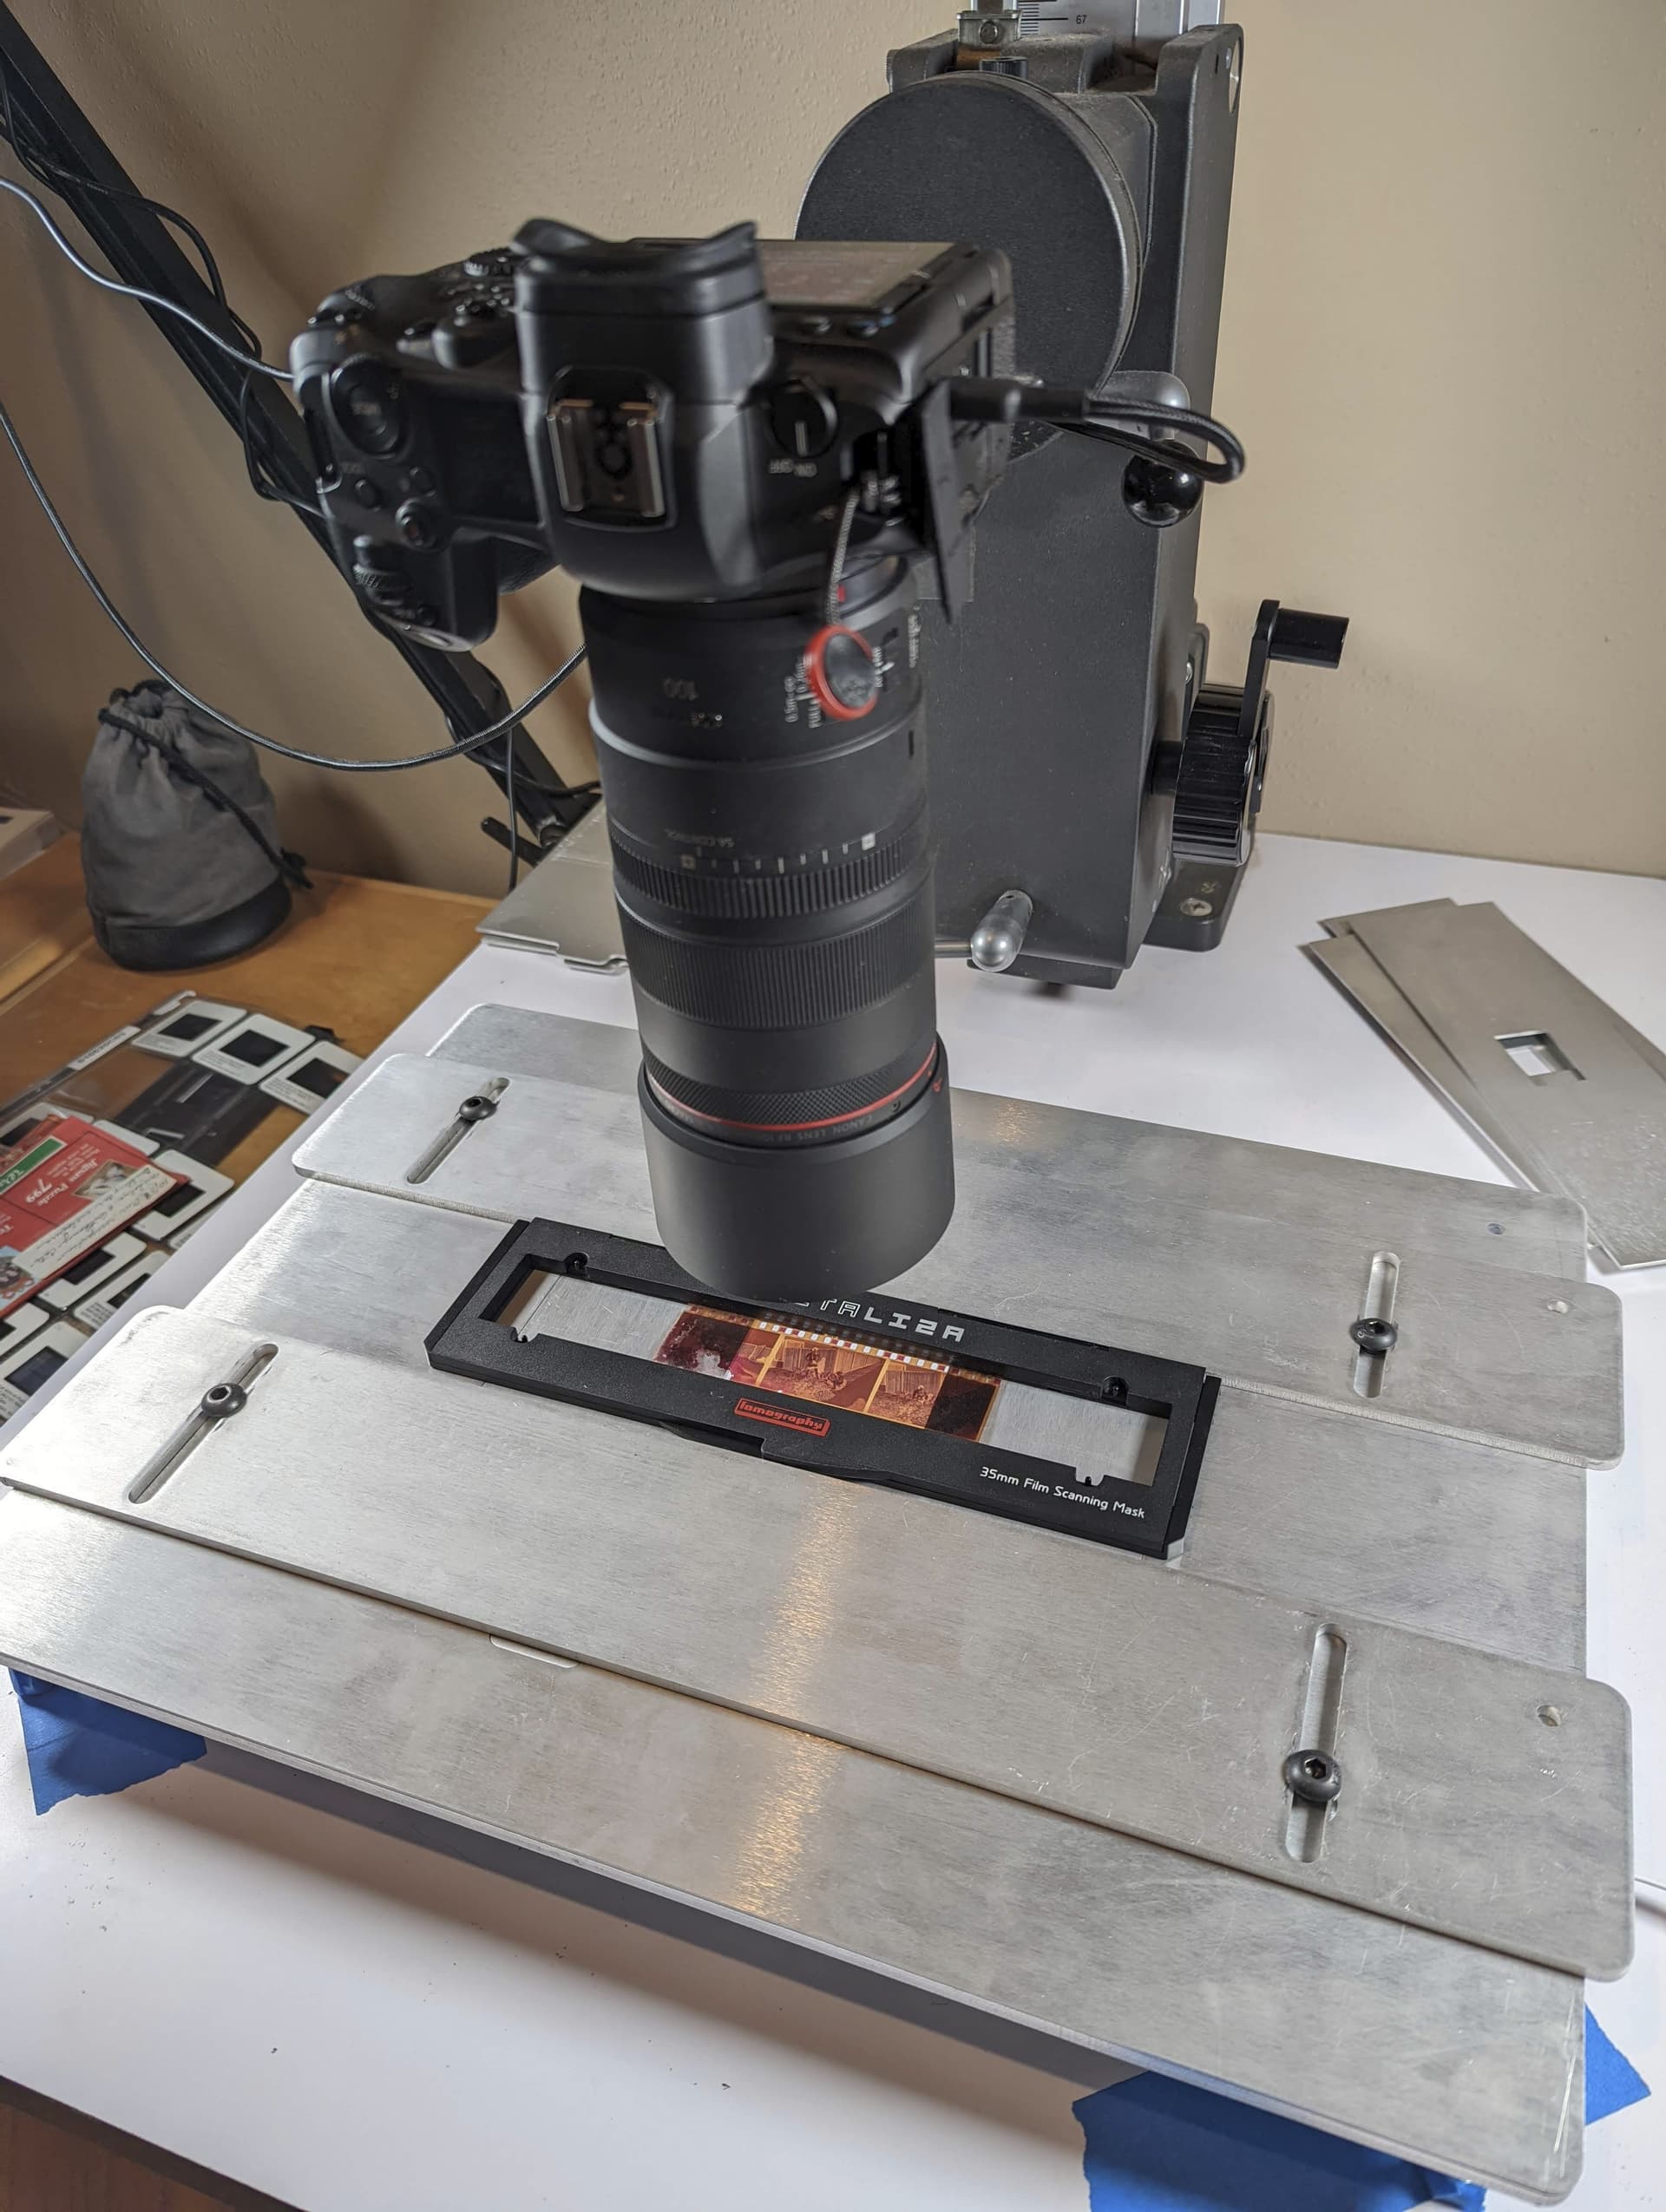
I’ve spent the last few weeks putting together a simple setup using an old Durst enlarger, the Valoi film holder and the centerpiece, a Nikon Rayfact 80mm line scan lens on a Sony camera.
I wanted to simply bolt a tripod head to the Durst mechanism …
The most complicated thing was to get a 3/8 UNC threaded bolt, because German photo stores usually only have screws.
Thanks to Robert O’Toole’s great blog, I decided to go with a Nikon lens. The lenses have no color cast, no chromatic aberration and no vignetting. Best of all, it’s incredibly sharp and only costs 300 bugs.
After some initial difficulties, NLP works very well and now replaces my Isomet HR 405 drum scanner. Anyone who has ever owned a drum scanner knows that the beasts consume an incredible amount of life.

4 Likes
I use a copy stand with my Nikon F750, a Tokina 100mm f/2.8 macro, and an Essential Film Holder. I recently bought the CS-Lite with the collimating sheets as a light source. The combination has allowed me to use auto exposure on the Nikon reliability. And it goes together quickly.
[url=https://flic.kr/p/2oZZzJx]
The ‘Rig’
The EFH and the CS-Lite with an ‘adapter’ The EFH does not sit solidly on the CS-Lite, so I created a foam-core adapter that keeps the two together. The adapter is two pieces of foam-core. One that fits inside the bezel of the CS-Liter, and one the size of the top of the CS-Lite. Two pair of 3/8inch ID washers are glued on top to locate the EFH.
1 Like
Recently upgraded from the Sony 90mm F2.8 macro to the 105mm Scanner-Nikkor from the Super Coolscan 8000. Added a Leica R mount to it via a Kipon T2-Leica R adapter, because I found some Leica Bellows R for pretty damn cheap, which is then adapted to E-mount for my A7 IV. Mounted on a Novoflex rail, which is attached to a home built copy stand with a Kaiser Slimlite Plano. Still need to figure out how to get a lens hood on this thing though.


2 Likes
Cardboard tube, painted black?
black polypropylene tube?
1 Like
Build a new rig with a custom R,G, and B individually adjustable light source to mitigate the orange mask in color film using hardware, using what I learned in various NLP posts, online, and in using previous iterations of scanning rigs I built before:


Details on the rig and custom light source can be found here:
5 Likes
After many tries, this is the setup that has worked the best for me:
- Viltrox L116T light, sitting on a diy fibreboard “box”.
- Fuji XT3 with a 7Artisans 60mm Macro lens (+10$ rubber lens hood from Amazon)
- Film holder was 3D printed at my local library using this model: https://www.thingiverse.com/thing:4672950
- A couple of hot shoe levers to match the level of the camera and the film holder
- A K&F ball head
- All set up on the baseboard of a Durst M600 enlarger.
- Thick black foam to block stray light and at the bottom to keep everything from moving.
I shoot using the Fuji app as trigger, so I don’t have to touch the camera at all.
Things to improve:
-
The film-moving mechanism of my holder is not totally smooth. Could be a rough print, or the o-rings that I use.
-
I’d like a better diffusion panel for my light, like thin white acrylic or something. Right now i’m using a couple of white translucent sheets, but they get scratched easily.
-
Find a way to attach the box to the baseboard so it doesn’t move at all. I thought velcro, but I use the enlarger for prints, so it has to be a removable solution.
-
I have to print a holder for 120, because so far I only have a setup for 35mm


1 Like
I’m probaby going to put a 58mm to M77 clamp on the wider section and then screw in a threaded tube as my permanent solution, but I have some wide poster tubes I could cut & spray matte black as an interim solution.
Anyone with the Cassette Film setup from https://cassettefilm.net/ and can provide feedback? I’m looking at their custom setup as I want a slightly larger mask for scanning full borders with 135 and 120 (6x6 and 6x17). Thank you.
Apologies if someone already posted. I could not find through search.
This wooden contraption incorporates parts from my Durst Laborator 1000 4x5” enlarger, with which I made thousands of black and white prints in the 70’s and 80’s. I preferred printing then without the diffuser under the condensers so was determined to build this digitising setup to try collimated and diffuse illumination. “The comparison later in an appropriate topic?” The stand can also be used for reflective copy up to A3.
Four condensers can be interchanged for 4x5”, 6x6cm and 35mm formats along with lens focal lengths. I have replicated their respective positions from the enlarger including the lamp-house which can be further adjusted on the column for experimentation. The adjustable condenser positions are for use with a Ø65mm opal lamp (Philips Photocrescenta 150W).

I intentionally made this a sturdy unit, the column is bolted to the platform and stand base. In use the stand is clamped front and back to my heavy workbench. When I focus, the maximum magnified image does not jiggle. I discovered the Velmex Unislide at Robert O’Toole’s “Close-Up Photography” site. Unlike macro rails the Unislide can be used vertically with no instability, adjustment has no backlash and it holds position when focused without brake. A lens collar mounts the lens+camera at centre of gravity.

Our negs and transparencies are stored flat in neg files so I use Plustek OpticFilm Strip Holders for 35mm, 120 roll film and slides. They align against either a horizontal or vertical adjustable guide for easy and quick capture. The Photocrescenta is once again switched with my Novex enlarger timer (exposure time is set at the computer!). Screen mirroring iPad clips to column head.

5 Likes
Well I for one would definitely look forward to seeing your results. I have the 6x9 version of this enlarger with the requisite condensers. Excellent build quality, it must be a pleasure to use it.
Thanks for the positive comments. I do enjoy using it very much. It’s like going back in time to when the film was first exposed and getting much more from the image. Well done for keeping your Durst as well!