I have done the mirror focusing setup. I think I did it correctly…any tips? It is really hard to get it to focus on the aperture rings to line it all up.
Here is a a scan I did. Luckily I have a comparison from a Noritsu.
Your A7RII is 42MP so a maximum of 7952 x 5304 pixels, in other words excellent for 35mm. What pixel dimensions is your Noritsu scan and what shutter speed are you using?
Presumably your scan is a RAW file, it could just be a question of sharpening applied to your Noritsu scan (a jpeg presumably). This probably isn’t the alignment as otherwise it would be sharper in different places on the frame, you don’t really need to focus critically on the aperture blades to establish correct alignment. Vlad’s Test Target would make this kind of assessment easier, you should get Group 0 Element 4 in the centre and the corners.
It’s really difficult to compare two images displayed at different sizes.
It’s also difficult to say whether you have missed focus by just a little bit.
While the Sony Macro lens has good values for apparent sharpness (e.g. on dxomark.com), I remember having read that it’s not up to that level at close focusing distances.
To compare the images, export your conversion and the Noritsu scan and see what you get, but there is always a penalty for interpolation when scaling.
If you like, you can share your scan and the one by Noritsu and we can try to evaluate the situation. Please attach completely unprocessed files. If the files are too big to attach here, you can use a share or sharing service and post a link instead.
If the Noritsu Scan includes sharpening then surely that would make it difficult to compare to accurately, as @Harry mentioned, along with possible camera movement due to cantilever.
I suppose that standard lab scans are subject to some processing. Here, lab sharpening seems subtle…and the camera scan looks out of focus. Focusing camera scans needs some attention and for best results, magnified live view is the way to go. The focus indicators that light up when focus is (almost) reached are not good enough. Also, focus must be checked at operational aperture settings, even more so if a lens has focus shift.
@Harry Yeah, I’m sure the Noritsu does have some sharpening applied, but even if I apply sharpening to my RAW image it still is…slightly less sharp. I actually have Vlad’s Test Targets on order, hopefully will be here this week some time.
I have NO information on the Nortisu scan other than the file itself.
This post shows the EXACT same issues with the SAME lens.
I am coming to the realization that the 90mm Macro is subpar scanning lens and I am actually considering selling and getting the Sigma A 105mm art. It seems to be the best consumer lens you can get for the money. 1x Macro Lens Test 2022 www.Closeuphotography.com — Close-up Photography, the “Nikon scanner lens” is several thousand dollars.
My setup consists of:
Oben GH3W-15 3-Way Geared Head with 7” Macro-Focusing
Could you try tethering your A7Rii using Sony Imaging Edge Desktop Remote to your computer? This would make focussing easier, you can check the centre and corners on your computer screen. Although the A7Rii does not have the compatibility of more recent cameras, it still should provide live view and remote shooting.
I have both the Sony 90 G and Sigma 105 DGDN macros. The Sony exhibits chromatic aberration at 1:1 and is not quite as sharp as the Sigma (which I use at f8).
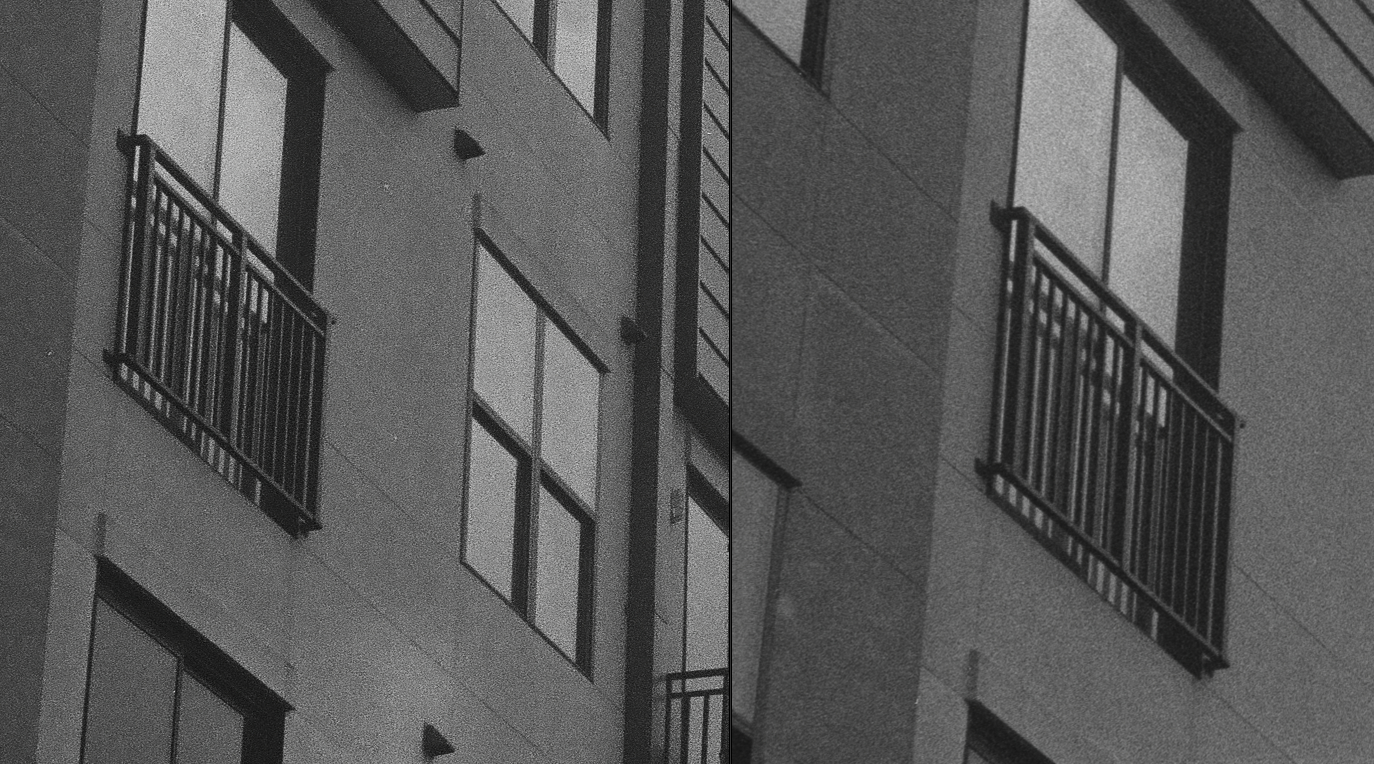
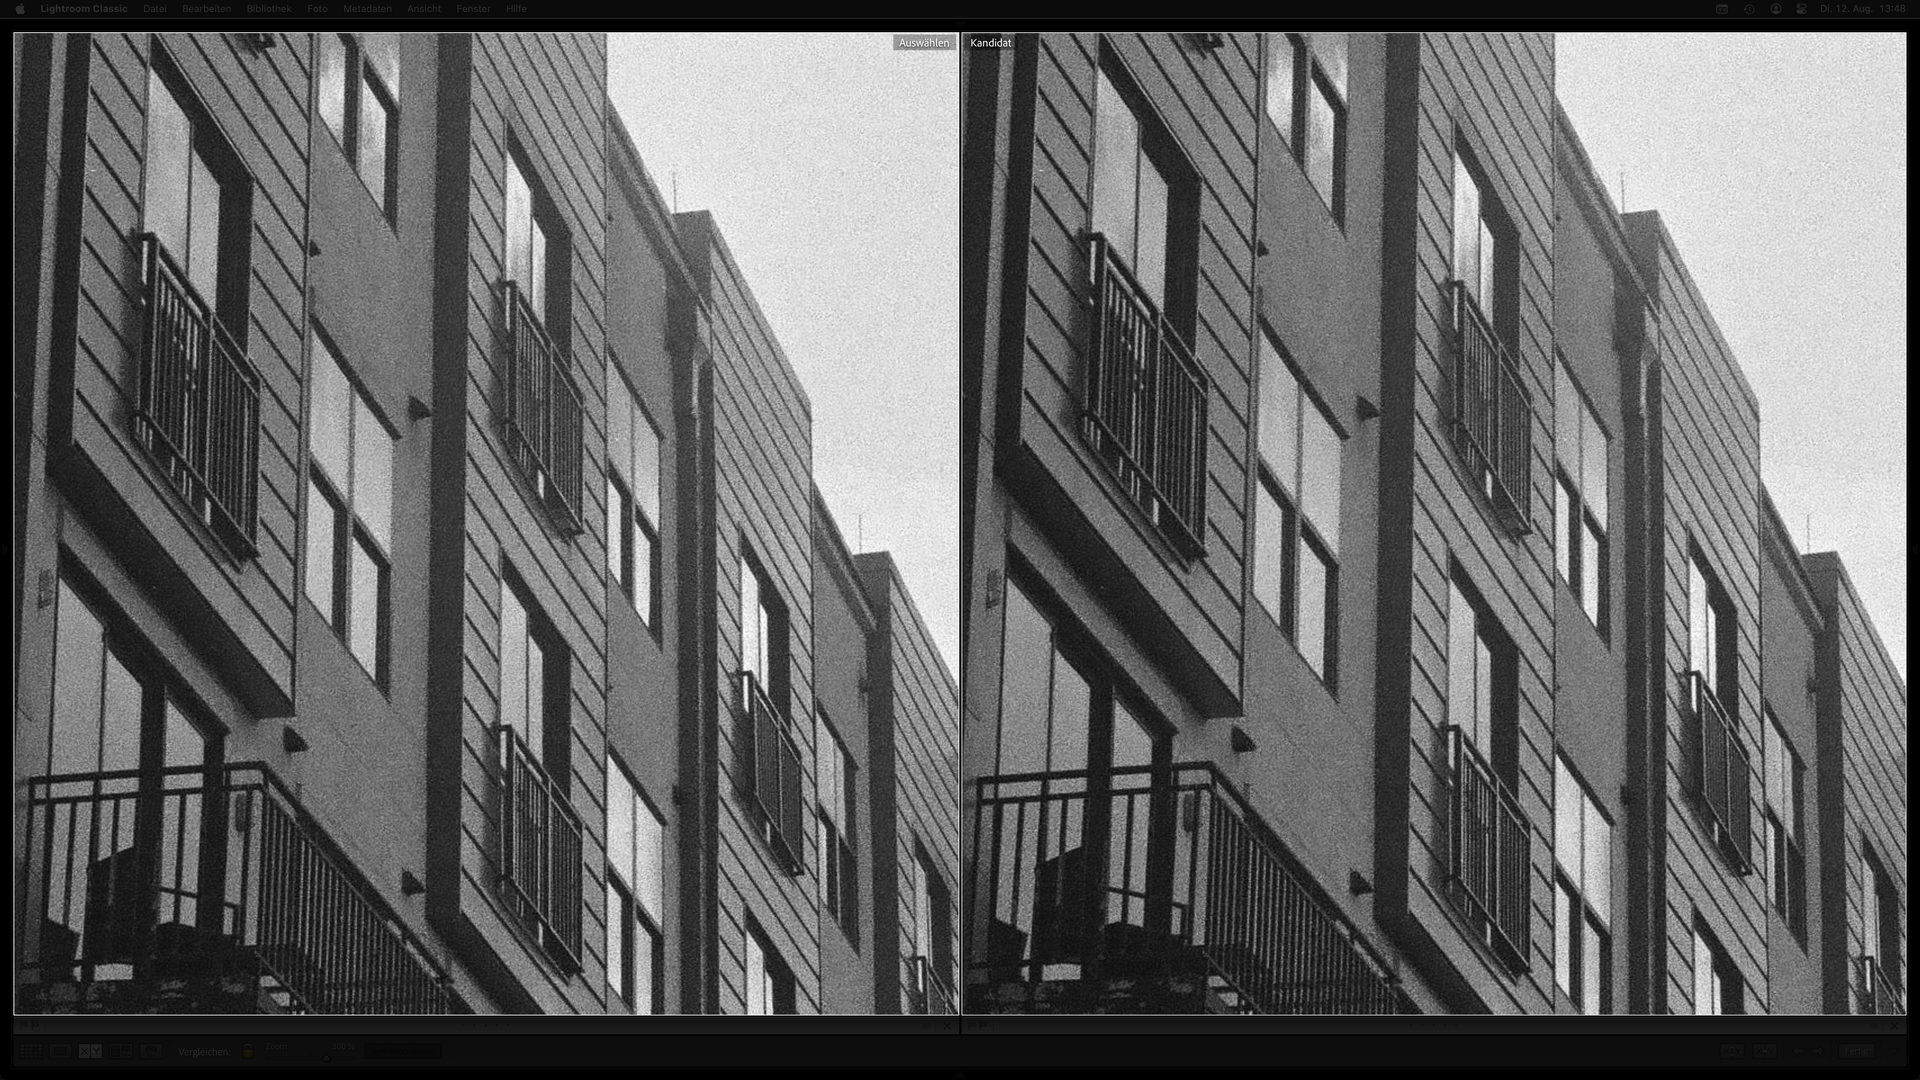
In order to not compare donkeys to elephants (they are both grey, aren’t they), I standardised sizes by exporting to TIFF and comparing the two after getting orientation and lighting as close as possible with reasonable effort and added some sharpening. Here is what I got:
The camera scan is about 2.5 times wider and higher than the Noritsu scan. Standardising dimensions already improves acutance of the camera scan. Add some sharpening and you get about the same impression.
I have not yet tried it on my computer, but did try it on my phone. I was able to use the focusing wrong and “focus peak” for focusing. Can try that, but not sure how much better the results would be. Turning the focusing ring until it gets in focus and then ever so slightly adjusting it until its perfect. I’m talking I am making literally hardly any movement to the ring. If it is that sensitive it will literally be impossible to be consistent with it.
I have been shooting with the 2s timer in the app and the 10s timer on the camera just to make sure I am not introducing shake/vibration.
I see no motion blur in your camera scan. And as shown above, your scan can get as good as the Lab’s…but you need to compare images the right way.
Lab scanners take three shots (R, G, B) with full sensor resolution. You’d need a monochrome camera sensor and R, G and B lighting.
Based on the camera scan that you shared and adequate processing, your gear and skills seem to fit the bill. One can always “invest” more effort and money, but whether it’s worth it, depends on how large you want to print.
My immediate gut reaction is that the left is the Noritsu and the right is the Sony “Scan”. But yes, they are damn close though.
What do you mean the camera scan is about 2.5 times wider and higher than the Noritsu? Do you mean resolution? If so, that tracks because the Noritsu was only like a 2.5Megapixel scan and the Sony is like a 42MP sensor.
So just to make sure I understand. You adjusted the my Sony RAW image to match in color/tone/brightness/contrast to the Noritsu, exported it to a TIFF and then cropped so it would be the same? Are you making any adjustments in the NLP conversion? Or are you just doing it all in LR?
What does the railing look like on the left (closer to the brick) off center.
I did end up ordering a Sigma 105mm ART…just to rule out any issues with lenses. As far as I can tell, that is the absolute best consumer lens you can buy with the best results until you start stepping up into the multi-thousand dollar scanner/printing lenses. At that point, I would just buy the damn Nortisu/Frontier.
I am surprised at how finicky this process is, from the constant refocusing, the micro adjustments in the editing apps. Honestly…its almost not reproducible/repeatable in any way.
@Graham confirms that the 105mm Sigma is slightly sharper than the Sony 90, but it still may be a slight focusing issue as well. I don’t know your Sony 90 but unless it is internal focusing then manual focus at 1:1 with the lens can be very vague, and that’s with any lens where focusing moves the lens closer or farther from the film because you are changing 2 parameters at once, the magnification (distance from the sensor) and the distance to the target film, in effect they can work to cancel each other out. Better to leave the lens alone and move the camera and lens together, much snappier.
The Sony 90mm is an internally focused (nothing moves externally of the lens) when I turn the focusing ring.
So instead of rotating the focusing ring on the lens I should be setting the focusing to the minimum focusing distance and then use my rails to “focus”?
Thanks for the download access Kurt. I examined both the Noritsu JPEG and your Sony ARW file after converting the latter in NLP. I think there are several things happening:
(1) The Noritsu scan probably has a lot of default sharpening applied, so one needs to be careful about whether the settings in each case provide for an “apples to apples” comparison.
(2) That said, in your ARW file I see possibly two issues: As has already been remarked, the lens being used is not really fit for this purpose; before conversion it shows signs of chromatic aberation which can interfere with sharpness, and the edge sharpness is not the greatest - there is evidence of some distortion.
(3) I think you may also have still a slight alignment issue, because the extent of the apparent unsharpness is somewhat greater on the right side than the left side.
Bottom line: You need a more purpose-specific kind of lens, and recheck the alignment.
I unfortunately have no context of what was applied from the Nortisu scan. I can certainly understand where you are coming from, can’t apply a bunch of sharpening to one and then assume the same scan with a different device should be able to get better results without also applying sharpening digitally. I can ask the lab, but they are pretty robotics, they develop and scan. They also have minimal to no incentive to help me fix my own scanning processes so I don’t want to be a pest, but maybe they jacked the sharpening slider to the max, that would at least give me the context of how much sharpening they are applying.
Yeah, I am replacing the Sony 90mm macro and bought a Sigma Art 105mm F2.8 DG DN Macro lens (Art105). It seems to be the best and most recommended “consumer” lens available ( 1x Macro Lens Test 2022 www.Closeuphotography.com — Close-up Photography ). I looked at the Nikon Printing-NIKKOR 105mm f2.8A (PN105A) but that just become too expensive. The only one I found was $1400+tax+shipping so nearing $1500. At that point I would be in the realm of a Nikon CoolScan 9000 ($1500 lens + camera + rig) or even nearing the cost of a Frontier. I don’t know of a better lens that would be more cost effective than the Sigma 105Art, it seems to be well regarded.
do you have any tips for alignment with the mirror (or any other tricks to make sure I’m aligned)? I have the mirror setup, and I try to focus on it but I cannot get to focus properly on the aperture blades so I can make sure it is dead center, plus it is really dark being inside of the lens so it is really hard to see the blades. From my understanding you just want the dead center of the aperture to be the dead center of the frame. Any suggestions/tips for alignment?
Hi Kurt, Sure, I know - you can’t control what the labs do these days and no doubt they sharpen by default. Also, I know finding a good flat-field macro lens at a reasonable price isn’t easy. For alignmnent, I would recommend buying a Zig-Align - it’s quite easy to use. These days “Betterlight” sells them. You don’t need more than the basic model: Zig-Align Mirror Kits for Parallelism. Cheers, Mark
Is there a good flat-filed lens that is recommended? Do you think the Sigma 105A will helping with this issue?
Thanks for the tip of the Zig-Align. I’m not quite sure how that works though? Does the square go on top of my film holder, and then the circular mirror mount to the front of my lens?
I’m not quite sure how it is supposed to mount to the front of my lens and be held securely? Another question…why in the world is it $144 for two mirrors? I already got a leveling mirror with my Valoi (VALOI 360 Leveling Mirror for digital camera scanning – CineStill Film). Couldn’t I mark the center of the circular mirror, and then get another mirror and put on my film holder and have the same thing?
The Zig-align is a circular disc with a mirror on the outside and a hole in the middle. You screw this onto the camera lens with whatever adapter works for your filter diameter. The mirror is place on the media plane, so facing the mirror on the disc. You have the shutter open and you view the image on your camera LCD. You adjust the leveling until a long series of concentric circles is clearly visible and even all round into infinity. It’s reliable.
Another option is to use a “Parallel” made by Versalab. It’s a laser based system, more expensive, but also very reliable. PARALLEL
Sorry, the website doesn’t tell me a ton other than “attach”, how does it screw on to the camera lens? I assume I would need step up converters for it to fit on my lens?