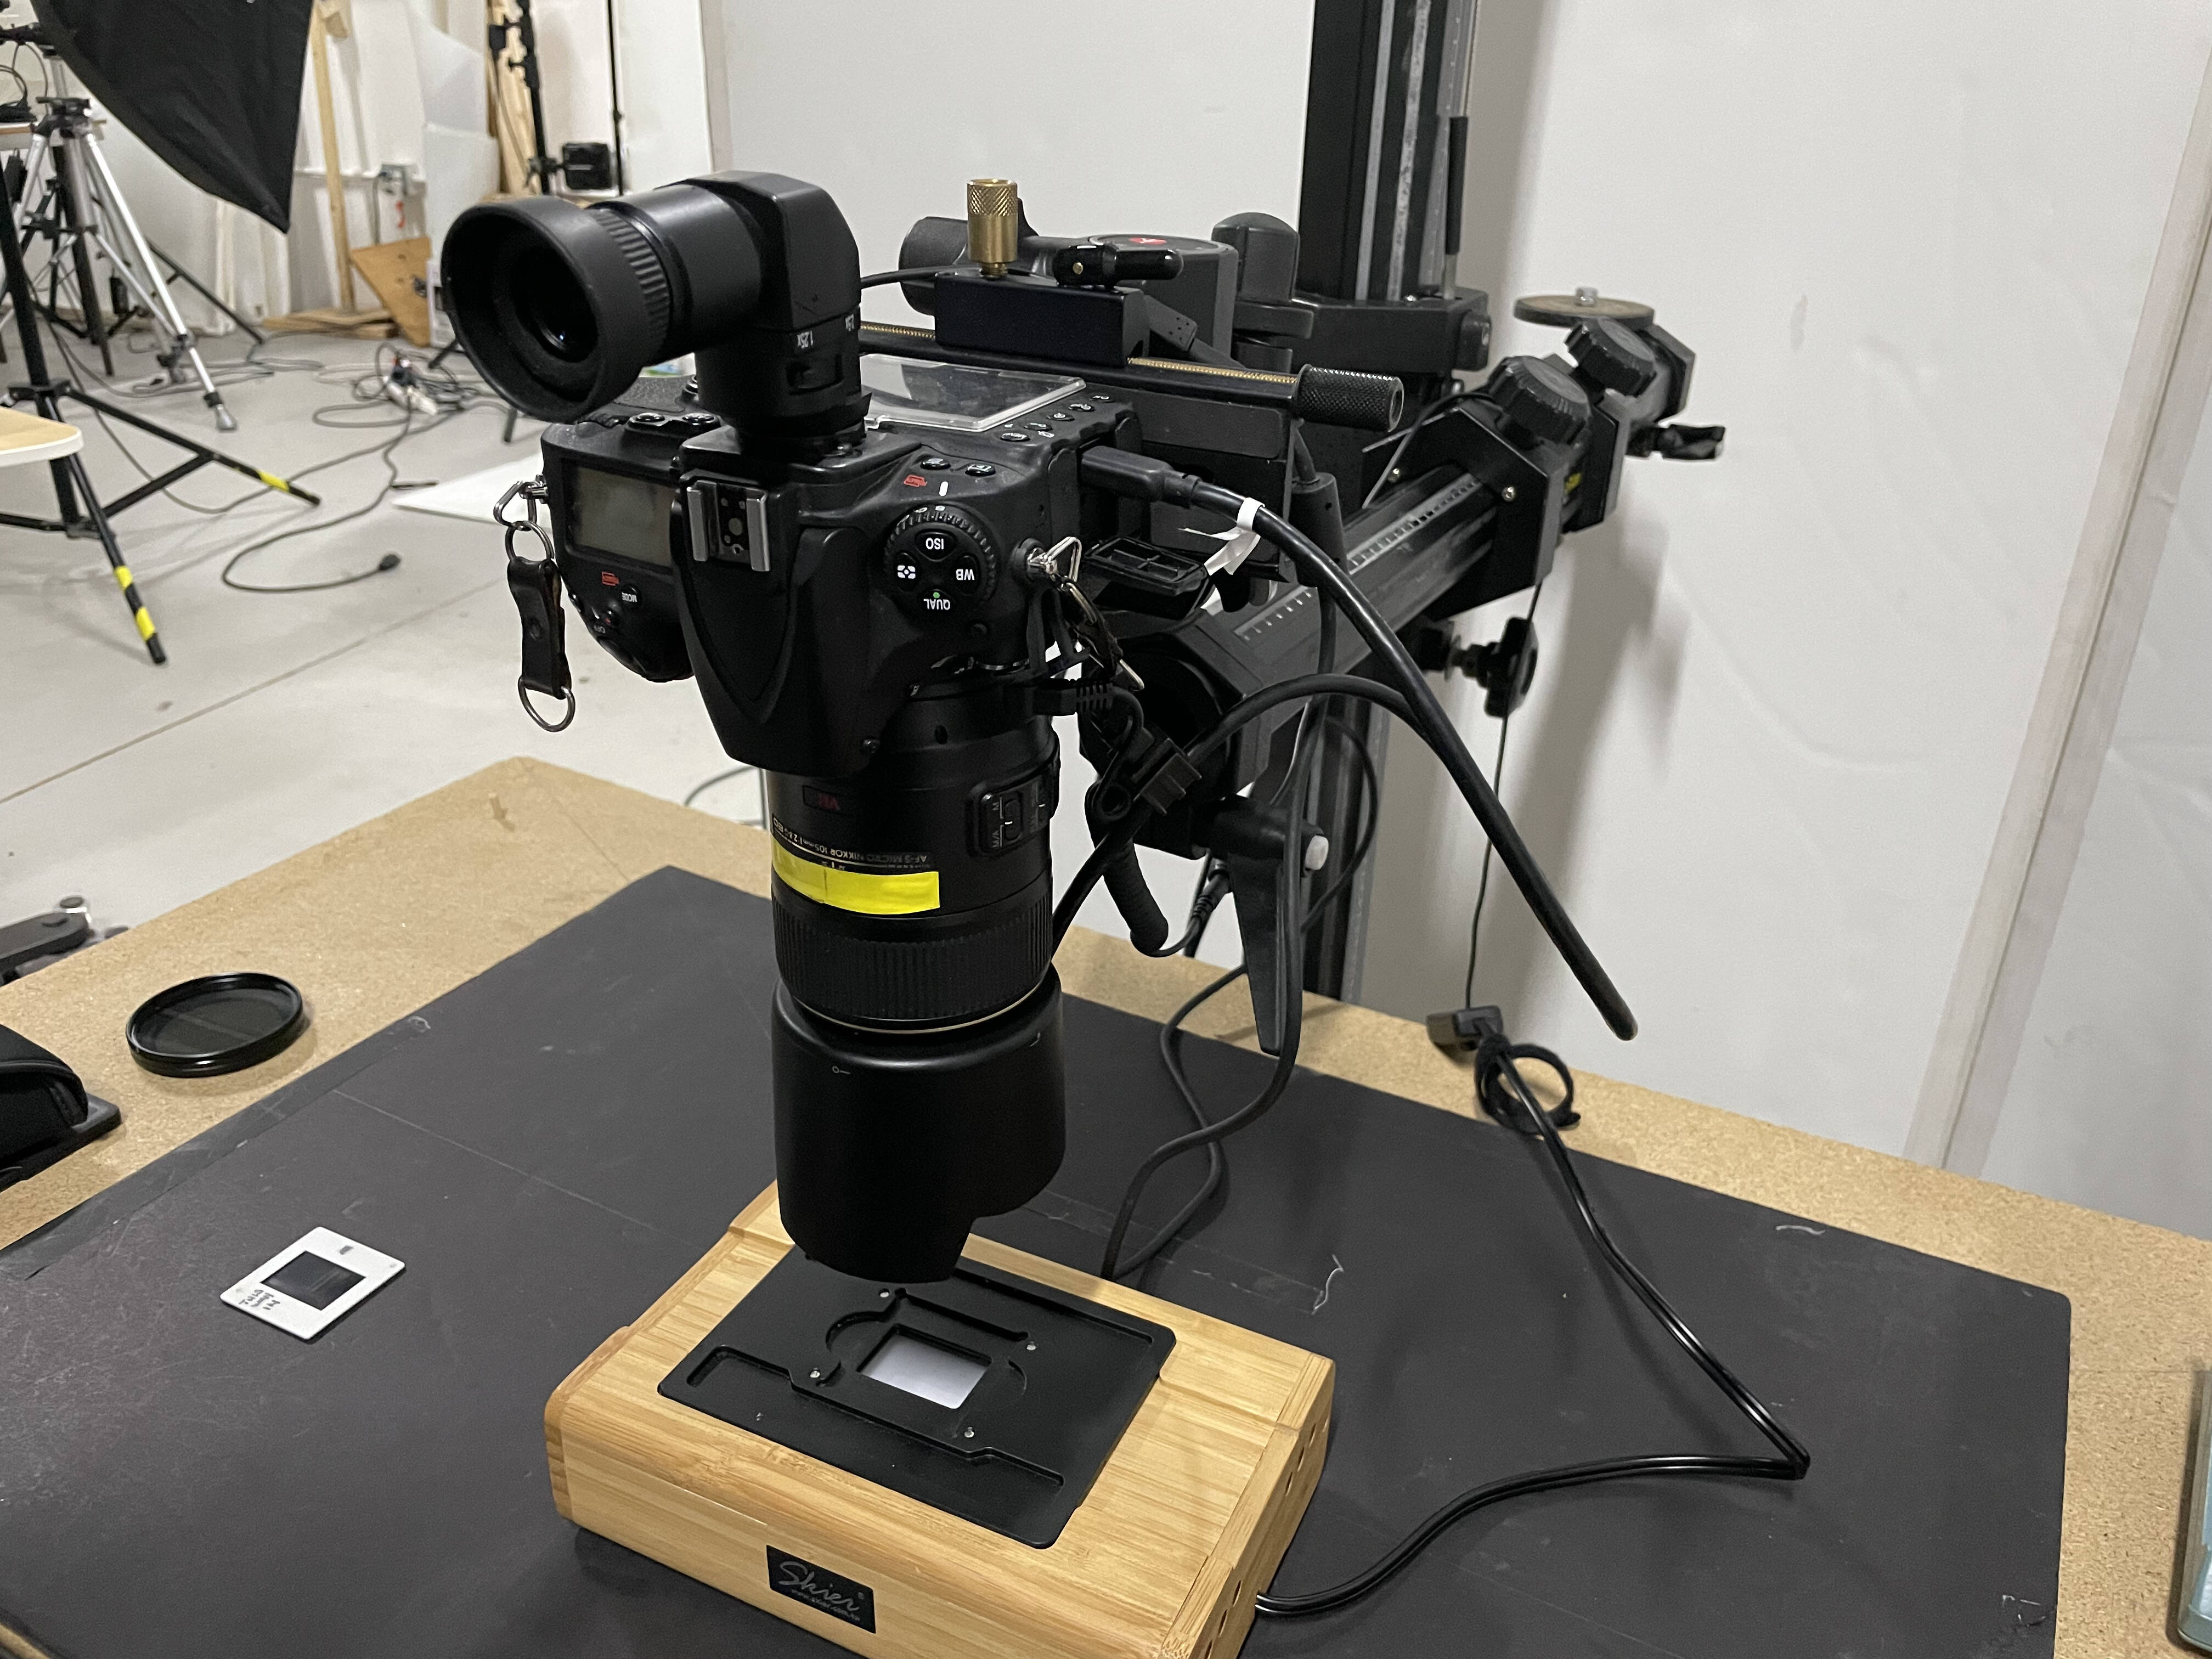
3D printed lenshood holder
Lab tables as copystand replacement
Self built Led display CRI99+ 4000K
Blue conversion foil ca. 5500K
A7R2 plus Sigma adapter
Sigma 105 2.8 Macro
Essential Film Holder
Tethered with Sony Remote
As far as I know, the use of blue filter is not generally recommended only because the orange mask is not something uniform on the negatives. By using blue filter you are actually uniformly taking away the orange mask
It is a Lee No. 201 Full C. T. Blue foil. It brings halogen light to 5000K. My led light has 4000k so it will be about 5500K which is totally OK, even for positives. I have tested it with and without foil and the results with foil are much better.
This is my setup home made. all my neg carriers are 3d printed, the round can is 3d printed, I coil my film up and place it inside the can to keep the dust off the film, It has felt pad’s on the exit to try and trap any dust before the film is pulled in to the carrier . I also printed a shield for my light pad to cut out any light not going through the negative.
My copy stand is made from an old piece of ndf, the tubing is some old hydraulic stainless steel pipe 25mm, I then designed and printed a mount to fit the tube in and screw it to the base. I also bought the manfrotto grip mount for it.
My camera is my Z6 with the ftz and 105 macro lense, this lense comes with two hoods that you can join together that works really well to keep off stray light.
My film can works a treat for keeping the dust off the film, as I pull it through the carrier, then once there are three negs captured I cut them off straight in to my negative storage pages.
The extruded metal, what do you cut that with? If this still sounds confusing, maybe it’s me. I thought i was replying to a post where the guy built a stand from extruded metal.
Here is the basic setup. Copy stand holding the Sony a7iii with the Sigma 70mm Macro lens. I have a basic grey base along with a magnetic board if I need to hold down prints. I use an LED lightbox for slides and negatives. I got the holders and X-rite colorchecker from B&H as you can see!
I love the simplicity of using the pipe fittings. I don’t know why I didn’t think of that, especially since I have those fittings in my studio that I use for other things.
Recently I purchased a Benro GD3WH Geared Head for a project photographing paintings as it makes it so much easier to achieve precise alignment compared with a ball head. This head worked beautifully for that job when it was mounted directly to a tripod, but in trying to use it for the CIY copy stand it wouldn’t work with the Manfrotto Super Clamp due to the positions of the adjustment knobs. This can be solved by buying a spacer, such as Manfrotto makes for their geared heads, but I was able to make a bracket that attached directly to the vertical pipe, allowing me to attach the Benro without using a Super Clamp. It works well, and the geared head certainly makes it easier to get precise alignment.
Geared heads are the bomb in my view. When you need to move 1mm, you can. You turn the wheel and it moves, period. You don’t have to loosen something first. I suppose ball heads are better in situations where you need to move rapidly, but I haven’t found a situation yet. I have a Manfrotto head for each of 3 tripods. The other nice thing about it is it’s profile. It’s like a fist and doesn’t take up hardly any room in a tripod bag.
Very interesting setup. I like no copy stand, a copy stand can transmit vibration which your setup reduces or eliminates. Instead of the lab tables could a large diameter fine thread bolt at each corner be used and the height and levelness permanently set? What brand and part number LEDs and blue filter did you use and where did you purchase them from? What did you use for the light diffuser? Do you like the negative carrier?
My ridiculous setup. I said ridiculous because once I remove the camera, I can’t always get it back to the height or combination that will make next scanning work consistently and painlessly. I’m looking to do away with all those extensions and reverse lens. Any idea for Sony APS-C macro lens recommendation?
I’m using a 3D Printer printed frame that can hold slides and film. I can unscrew the film holder which then gives room for framed slides. I mounted the holder to a wooden bank that perfectly fits above the light source. Illumination comes from a Kaiser slimlite plano dedicated to photography. The slimlite can be powered via USB but has also a build in powerpack.
My camera is above at a repro stand with a Tamron 90mm macro lens. I also have extension tubes that I can use. Attached to the camera I use a CamRanger to control the camera from my mac.
I originally submitted this in another section, then just noticed this one for scanning setups:
This my compact horizontal DSLR scanning setup that I built recently using the EFH and a Raleno 116 video panel. The camera platform is fixed and the EFH/Raleno platform is adjustable vertically, and tilts left/right and front/back on springs using the black knobs; and slides forwards/backward along linear rods on ball bearing bushings.
It can accomodate my Nikon D850 (FF) and my Nikon D7000 (APS-C) with Sigma 105mm macro and Nikon 55mm macro lenses. With the D850 I can scan 35mm and 6x6 with the 105mm lens by moving the platform back and forth, and could scan 4x5 with the 55mm lens with the appropriate negative holder. With the D7000 I can scan 35mm with the 105mm lens and 6x6 and 4x5 with the 55mm lens. The tilting mechanism allows me to ensure the film plane is parallel with the sensor plane within a small fraction of a degree, confirmed with a digital level, and is square with the sensor frame with small adjustments of the knobs.